|
Tuesday, January 1
|
View Page
|
 |
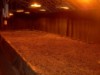
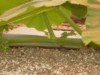
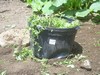
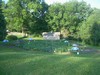
A typical wintery day here and, while most are not thinking about pumpkins, there is a reason some people call me “The Mad Scientist”;-)
|
|
|
|
Tuesday, January 1
|
View Page
|
 |
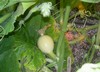
I guess the story started back in September when I was able to hand-select some plant material from the Wallace patch for cloning. Even though at the time of selecting the material for the clones I had no idea what the weight of the pumpkin was, it was impressive in pure size alone, and the odds were the weight was going to be equally impressive.
Picture taken on September 25th, 2012
|
|
|
|
Tuesday, January 1
|
View Page
|
 |
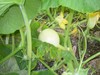
Well, the clones I harvested became very special when the pumpkin was weighed, and it was not only a new world record, but broke the One-Ton barrier and became the 2009 Wallace ’12 (Congratulations Ron!). I am very appreciative of having a chance to collect the plant material, (thanks again Ron!) and now the pressure is on me to keep it alive.
Picture taken on September 28th, 2012
|
|
|
|
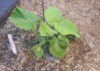
Tuesday, January 1
|
View Page
|
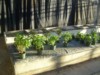 |
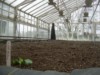
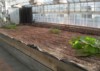
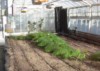
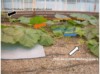
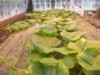
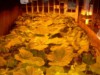
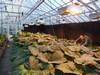
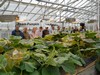
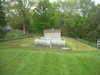
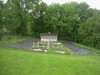
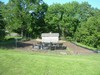
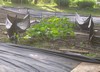
Now that I had very rare and sought-after plant material in hand, I thought I should try and do something special with it. Working as a team with many different people, I began to put together what I am calling “The Raised Bed” or “Winter Pumpkin Growing” Project.
What you are looking at is a section of greenhouse that has two benches (the one in the distance is uncovered and the one in the foreground has Poinsettias on it) and an aisle way in between. This area will serve as the base to my project.
Picture taken on October 16, 2012
|
|
|
|
Tuesday, January 1
|
View Page
|
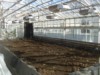 |
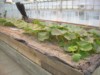
A lot of work was completed between the last entry and this one, and here is a basic summary of what occurred…
1.) Metal bench top was put in place and supported to fill in the aisle way
2.) Planks of wood were attached to form a raised bed set-up on the long sides resulting in a soil depth of 6-18” due to variations in the benches.
3.) Two layers of concrete blocks were stacked on the shorter sides to completely enclose the growing area, which is 9.5ft. X 26ft.
4.) A large sheet of weed block was laid in the bottom to allow for drainage while still holding the soil
5.) Eight 400watt HPS lights were hung to allow even lighting over the entire raised bed
6.) For a growing medium, the following was added:
a. 5 cubic yards of compost (mainly leaves)
b. 2 cubic yards of used potting media (coconut husk based)
c. 1.5 cubic yards of loam
d. 4 large bags (92lbs total) of ‘Super Coarse’ Perlite
7.) Then everything was mixed well
Picture taken on November 17, 2012 (prior to perlite and mixing)
|
|
|
|
Tuesday, January 1
|
View Page
|
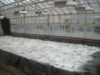 |
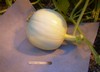
That is not snow, but lime, as the pH of my media came back an acidic 5.8! Since I wanted to move the pH one entire point in about 12 days, I searched out hydrated lime, which is stronger than your typical dolomitic or calcitic lime. It is also more expensive and of greater hazard to the applicator, so I suggest you only use it in special applications, which this situation fit perfectly.
Picture taken on November 25, 2012
|
|
|
|
Tuesday, January 1
|
View Page
|
 |
Now, even though there is heat in the greenhouse, I wanted to make sure that the soil was also being heated to eliminate any possible chill to the pumpkin plants, especially in the early stages of growth. So, I buried a 40ft. heavy duty, thermostat-controlled, soil-heating cable under both plant sites.
Picture taken on November 26, 2012
|
|
|
|
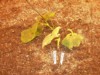
Tuesday, January 1
|
View Page
|
 |
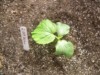
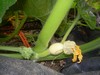
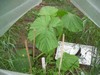
It seemed a little odd to collect all of my germination materials this time of year, but this was the official planting day for my chosen 2009 Wallace seedling. To the best of my knowledge, this is the only 2009 being grown at this time. (Note: The official seed starting day for the 2009 Wallace ’12 was 11/18/12)
Also, on 11/29/12 I planted two 1725 Harp [2009 Wallace] clones.
So, in this raised bed I have a seed from the 2009 Wallace and clones from the original 1725 Harp plant that grew the 2009 Wallace. No matter how you look at it, there are some very special genetics in this growing area.
Picture taken on November 27, 2012
|
|
|
|
Tuesday, January 1
|
View Page
|
 |
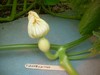
2009 Wallace ’12 update…
In short, everything is looking great! The first true leaf is expanding and the main vine is beginning to form.
Picture taken on November 30, 2012
|
|
|
|
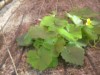
Tuesday, January 1
|
View Page
|
 |
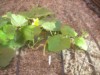
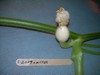
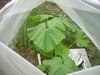
1725 Harp [2009 Wallace] clone1
Just for a base picture, here is how ‘Clone1’ from the 1725 Harp [2009 Wallace] plant looks. It is not in great shape, but this is common for this time of year. What is encouraging is that I am seeing noticeable improvements in the short time since it has been planted. This clone is in a much better environment now (warmer and greater light), and I think that is what it is responding to.
Picture taken on November 30, 2012
|
|
|
|
Tuesday, January 1
|
View Page
|
 |
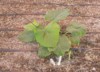
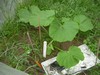
1725 Harp [2009 Wallace] clone2
Clone2 from the 1725 Harp [2009 Wallace] right now is looking a little better because it has a vine that has a healthy looking tip, so there should be some new material developing in the near future.
Picture taken on November 30, 2012
|
|
|
|
Tuesday, January 1
|
View Page
|
 |
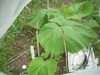
2009 Wallace ’12 update…
For whatever reason, the second true leaf seems to have some damage, but the vine tip still looks good.
Picture taken on December 3, 2012
|
|
|
|
Tuesday, January 1
|
View Page
|
 |
2009 Wallace ’12 update…
Progressing very nicely, I have just been guiding it with the bamboo stakes. The second true leaf seems to have outgrown the problem at the margin, and the third true leaf looks normal. Typically, I see something like this in my field plantings and thought it had something to do with the cold or other shock, but this seedling is in very consistent conditions. So, I guess there are somethings that just happen.
Picture taken on December 7, 2012
|
|
|
|
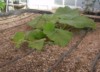
Tuesday, January 1
|
View Page
|
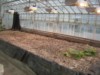 |
Here is a general raised bed overview (with the lights on), and you can see the clones in the foreground. Also, I took another soil sample today for pH analysis, and to my delight it has stabilized right around 6.9, so the nutrients should be plant-available, and my math on the amount of lime to add was spot on.
Picture taken on December 7, 2012
|
|
|
|
Tuesday, January 1
|
View Page
|
 |
It is amazing how quick these plants grow, as you can see in this picture. I cannot complain about the plants performance up to this point. The third true leaf grew exponentially since the last picture that was taken only 3 days ago!
Picture taken on December 10, 2012
|
|
|
|
Tuesday, January 1
|
View Page
|
 |
1789est Wallace [1872 Wallace] clone
I had a 1789est Wallace [1872 Wallace] clone that was not looking well, so I decided to plant it in the raised bed to see if the light and greenhouse heat would perk it up. There are no soil heating cables near this clone, so this acts as a test to see if there is any change in growth compared to the other clones that have the benefit of heating cables below.
Picture taken on December 10, 2012
|
|
|
|
Tuesday, January 1
|
View Page
|
 |
Since I know the pumpkin plants are only going to get bigger, I thought this would be a good opportunity to install my irrigation set-up. What is pictured here is my idea to be able to irrigate with warm (greenhouse temperature) water. The materials are a 100-gallon tank with a 1/6 hp water pump that is controlled by a ‘Traceable Controller’ and is programmed to come on for one hour per day. The water is pumped to my drip lines that are set up very similarly to what I do in the field.
Picture taken on December 15, 2012
|
|
|
|
Tuesday, January 1
|
View Page
|
 |
2009 Wallace ’12 update…
Since all the plants are showing signs that they are getting ready to run, I decided to install my drip irrigation while it would still be easy. This picture shows the wet spots of the drip tapes that I was testing and also the 2009 Wallace plant from a bird’s eye view. I have been carefully guiding the main vine, and the slow and steady process has been working out just fine.
Picture taken on December 15, 2012
|
|
|
|
Tuesday, January 1
|
View Page
|
 |
2009 Wallace ’12 update…
What makes greenhouse growing great is that I can tend to the pumpkin at any time with the supplemental light. This shows the 2009 Wallace after hours and enjoying the artificial light long after the sun has set. Main vine is down and starting to make a run for it ;-)
Picture taken on December 19, 2012
|
|
|
|
Tuesday, January 1
|
View Page
|
 |
2009 Wallace ’12 update…
Here is a Christmas Eve update. (I know it sounds odd to those of us in the Northern Hemisphere.) The 2009 Wallace continues to grow very well and shows nothing but positive signs for the future.
Picture taken on December 24, 2012
|
|
|
|
Tuesday, January 1
|
View Page
|
 |
1725 Harp [2009 Wallace] clone 1
I have been taking pictures of all the plants on a regular basis, but for the purpose of this diary I am only showing the clones at random times to try and make this project easier to follow. This is the 1725 Harp [2009 Wallace] clone 1, which is looking great and producing flowers already with continued new growth.
Picture taken on December 24, 2012
|
|
|
|
Tuesday, January 1
|
View Page
|
 |
1725 Harp [2009 Wallace] clone 2
This clone is slightly ahead of clone1, as there is a side vine already forming and starting to grow and vine out. There is a flower that opened today, and I always try and take the time to smell the pumpkin flowers, which in December seem to smell even better than in summer time.
Picture taken on December 24, 2012
|
|
|
|
Tuesday, January 1
|
View Page
|
 |
1789est Wallace [1872 Wallace] clone
Well, the conclusion from my quick plant experiment is that the supplemental light and greenhouse temperature seem to be all the pumpkin plants need, and the addition of soil heating cables are not necessary in this growing set-up. (However, I like them as a safe guard, so I will continue to keep them on for the plants that they are under.) You can see a vine already starting to form and grow on this clone.
Picture taken on December 24, 2012
|
|
|
|
Tuesday, January 1
|
View Page
|
 |
Raised Bed overview
Compare this picture to one shown earlier, and you will see more green in the picture, which is an encouraging sign to this winter project.
Picture taken on December 24, 2012
|
|
|
|
Tuesday, January 1
|
View Page
|
 |
2009 Wallace ’12 update
This plant is really starting to take off! If you look closely, you can see an orange decorative pumpkin and a white tag close together. This marks where the tip of the main vine was on December 24th (Christmas Eve,) and I am using this as a fixed point so I can track the growth rate over time.
Picture taken on December 27, 2012
|
|
|
|
Tuesday, January 1
|
View Page
|
 |
2009 Wallace ’12 update
Well, the white tag is still in the picture but has been engulfed by one of the leaves on the main vine. You can see the decorative pumpkin that has been moved to the current tip of the main vine. After doing the measurements and math, the main vine grew a total of 44” over the last 6 days. That is an average of 7.33” of main vine growth rate per day! Considering it is late December, I am very happy with this rate, as this is what I can see in the field on a summer day.
Picture taken on December 30, 2012
|
|
|
|
Tuesday, January 1
|
View Page
|
 |
Clones update
Since the clones are all getting bigger, here is how they look. The 1725 Harps are planted side by side and have heating cables below them, and the 1789est Wallace is off to the side as a back up and is improving from how it looked initially.
Picture taken on December 30, 2012
|
|
|
|
Tuesday, January 1
|
View Page
|
 |
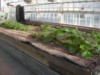
Here is how the Raised Bed is looking now. You can see that the open area is getting smaller as the pumpkin plants are growing. The clones are starting to produce some male flowers, which is an encouraging sight, and I hope that some female flowers will be developing soon.
Happy New Year!
Picture taken on December 30, 2012
|
|
|
|
Wednesday, January 2
|
View Page
|
 |
2009 Wallace ’12 update
Today I saw the first female flower on the main vine. It is very small at this point and is about 12 ft. out from the initial plant site, so I would like to have this one take since my growing space is limited. Overall, the plant is looking good, and the side vine growing tips are there and will hopefully start running soon.
|
|
|
|
Thursday, January 3
|
View Page
|
 |
2009 Wallace ’12 update
There are secondary vines on the plant, but their rate of growth seems to be slow considering the length of the main vine. I think this may be due to the high nitrogen that is causing rapid main vine growth, which is resulting in a longer than normal plant for its stage of development. I am confident that side vines will start to fill out soon, as you can see the first one is just starting to expand.
|
|
|
|
Sunday, January 6
|
View Page
|
 |
2009 Wallace ’12 update
Leaves continue to maintain their lush green color and are about the size of a typical field- grown plant, so the conditions must be at least similar to the field. The little white tag that is about 1/3 of the way down the main vine marks the Christmas Eve (12/24/12) length of the main vine that was just 13 days ago, for a fun comparison.
|
|
|
|
Sunday, January 6
|
View Page
|
 |
2009 Wallace ’12 update
I remember when this plant was just a seedling; now look how much the plant has grown. The lights are on in this picture, which ensures the plant will receive a minimum amount of light per day regardless of weather conditions.
|
|
|
|
Sunday, January 6
|
View Page
|
 |
The clones are also growing well, and it looks like soon there is going to be competition for space, but right now I am trying to keep as much vine growth as possible. The goal is to maximize the potential that I can get a male flower on at least one plant on the day the female decides to open. Once I get a successful pollination, I can be more aggressive with my pruning.
|
|
|
|
Sunday, January 6
|
View Page
|
 |
With all of the vines and tendrils growing everywhere, it is starting to look like the planet Dagobah.
|
|
|
|
Wednesday, January 9
|
View Page
|
 |
2009 Wallace ’12 update
Well, this is hopefully a good sign with some pulp mill fabric coming into view ;-) There is a potential female flower that is developing on the main vine of the 2009 Wallace ’12. However, it doesn’t seem to be developing as quickly as I would normally see in the field.
|
|
|
|
Wednesday, January 9
|
View Page
|
 |
2009 Wallace ’12 update
Here is another shot of the female flower. Sadly, there is a slight yellowing occurring and, sure enough, this one aborts before the flower even opens, so I was looking down the vine and found another female flower.
|
|
|
|
Wednesday, January 9
|
View Page
|
 |
1725 Harp [2009 Wallace] clone 2
This is potentially what the 2009 Wallace looked like when it was a baby, since what you are looking at is a female flower on the 1725 Harp clone2. It is very young and has just come out of the main vine tip. Only time will tell if it continues to mature.
|
|
|
|
Wednesday, January 9
|
View Page
|
 |
Patch mid-point and, as you can see, the main vines have passed each other. I have done my best to try and label what main vine is from what plant. Since my main goal is seeds, I am not worried about a ‘messy’ plant pattern; I just want to set some pumpkins and then I can decide how to prune and direct the plants for maximum efficiency. Right now, the focus in on leaf growth and flower production ;-)
|
|
|
|
Wednesday, January 9
|
View Page
|
 |
Patch overview, and there are a lot more leaves now than in some of the earlier pictures.
|
|
|
|
Wednesday, January 9
|
View Page
|
 |
Just a fun shot showing pumpkin plants and snow in the same picture. You are mainly looking at just the clones in this picture. On the left hand side at about the 8 o’clock position you can see the main vine of the 2009 Wallace ’12 sneaking in.
|
|
|
|
Wednesday, January 9
|
View Page
|
 |
Right on cue, the male flowers are starting to show up and are pollen grain-filled, as there are no bees to steal any of the pollen. This is a flower on a 1725 Harp [2009 Wallace] clone, so if you look closely, those pollen grains may contain the genetic sequence to producing a 2000+pound pumpkin.
|
|
|
|
Friday, January 11
|
View Page
|
 |
2009 Wallace ’12 update
Here is the second female on the 2009 Wallace ’12 that is continuing to show developmental progress. It has earned the right to have mill fabric under it, which is a high honor, as I do not have much of the mill fabric that is not frozen to the outside snow and ice.
|
|
|
|
Friday, January 11
|
View Page
|
 |
1725 Harp [2009 Wallace] clone 2
This is an updated picture showing the female on my clone2 plant has been continuing to show signs of progress and has gotten the official mill fabric treatment.
|
|
|
|
Friday, January 11
|
View Page
|
 |
Patch update, from a little different angle. This image is taken basically looking down the main vine of the 2009 Wallace ’12 plant. The plants are looking good, and the patch seems to be getting smaller ;-)
|
|
|
|
Saturday, January 12
|
View Page
|
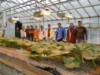 |
Team-Pumpkin Patch Tour Day!
My patch is open to those that want a tour, and here is everyone warming up in the nice pumpkin greenhouse section. For those looking at the picture in detail, please disregard the field pumpkin that is in the picture, as it is just a Halloween leftover and is just there to add some orange to the patch. I want to thank everyone for their help and hope this one-of-a-kind tour was a good way to break-up a cold winter’s day.
|
|
|
|
Sunday, January 13
|
View Page
|
 |
2009 Wallace ’12 update
Well, most updates have been positive, but here you can see a sight that I hope is an isolated case. I see this in the field, so I am not worried, but there is a lot riding on each potential female flower and with such a small growing area I want every flower to mature. There is another female flower down the vine, so maybe that will be “the one.”
|
|
|
|
Sunday, January 13
|
View Page
|
 |
Overall, the raised bed is looking more like a pumpkin patch. In the foreground is the 2009 Wallace; the leaves are in great shape, so I am hopeful that there will be enough plant material to push a pumpkin if I can get one pollinated.
|
|
|
|
Tuesday, January 15
|
View Page
|
 |
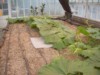
This is starting to become a pattern in the entire raised bed, which is not a good sign.
For some reason *all* the females flowers on all the plants are aborting before they mature enough to even open. I do not think it is genetic as I have three different backgrounds all exhibiting the same symptoms. I also have four plants (three clones and one seedling) and all plants are showing the same problem. I am perplexed because the male flowers are maturing normally and are filled with pollen. Also, as the pictures show, the plants all look great.
|
|
|
|
Thursday, January 17
|
View Page
|
 |
Doing some after hours work in the pumpkin greenhouse and with the black shade cloth pulled it gives a unique look to the area.
|
|
|
|
Saturday, January 19
|
View Page
|
 |
In an effort to try and diagnose the female flower problem I took tissue samples and sent them overnight to the lab. Well, the results came back and while I was hoping for a nutrient deficiency the results came back better than I have seen in my typical field grown plants. The only nutrient that was higher than I wanted to see was nitrogen. So, my current theory is the lack of female flower development is due to excessive nitrogen. There have been some vine stress cracks that also suggest higher than needed nitrogen. Also, the poor female flower development problem is occurring consistently on all plants so it is not a genetic.
With everything else in check and the plants continuing to grow and look great I have decided to excessively water the plants in an effort to leach out some of the excess nitrogen.
|
|
|
|
Tuesday, January 22
|
View Page
|
 |
Looks like I will have to do some pruning as the plants have filled in the entire raised bed. I can still tell what plant is what but as the side vines grow and start to cross it is getting harder. I am still trying to keep as many vines as possible as I still do not have any pollinations on any of the plants. There is something that is not right in the greenhouse as all the female flowers seem to be have the same problem.
|
|
|
|
Friday, January 25
|
View Page
|
 |
2009 Wallace ’12 update
This is the only female flower to make it this far. It looks like it will open in about 2 or so days. The weed block in the picture indicates that it is at one of the very edges of the bed. If this one takes I will have to work on building a table top for it to grow on which I will gladly do.
|
|
|
|
Friday, January 25
|
View Page
|
 |
I just like this picture, I call it… “Under the lights”.
|
|
|
|
Friday, January 25
|
View Page
|
 |
2009 Wallace ’12 update
This shows the little supporting structure I have put together for the main vine on the 2009 Wallace as I slowly give it a turn. The reason for the slow process is the developing female flower is right at the corner and I want to try and maintain the current position as it will be easier to add a supporting structure below the pumpkin if necessary.
|
|
|
|
Friday, January 25
|
View Page
|
 |
Hers is a “Min / Max” thermometer. For those that have not read one before it can be a little confusing but simply put the left side indicates the minimum temperature that you read at the bottom of the indicator. On the right side the Max temperature is read at the bottom of the blue indicator. The gray is the fluid that reads the same temperature on both sides and is what pushes the indicators.
I have included some bold arrows to show the location of the minimum and maximum temperatures.
|
|
|
|
Friday, January 25
|
View Page
|
 |
This is a nice night time shot showing the greenhouse with the lights on after an evening of patch work.
|
|
|
|
Saturday, January 26
|
View Page
|
 |
2009 Wallace ’12 update
It looks like I am actually going to have a flower open tomorrow, it is almost off the raised bed but I still hope it takes.
|
|
|
|
Sunday, January 27
|
View Page
|
 |
2009 Wallace ’12 update
First pollination day! It is nice when you do not have to worry about any bees cross pollinating the flowers so I can watch and wait until the flowers fully open and the pollen get fluffy on its own.
|
|
|
|
Sunday, January 27
|
View Page
|
 |
2009 Wallace ’12 update
Really cannot ask for a better flower.
|
|
|
|
Sunday, January 27
|
View Page
|
 |
2009 Wallace ’12 update
Out of force of habit I did the typical field pollination routine. You can also read the tag as this cross is F: 2009 Wallace x M: 1725 Harp [2009 Wallace] clone. So essentially it is a half self cross;-)
|
|
|
|
Sunday, January 27
|
View Page
|
 |
2009 Wallace ’12 update
To try and increase the odds that this pumpkin sets I covered it with a shade dome.
|
|
|
|
Thursday, January 31
|
View Page
|
 |
Oh no!
Well this one is not going to make it. Looks like I have to hope for another female flower further down the vine.
|
|
|
|
Friday, February 1
|
View Page
|
 |
Thin piece of protective glass keeping the pumpkin plants isolated from the cold outside temperatures. As the sun sets and the inside lights become more distinctive it sure does make the vines look like they are alive and trying to get out.
|
|
|
|
Saturday, February 2
|
View Page
|
 |
2009 Wallace ’12 update
Today marks my first ever Groundhog Day pollination, and as you can see the 2009 Wallace has produced another great looking female flower. I have gone ahead and placed some mill fabric under this flower as its location is great with easy access and room for the pumpkin to grow.
|
|
|
|
Saturday, February 2
|
View Page
|
 |
Here is a male flower that was just harvested off the 1725 Harp [2009 Wallace] clone. As you can see there is plenty of pollen on the stamen and it looks just like I want to see when I pollinate in the field.
|
|
|
|
Saturday, February 2
|
View Page
|
 |
This is a rare picture showing how the plants compare to me. The once expansive raised bed has now gotten seemingly smaller.
|
|
|
|
Sunday, February 3
|
View Page
|
 |
Light snow cover this morning before I head in to tend to the pumpkin plants, but as I parked the car I noticed something odd…
I think I have a deer problem in the area.
|
|
|
|
Monday, February 4
|
View Page
|
 |
Today I had to do a little pruning to keep the isle somewhat clear since the plants were making a run off the raised bed. Even after cutting out quite a bit of plant material it does not seem like there is that much missing so I will probably have to go through and repeat this process again in the near future.
|
|
|
|
Tuesday, February 5
|
View Page
|
 |
2009 Wallace ’12 update
So far this pumpkin is looking good, as the stem is swelling, and I expect the pumpkin to start doing the same any day now.
|
|
|
|
Tuesday, February 5
|
View Page
|
 |
Well, it may not be Sasquatch, but I did have a visitor to the pumpkins that you can just see in the distance. Thanks Steve for the surprise patch tour inquiry, hope this got you in the mood and ready for spring.
|
|
|
|
Friday, February 8
|
View Page
|
 |
Oh No! (Not again!)
|
|
|
|
Saturday, February 9
|
View Page
|
 |
24-hr Picture Comparison
In short we received about 31” of snow, (not counting the drifts in some area) so it looks like it will be a little while until I see the patch again or can get the boat out;-)
|
|
|
|
Thursday, February 14
|
View Page
|
 |
The raised bed is at maximum capacity, so I will have to do some pruning to make more space. The only problem is the compost pile is covered with snow.
|
|
|
|
Friday, February 15
|
View Page
|
 |
2009 Wallace ’12 update
Could this be “the one”? Only time will tell.
|
|
|
|
Sunday, February 17
|
View Page
|
 |
Here is a beautiful female flower on the 2009 Wallace plant, I just hope that it grows and develops.
Cross: F: 2009 Wallace ‘12 x M: 1725 Harp ‘09 [2009 Wallace] clone
5 lobes and a 9 out of 10 rating for symmetry
|
|
|
|
Sunday, February 17
|
View Page
|
 |
In an effort to keep the pollination as cool as possible, I simply went outside and got some snow. I think this is the first ever “snow cooled pollination”.
|
|
|
|
Thursday, February 21
|
View Page
|
 |
F: 2009 Wallace ’12 x M: 1725 Harp ’09 [2009 Wallace] clone
Is the snow the luck that I needed…? So far the pumpkin has grown and is still shiny so I am cautiously optimistic.
|
|
|
|
Friday, February 22
|
View Page
|
 |
F: 2009 Wallace ’12 x M: 1725 Harp ’09 [2009 Wallace] clone
It is getting bigger, but the pumpkin is pointing straight up so I hope the leaf it is near can act as a gentle support as it (hopefully) continues to grow and develop.
|
|
|
|
Monday, February 25
|
View Page
|
 |
F: 2009 Wallace ’12 x M: 1725 Harp ’09 [2009 Wallace] clone
The pumpkin is starting to lie down and as of today it is the biggest pumpkin I have grown as part of this winter project. (This is not saying much but I have to take my milestones where I can.) Growing needs to continue but so far it has not stopped.
|
|
|
|
Friday, March 1
|
View Page
|
 |
F: 2009 Wallace ’12 x M: 1725 Harp ’09 [2009 Wallace] clone - Day 12
Growth is slow for its age, but in this environment I am not sure what ‘normal’ would be. I can say that the pumpkin is still growing and more importantly developing. My goal in this case is not a giant pumpkin, but more importantly, I am interested in the genetics to hopefully grow a giant pumpkin in the field this year.
(Sorry for the slightly blurry picture.)
|
|
|
|
Friday, March 1
|
View Page
|
 |
I have been working on the potential problem with the pumpkin flowers for many hours and have been asking many growers and researchers alike. No one could really come-up with an answer despite me trying many different theories and ideas. However, in another section of greenhouse I had some “neglected” pumpkin plants that all of a sudden had female flowers develop and open. I looked at the temperature data from that greenhouse section and it was very different from what I was running in the main raised bed pumpkin room.
So, I am reducing the temperatures in hopes that this will be the key to this project. My new target low is 60-degress F and my high is 80-degress F, which according to this Min / Max thermometer I have this new target dialed in just right. What makes greenhouse growing a challenge is I have control over all sorts of factors but I am not sure what the ‘ideal’ target range is in many cases. Field growing you have to be reactive and this is what I am accustom to dealing with.
|
|
|
|
Sunday, March 3
|
View Page
|
 |
Team-Pumpkin Patch Tour #2
I want to thank everyone for coming out to view the winter pumpkin project I have been working on. Some people were repeats and noticed the large increase in plant growth since the last tour, and for others this was their first time visiting. Hopefully this helped everyone get ready for spring.
|
|
|
|
Sunday, March 3
|
View Page
|
 |
F: 2009 Wallace ’12 x M: 1725 Harp ’09 [2009 Wallace] clone - Day 14
This may be one of the smallest pumpkins shown on a patch tour but it did get a lot of attention and hopefully this pumpkin makes it and some growers will be able to come back and see the pumpkin again.
|
|
|
|
Monday, March 4
|
View Page
|
 |
F: 2009 Wallace ’12 x M: 1725 Harp ’09 [2009 Wallace] clone - Day 15
Even buried in the jungle of vines, just a day later you can notice an increase in size.
|
|
|
|
Tuesday, March 5
|
View Page
|
 |
F: 2009 Wallace ’12 x M: 1725 Harp ’09 [2009 Wallace] clone - Day 16
I think this one may be a keeper! Now I have to work on some pruning so there can be enough room for the pumpkin to grow in. I have been reluctant to do this because of so many failures, but now with continued positives signs I feel more confident pruning. I also have to try and get some mill fabric/belting under the pumpkin for it to grow on.
|
|
|
|
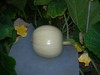
Thursday, March 7
|
View Page
|
 |
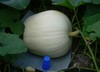
Snowball F: 2009 Wallace ’12 x M: 1725 Harp ’09 [2009 Wallace] clone - Day 18
Well I decided to get out the mill fabric while I could still lift the pumpkin as it continues to grow every day. Hopefully it is also developing the highly anticipated seeds from the cross that I wanted to make all winter. At least looking on paper this cross, made under the particular special conditions I have set-up, could be a game changer in the upcoming season.
Also, since this pumpkin’s pollination was cooled by snow, the pumpkin itself is being grown in the winter time, and it as a roundish shape with white color I have decided to name it “Snowball”.
|
|
|
|
Thursday, March 7
|
View Page
|
 |
Here is a male flower on top of the compost pile I have outside. Not the most common picture with the snow as a background.
|
|
|
|
Friday, March 8
|
View Page
|
 |
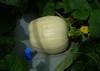
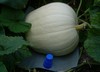
Snowball F: 2009 Wallace ’12 x M: 1725 Harp ’09 [2009 Wallace] clone – Day 19
Today I am heading off to Niagara Falls for the Giant Vegetables Growers Convention, but I had a pollination to do this morning so there was a slight detour. It was snowing at a high rate outside, but nothing gets in the way of a potential pollination.
Also, this was the first day I measured to the pumpkin! The OTT = 90.5” or 18.5 lbs.
|
|
|
|
Friday, March 8
|
View Page
|
 |
As you can see from this picture, I am glad I am on the inside. However, now I have to leave the pumpkin patch and drive in the rapidly increasing snow levels, but it is all for pumpkins!
|
|
|
|
Sunday, March 10
|
View Page
|
 |
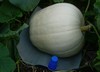
Snowball F: 2009 Wallace ’12 x M: 1725 Harp ’09 [2009 Wallace] clone – Day 21
This is a late night picture as the shine of the pumpkin is quite bright under the lights. I also wanted to measure today just to make sure it was growing.
The OTT = 102” or 26 lbs.
|
|
|
|
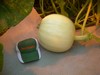
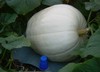
Tuesday, March 12
|
View Page
|
 |
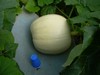
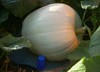
Snowball F: 2009 Wallace ’12 x M: 1725 Harp ’09 [2009 Wallace] clone – Day 23
In this particular picture this pumpkin sure does look like a “Snowball”.
|
|
|
|
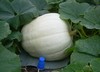
Friday, March 15
|
View Page
|
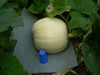 |
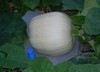
Snowball F: 2009 Wallace ’12 x M: 1725 Harp ’09 [2009 Wallace] clone – Day 26
I finally put something in the picture for a size comparison that I will keep with the pumpkin so it is easier to see the growth over time. I can see it growing overtime but everyone wants to know how big Snowball is and how quick is Snowball growing? So here is some data…
OTT = 127” or 49lbs. with a 4.6lb. average per day over the last 5 days.
|
|
|
|
Friday, March 15
|
View Page
|
 |
For the most part the Powdery Mildew has been kept under control. The advantage is there are very few spores in the local area outside so the powdery that is seen is basically from self infections and there is not a large reservoir of inoculum. However, giving the right conditions it is amazing how quick powdery mildew can spread so I am keeping a constant eye out for it.
|
|
|
|
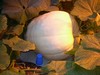
Saturday, March 16
|
View Page
|
 |
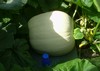
Snowball F: 2009 Wallace ’12 x M: 1725 Harp ’09 [2009 Wallace] clone – Day 27
Is it just me or is the blue cup getting smaller?
|
|
|
|
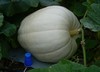
Monday, March 18
|
View Page
|
 |
Snowball F: 2009 Wallace ’12 x M: 1725 Harp ’09 [2009 Wallace] clone – Day 29
Growth update… OTT = 140.5” or 66 lbs. for a 5.6lb average weight gain per day over the last 3 days.
|
|
|
|
Tuesday, March 19
|
View Page
|
 |
Snowball F: 2009 Wallace ’12 x M: 1725 Harp ’09 [2009 Wallace] clone – Day 30
I had some issues with my automatic irrigation over the last week, but I now have the problem identified and fixed. As a result the pumpkin was not getting the amount of water it should have been receiving over the last few days. So, I went through and did some hand watering and also got the automatic irrigation fully functional.
|
|
|
|
Thursday, March 21
|
View Page
|
 |
Snowball F: 2009 Wallace ’12 x M: 1725 Harp ’09 [2009 Wallace] clone – Day 32
I am starting to notice the pollinator influence as the pumpkin is starting to gain some nice length to it. I would have expected more color due to the pollinator but I guess snowball was a good name as it looks like it is going to remain snow white in color.
|
|
|
|
Saturday, March 23
|
View Page
|
 |
Snowball F: 2009 Wallace ’12 x M: 1725 Harp ’09 [2009 Wallace] clone – Day 34
Considering the small plant size and excessive vegetative growth resulting in quinary (5th) vines I am very happy to see this growth rate. I think now that I have the irrigation at a normal rate the growth should stabilize.
Growth update… OTT = 160” or 96 lbs. for a 6.0lb average weight gain per day over the last 5 days.
|
|
|
|
Tuesday, March 26
|
View Page
|
 |
Snowball F: 2009 Wallace ’12 x M: 1725 Harp ’09 [2009 Wallace] clone – Day 37
Snowball continues to grow, (no measurements needed;-)
|
|
|
|
Thursday, March 28
|
View Page
|
 |
Snowball F: 2009 Wallace ’12 x M: 1725 Harp ’09 [2009 Wallace] clone – Day 39
The pumpkin is developing a nice tall stem end which is something I like to see as the thicker walls tend to be on this side and while a few extra pounds may not make a difference for this pumpkin it is a nice trait to have in the genetic line.
Growth update… OTT = 174.5” or 124 lbs. for a 5.6lb average weight gain per day over the last 5 days.
|
|
|
|
Monday, April 1
|
View Page
|
 |
Snowball F: 2009 Wallace ’12 x M: 1725 Harp ’09 [2009 Wallace] clone – Day 43
While there may not be much of an exterior change I hope internally the potential seeds are developing;-)
|
|
|
|
Tuesday, April 2
|
View Page
|
 |
Snowball F: 2009 Wallace ’12 x M: 1725 Harp ’09 [2009 Wallace] clone – Day 44
By the tape the growth rate seems to be slowing a little bit, but to be honest it is getting hard to measure this pumpkin. It is not because of its size or shape, but how I have to balance myself in the raised bed without damaging any of the vines and keeping my head clear of the above lights and live stem pipe.
Growth update… OTT = 184.5” or 145 lbs. for a 4.2lb average weight gain per day over the last 5 days.
|
|
|
|
Friday, April 5
|
View Page
|
 |
Snowball F: 2009 Wallace ’12 x M: 1725 Harp ’09 [2009 Wallace] clone – Day 47
This picture was taken later in the day and the lights are on which highlight the youthful looking skin to this pumpkin. Today also marks the age (47 days) that I have opened up a pumpkin to find a good count of viable seeds so everyday beyond today is a bonus for potentially developed seeds. There are never any guarantee’s but at least now I feel the pumpkin is old enough.
|
|
|
|
Saturday, April 6
|
View Page
|
 |
Snowball F: 2009 Wallace ’12 x M: 1725 Harp ’09 [2009 Wallace] clone – Day 48
I think the nickname “Snowball” was a good choice;-)
|
|
|
|
Monday, April 8
|
View Page
|
 |
Snowball F: 2009 Wallace ’12 x M: 1725 Harp ’09 [2009 Wallace] clone – Day 50
Overall there is not much I can complain about this pumpkin. The growth has been very consistent even as it continues to age which is an exciting trait to see. Also, have the 2,009 pound pollinator only reinforces the grow genes so this reassures me that the cross I intended to make was the right one. Now, I just hope there are seeds to be able to field test this cross.
Growth update… OTT = 197.5” or 177 lbs. for a 5.3lb average weight gain per day over the last 6 days.
|
|
|
|
Wednesday, April 10
|
View Page
|
 |
Snowball F: 2009 Wallace ’12 x M: 1725 Harp ’09 [2009 Wallace] clone – Day 52
Well by popular demand here is another picture of Snowball. At this point this has been a fun growing experience as I have been able to share the growth of the pumpkin with not only those that watch my dairy but those that have come in for patch tours. It may not be the biggest pumpkin that I have grown but it has been one of the most interesting for sure.
|
|
|
|
Friday, April 12
|
View Page
|
 |
Snowball F: 2009 Wallace ’12 x M: 1725 Harp ’09 [2009 Wallace] clone – Day 54
This is the last growth update for Snowball until she is harvest day. For those that are looking for the latest information to participate in the guess the weight contest this is the last picture and growth update your will have before the end time for submissions to the contest.
Even though this project has taken quite a bit of time and many weekend trips to do pollinations, getting a pumpkin to this size with the cross I have been fortunate to make has been rewarding. Now, if there are seeds that would make me (and by the amount of requests many others) very happy, but I will have to wait and see for this.
Growth update… OTT = 202” or 189 lbs. for a 3lb average weight gain per day over the last 4 days.
|
|
|
|
Sunday, April 14
|
View Page
|
 |
Snowball Harvest Day!
Here I am telling the Team the plan of harvest. It is a little different when the pumpkin is in a raised bed and there are lights and heat pipes above. No tripod could be used so it was hand tarps, many hands and a Team effort to get the harvest complete.
|
|
|
|
Sunday, April 14
|
View Page
|
 |
Snowball Harvest Day!
With everyone on the same page I started clearing a path in the vines as this was the easiest way to get Snowball out of the raised bed. Now that the Team knew the plan it was just a matter of following the protocol.
|
|
|
|
Sunday, April 14
|
View Page
|
 |
Snowball Harvest Day!
The moment of truth with the actual vine cutting event, marking the official harvest.
|
|
|
|
Sunday, April 14
|
View Page
|
 |
Snowball Harvest Day!
After a little help here is Snowball on the cart for transport to the scale. I have left the blue cup next to the pumpkin for size comparison and looking at it on the cart away from the vines it seemed to be larger than it was when it was in the vines. The Team did a great job ensuring Snowball was centered on the cart and minimal damage was done to the outer skin.
|
|
|
|
Sunday, April 14
|
View Page
|
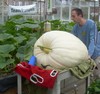 |
Snowball Harvest Day!
Here I am wheeling Snowball toward the scale. As I worked my way closer to the door, I began to wonder if it would be able to fit through the narrow greenhouse doorway…
|
|
|
|
Sunday, April 14
|
View Page
|
 |
Snowball Harvest Day!
Well it was a close fit through the doorway but with the support of the Team behind me everything went well. It was great to share this experience with not only some of the seasoned growers but also many students that were able to watch the pumpkin grow over the winter.
|
|
|
|
Sunday, April 14
|
View Page
|
 |
Snowball Harvest Day!
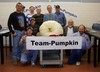
This is the official weigh-in room and where ever the pumpkin went, the Team was sure to follow. It was like the pumpkin had its own body guards that would protect it from anyone that wanted to try and steal it. Also, it always seems that the Team-Pumpkin sign is in front of where the action is happening.
|
|
|
|
Sunday, April 14
|
View Page
|
 |
Snowball Harvest Day!
To ensure the weigh-in was Team-Pumpkin official there were judges and officials that ensured there were no flaws or problems with any part of Snowball. Growers representing different states were honored with the task of inspecting, and they left no pumpkin unturned;-)
|
|
|
|
Sunday, April 14
|
View Page
|
 |
Snowball on the Scale!
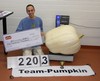
What can I say; I was thrilled with the weight of 220.3 pounds! As an added bonus, once the scale was closed there was an unexpected awards show.
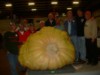
I did get a 1st place flat ribbon from Flat Norm that was in attendance that did not make it in this picture, but, in addition to this I also received a first place blue ribbon, a trophy and even a big check! The check is for One Hundred Thousand Team-Pumpkin Dollars!!!
|
|
|
|
Sunday, April 14
|
View Page
|
 |
Team-Pumpkin Weigh-in Results…
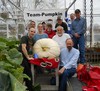
220.3 DeBacco ’13 (F: 2009 Wallace ‘12 x M: 1725 Harp ’09 [2009 Wallace] clone)
56 days old
45 feet out on the main vine (not bad for a raised bed that was only 26ft. long and 9ft. wide;-)
Official OTT= 209.5”
Estimated weight = 209.5 pounds (using the 2013 Team-Pumpkin Standard OTT Chart)
Here is the “money shot” with all of my awards and prize money included in one picture with also a zoom in on the actual scale read out. In short this project was a lot of time and work, but in the end it was worth it. This so concludes the greenhouse season but the closing of this overlapped with my field season so the following pictures will have the date stated in the caption. Hopefully this will make two seasons in one easier to follow.
|
|
|
|
Monday, April 15
|
View Page
|
 |
Here is the Team after another great time at the Growers Meeting in Niagara Falls Canada. I was a featured speaker for a second year and it is encouraging to hear positive comments after the talk along with many follow-up questions.
Picture taken on March 10, 2013
|
|
|
|
Monday, April 15
|
View Page
|
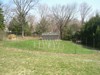
 |
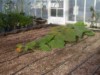
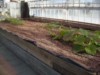
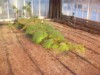
Here is an overview of the patch showing a little snow on the shady portion of the patch. There is a combination of winter rye and what is called “contractor’s mix” of regular grass seed growing right now that was seeded last fall.
Picture taken on March 24, 2013
|
|
|
|
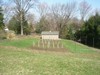
Monday, April 15
|
View Page
|
 |
The snow is now gone from the patch and in an effort to start making some progress I measured out and installed the anchors for the cold frames that will each house a luck pumpkin plant.
Picture taken on March 30, 2013
|
|
|
|
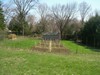
Monday, April 15
|
View Page
|
 |
With the anchors for the cold frame in place I till just the area that will be under cover. This allows the cover crop to be incorporated and also makes the soil easier to work as I will be burring 40ft. soil heating cables today.
Picture taken on March 30, 2013
|
|
|
|
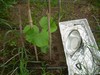
Monday, April 15
|
View Page
|
 |
This is the pattern I use for my heavy duty 40ft. soil heating cables. Look closely and you will see that the thermostat is not only between two heating elements but is also at the same level or slightly elevated from the elements that surround it.
Since heat rises you do not want to have the thermostat below where the heat is being generated as this will give a false reading and can result in the soil getting to warm and reducing the benefit to the plant above.
Picture taken on March 30, 2013
|
|
|
|
Monday, April 15
|
View Page
|
 |
All the soil heating cables are buried and I put the hoops in so the cold frame structures are all installed. I will not add the plastic coverings for some time, but I wanted to catch this good weather window of opportunity.
Picture taken on March 30, 2013
|
|
|
|
Monday, April 15
|
View Page
|
 |
The cover crop is greening up and starting to grow. However, I have to till the center third of my pumpkin patch so I can get my irrigation system on the ground and also incorporate some of the amendments I have applied.
Picture taken on April 9, 2013
|
|
|
|
Monday, April 15
|
View Page
|
 |
This is just after tilling my middle third of my pumpkin patch. I leave the upper and lower thirds so the cover crop can continue to grow. I wait on applying my amendments and allow the living roots of the cover to be in the soil to help increase the microbiology.
Picture taken on April 9, 2013
|
|
|
|
Tuesday, April 16
|
View Page
|
 |
I tilled the middle section again to ensure I have an advantage on the grass that is trying to grow back after the first tilling. I will also be applying my drip irrigation now that the soil is relatively free of surface debris.
|
|
|
|
Sunday, April 28
|
View Page
|
 |
The upper and lower thirds of the garden have been mowed, but because I have more than just winter rye I have chosen to cover the mowed areas with commercial grade weed barrier. This will block out the sunlight while still allowing water to pass through. The advantage is a great way to kill the cover crop without the need for herbicides and it should limit passes with the tiller to only two.
The left side is the finished look and the lower side just has the barrier initially rolled out but not unfolded so you can see the comparison of before and after.
|
|
|
|
Wednesday, May 1
|
View Page
|
 |
Even covered with weed barrier, the cover crops seemed to continue growing so I did another mowing and covering. It was not vigorous growth but enough that there was material to mow. Hopefully in a week or so there will be an obvious kill line noticeable between the covered and uncovered areas.
|
|
|
|
Tuesday, May 7
|
View Page
|
 |
Chosen line-up for “Field Growing Season 2013”…
1789est Wallace ’11 (F: 1725 Harp x M: 1810.5 Stevens)
1725 Harp ’09 (F: 1385 Jutras x self)
1676.5 Daletas ’12 (F: 1381 Checkon x 1495 Stelts)
1630 Colbert ’12 (F: 1596 Werner x M: 1303 Sweet)
1216.5 DeBacco ’11 (F: 1325 Hopkins x M: 1725 Harp)
220.3 DeBacco ’13 “Snowball” (F: 2009 Wallace x M: 1725 Harp [2009 Wallace] clone)
|
|
|
|
Wednesday, May 8
|
View Page
|
 |
1789est Wallace ’11 (F: 1725 Harp x M: 1810.5 Stevens)
Seed was placed in the propagation chamber on April 14th and it was planted in the cold frame on April 28th
This plant was stated a little latter than the rest as the first 1789est that I had failed to produce a vine! There were cotyledons, but then that was it. This resulted in the back-up being started a few days later than I would have liked and it took a little longer than normal to produce a radical but at least I was able to get a plant going.
As you can see the area around the plant has a lot of weeds and this was done on purpose. The weeds were allowed to grow (even though they will be pulled out later) so the roots and exudates they produce can help increase the soil biology around the initial plant site.
|
|
|
|
Wednesday, May 8
|
View Page
|
 |
1725 Harp ’09 (F: 1385 Jutras x self)
Seed was placed in the propagation chamber on April 11th and it was planted in the cold frame on April 19th
Plant is doing well, but it seems to have the tendency to grow up and not want to stay grounded. I have used some more bamboo stakes and afternoon encouragement to get it on the straight and level.
As you can see the area around the plant has a lot of weeds and this was done on purpose. The weeds were allowed to grow (even though they will be pulled out later) so the roots and exudates they produce can help increase the soil biology around the initial plant site.
|
|
|
|
Wednesday, May 8
|
View Page
|
 |
1676.5 Daletas ’12 (F: 1381 Checkon x 1495 Stelts)
Seed was placed in the propagation chamber on April 11th and it was planted in the cold frame on April 19th
This plant is the patch best at this point. It seems to be loving life and growing great! It was hard to get a good picture of this one as it has filled the opening I have in the cold frame for venting.
As you can see the area around the plant has a lot of weeds and this was done on purpose. The weeds were allowed to grow (even though they will be pulled out later) so the roots and exudates they produce can help increase the soil biology around the initial plant site.
|
|
|
|
Wednesday, May 8
|
View Page
|
 |
1630 Colbert ’12 (F: 1596 Werner x M: 1303 Sweet)
Seed was placed in the propagation chamber on April 11th and it was planted in the cold frame on April 19th
Overall this plant is a little “thin” in my opinion, but it is still growing and progressing so I am not concerned. The weeds have actually helped cushion the main vine as it was coming down so there is another bonus to keeping some extra vegetation around during the early stages of development.
As you can see the area around the plant has a lot of weeds and this was done on purpose. The weeds were allowed to grow (even though they will be pulled out later) so the roots and exudates they produce can help increase the soil biology around the initial plant site.
|
|
|
|
Wednesday, May 8
|
View Page
|
 |
1216.5 DeBacco ’11 (F: 1325 Hopkins x M: 1725 Harp)
Seed was placed in the propagation chamber on April 11th and it was planted in the cold frame on April 19th
I think I always grade my seeds the hardest but honestly this is probably the second best looking plant in the patch. It is hard to select one of my own seeds to grow but I think I made a good choice as I was happy with the progress of the plant last year so I wanted to give it a try again. I just wish it had virus resistance.
As you can see the area around the plant has a lot of weeds and this was done on purpose. The weeds were allowed to grow (even though they will be pulled out later) so the roots and exudates they produce can help increase the soil biology around the initial plant site.
|
|
|
|
Wednesday, May 8
|
View Page
|
 |
220.3 DeBacco ’13 “Snowball” (F: 2009 Wallace x M: 1725 Harp [2009 Wallace] clone)
Seed was placed in the propagation chamber on April 22nd and it was planted in the cold frame on May 4th
This one was easy for me to select to plant as I think this cross is unique and offers some of the finest two thousand plus pound genetics going. If you want to see what I went through this winter to get to this stage check out earlier postings in my dairy. It is nice when a plan comes together that I started back in November.
As you can see the area around the plant has a lot of weeds and this was done on purpose. The weeds were allowed to grow (even though they will be pulled out later) so the roots and exudates they produce can help increase the soil biology around the initial plant site.
|
|
|
|
Friday, May 10
|
View Page
|
 |
This shows the slow killing of the cover crops due to light suppression. I rolled the weed barrier back to get an idea of the progress and it seems the cover crops are just starting to turn yellow and have a slight rotting hay odor which is a sign of early degradation.
|
|
|
|
Friday, May 10
|
View Page
|
 |
With the barrier rolled back over the ground I feel confident that my plan will work out and be timed with the progression of the plants development.
|
|
|
|
Thursday, May 23
|
View Page
|
 |
Aphids noticed in the patch on my winter rye!
The closest I can identify these aphids is-- Greenbug (“Schizaphis graminum”)-- based on their general morphology, but it is hard to get an exact identification. The reason I want a close identification is it can help indicate what potential viruses are transmitted by the type of aphid at a higher rate. Last year, I lost my entire patch to ZYMV (Zucchini Yellow Mosaic Virus) with Green Peach Aphids being the likely vector.
Seeing these aphids in the patch does have me concerned, however they do not seem to transmit the typical viruses that infect pumpkin plants at a very high rate, but all it takes is one. So, as a precaution I have ordered Garlic Barrier as a method to try and deter the aphids from coming into the patch. Insecticides are basically useless as all the aphid has to do is pierce the plant tissue, it can die just after doing this and still transmit the virus. Idea with the Garlic Barrier is to prevent them from coming in contact with the pumpkin plants in the first place as this is the only way to prevent the infection from occurring.
|
|
|
|
Friday, May 24
|
View Page
|
 |
Today I took the plastic off the four plants that have out grown their respective enclosures. I should have taken them off sooner but the threat of recent threat of thunderstorms made the added protection of the plastic worth the cramped quarters for the plants for a few extra days. Now that this threat has passed, the plants are now exposed to the elements. It started raining while I was in the process of removing the plastic and structures, so I was not able to finish but at least some of the plants can stretch out without running into the walls of the cold frame.
|
|
|
|
Monday, May 27
|
View Page
|
 |
Drip tapes are all laid out in the patch and silt fence is up. There is still some damage from a recent cold snap along with very high winds. The cold temperatures resulted in the vines and leaf stalks becoming brittle and not very flexible and then the wind causing a stress on the plant. In short, my plants sustained many broken leaf stalks but I think they will recover, but right now they just do not look very uniform.
I was fortunate that none of the main vines broke, but two did roll on me and it was too cold to try and right them so I left them as is and will just have to adjust to the current plant growth pattern that I guess would be called cork screw;-)
|
|
|
|
Sunday, June 9
|
View Page
|
 |
Went to help a fellow grower out and there were some weeds and they were removed from the patch and organized into pails and buckets. What I did not realize is the weeds were going to be for sale, personally I think the price is a little high, but what do I know.
|
|
|
|
Wednesday, June 12
|
View Page
|
 |
1789est Wallace ’11 (F: 1725 Harp x M: 1810.5 Stevens)
This plant was started a little later and has been slow to develop but it seems to be getting going now. The secondaries are present and starting to vine out.
While it seems the standard for comparison this time of year is main vine length, I have had plants in the past that grow a great main vine but do not ‘fill-in’, so I developed the idea of Leaf Area Estimation which is basically the area of a triangle. (This works best for the standard Christmas Tree style of pruning.) All you have to do is measure the width of the plant and the length of the main vine. Then it is simply (1/2)*(width of the plant)*(main vine length) = Leaf Area Estimation.
Leaf Area Estimation= 48 square feet
Main Vine Length= 12 feet
|
|
|
|
Wednesday, June 12
|
View Page
|
 |
1725 Harp ’09 (F: 1385 Jutras x self)
This plant did get rolled early in the season and is now just starting to recover with the secondary vines getting to a length that can be buried for increased main vine stabilization. There is a potential pollination that will be occurring in the near future, and even though the plant is smaller than I would like, but I will still make an attempt at the pollination that I can always cull later if I chose.
While it seems the standard for comparison this time of year is main vine length, I have had plants in the past that grow a great main vine but do not ‘fill-in’, so I developed the idea of Leaf Area Estimation which is basically the area of a triangle. (This works best for the standard Christmas Tree style of pruning.) All you have to do is measure the width of the plant and the length of the main vine. Then it is simply (1/2)*(width of the plant)*(main vine length) = Leaf Area Estimation.
Leaf Area Estimation= 103.5 square feet
Main Vine Length= 18 feet
|
|
|
|
Wednesday, June 12
|
View Page
|
 |
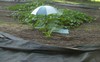
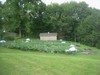
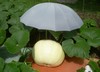
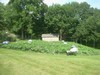
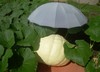
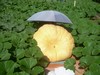
1676.5 Daletas ’12 (F: 1381 Checkon x 1495 Stelts)
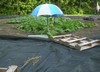
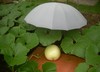
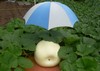
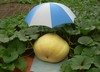
This plant has been very strong from the beginning and it continues to be that way. However, while it may have the longest main vine it does not have the greatest leaf area, so this is why I like measuring the entire plant for a more complete look at the plant potential. This plant is growing great and I have no negatives to say about it. I have set-up my umbrellas to protect the immature females from the soil splash caused by heavy rain and the strong rays of the sun in hopes of increasing the odds for a successful pollination.
While it seems the standard for comparison this time of year is main vine length, I have had plants in the past that grow a great main vine but do not ‘fill-in’, so I developed the idea of Leaf Area Estimation which is basically the area of a triangle. (This works best for the standard Christmas Tree style of pruning.) All you have to do is measure the width of the plant and the length of the main vine. Then it is simply (1/2)*(width of the plant)*(main vine length) = Leaf Area Estimation.
Leaf Area Estimation= 189.6 square feet
Main Vine Length= 20.5 feet
|
|
|
|
Wednesday, June 12
|
View Page
|
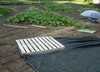 |
1630 Colbert ’12 (F: 1596 Werner x M: 1303 Sweet)
This has been an interesting plant because the vines have been thinner than normal and the leaves are smaller than normal but the basics of the plant (area and growth) have all been normal. This characteristic is different than the other plants but I have full confidence the full sized pallet I have next to it could come in handy later this year;-)
While it seems the standard for comparison this time of year is main vine length, I have had plants in the past that grow a great main vine but do not ‘fill-in’, so I developed the idea of Leaf Area Estimation which is basically the area of a triangle. (This works best for the standard Christmas Tree style of pruning.) All you have to do is measure the width of the plant and the length of the main vine. Then it is simply (1/2)*(width of the plant)*(main vine length) = Leaf Area Estimation.
Leaf Area Estimation= 124 square feet
Main Vine Length= 16 feet
|
|
|
|
Wednesday, June 12
|
View Page
|
 |
1216.5 DeBacco ’11 (F: 1325 Hopkins x M: 1725 Harp)
This could be my best plant in the patch at this time. The growth has been seemingly accelerated in all directions over the past few days. Leaf height and size has all been what I like to see and so has the aggressive vine growth. Hopefully, the different genetic backgrounds will combine their positive attributes in one plant.
While it seems the standard for comparison this time of year is main vine length, I have had plants in the past that grow a great main vine but do not ‘fill-in’, so I developed the idea of Leaf Area Estimation which is basically the area of a triangle. (This works best for the standard Christmas Tree style of pruning.) All you have to do is measure the width of the plant and the length of the main vine. Then it is simply (1/2)*(width of the plant)*(main vine length) = Leaf Area Estimation.
Leaf Area Estimation= 199.5 square feet
Main Vine Length= 19 feet
|
|
|
|
Wednesday, June 12
|
View Page
|
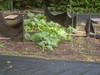 |
220.3 DeBacco ’13 “Snowball” (F: 2009 Wallace x M: 1725 Harp [2009 Wallace] clone)
This was the last plant to go in the ground, so it is expected to be the smallest and this is true, however I like what I see. The wind did damage some of the leaves but soon the secondaries will be at the stage that they can be buried to help stabilize the plant. I am encouraged by the sight of a female already on the main vine. For those that have been following the story of Snowball it looks like the story is continuing and so far is still showing positive signs.
While it seems the standard for comparison this time of year is main vine length, I have had plants in the past that grow a great main vine but do not ‘fill-in’, so I developed the idea of Leaf Area Estimation which is basically the area of a triangle. (This works best for the standard Christmas Tree style of pruning.) All you have to do is measure the width of the plant and the length of the main vine. Then it is simply (1/2)*(width of the plant)*(main vine length) = Leaf Area Estimation.
Leaf Area Estimation= 22.5 square feet
Main Vine Length= 10 feet
|
|
|
|
Wednesday, June 12
|
View Page
|
 |
Overall the patch is going well. I have plants that had different planting dates so there is more variability than I typically have simply because of the age differences of the plants. Seeing Snowball progress has been a continued fun experience. Right now, I am hoping that the rain will slow down because the wet ground is preventing much needed tasks from getting accomplished in the patch. This is the season of weeding and vine burring but spending time in the patch when the soil is very wet you can easily do more harm than good. I would go fishing but the River is flooded.
|
|
|
|
Friday, June 14
|
View Page
|
 |
Here is what I have collected in my rain gauge…
6/7/13 = 3.7”
6/11/13 = 2.0”
6/14/13 = 2.5”
For a total of 8.2” of rain over the last week.
|
|
|
|
Thursday, July 4
|
View Page
|
 |
July 4th, 2013 Patch Update…
Overall despite the seemingly constant rain events the plants are growing at a pace similar to what I have observed in years past. Most main vines are around 30ft. long and there are some secondaries terminated with each plant being about 32ft. wide.
|
|
|
|
Sunday, July 7
|
View Page
|
 |
1789est Wallace ’11 (x 220.3 DeBacco “Snowball”)
Day: 13
OTT: 99.5 ”
Est. weight: 24.3 lbs.
Pollination Date: June 24th, 2013
Number of lobes: 4
Overall I like the shape of this pumpkin and the cross is certainly unique to say the least as it has 2009 Wallace ’12 and the 1725 Harp that grew the 2009 Wallace genetics in the pollinator. With the high humidity there are actually some spores of powdery mildew already showing up on a few leaves.
|
|
|
|
Sunday, July 7
|
View Page
|
 |
1676.5 Daletas ’12 (x 1216.5 DeBacco)
Day: 21
OTT: 174”
Est. weight: 123 lbs.
Pollination Date: June 16th, 2013
Number of lobes: 5
I think this pumpkin is going to be whiter than I was hoping for. I was hoping for the shape of the mother with the color of the pollinator, but it looks like I am getting only one of these characteristics. Plant overall is maintaining its aggressive growth rate so the predetermined plant site is filling in well.
|
|
|
|
Sunday, July 7
|
View Page
|
 |
1630 Colbert ’12 (x 1725 Harp)
Day: 19
OTT: 174.5”
Est. weight: 124 lbs.
Pollination Date: June 18th, 2013
Number of lobes: 5
This plant has consistently produced small leaves even as the season progresses, but it does not seem to be a problem. It looks like this pumpkin will be orange and wheel-like in shape with a sunken in blossom end.
|
|
|
|
Sunday, July 7
|
View Page
|
 |
1216.5 DeBacco ’11 (x 1676.5 Daletas)
Day: 26
OTT: 211”
Est. weight: 214 lbs.
Pollination Date: June 13th, 2013
Number of lobes: 5
This pumpkin is the biggest in the patch as of today. It looks like a good mix of the parents. Hopefully it will have some orange color and at least at this point in development, it is a wide pumpkin. I like what I see and just hope things continue to progress on the current trajectory.
|
|
|
|
Sunday, July 14
|
View Page
|
 |
Overall it has been a rainy week with not a lot of total rain accumulation, but enough to keep everything very moist which is prime conditions for disease. Other than some Powdery Mildew so far there have not been too many issues with disease, but I expect this to change very soon. However, as of today things are looking good.
|
|
|
|
Sunday, July 14
|
View Page
|
 |
1789est Wallace ’11 (x 220.3 DeBacco “Snowball”)
Day: 20
OTT: 172”
Est. weight: 119 lbs.
Recently I have been fighting a plant wilt that is a little odd. It causes the leaves the wilt during the day in isolated areas but then bounce back as the sun starts to go down. The following day it could wilt in a different portion then the previous day. Either way there is some plant stress going on as the pumpkin is not growing like the others. As of right now the wilting does not seem to be disease related, but is something I will keep my eye on.
|
|
|
|
Sunday, July 14
|
View Page
|
 |
1676.5 Daletas ’12 (x 1216.5 DeBacco)
Day: 28
OTT: 249”
Est. weight: 346 lbs.
This pumpkin seems to be doing well with the decent stretch of weather we have been having. It is starting to develop a little bit of a pear shape as the blossom end is getting wider than the stem end. It does not look like there is going to be much color but hopefully it keeps on growing.
|
|
|
|
Sunday, July 14
|
View Page
|
 |
1630 Colbert ’12 (x 1725 Harp)
Day: 26
OTT: 237.5”
Est. weight: 302 lbs.
Looks like this is going to be a wheel shape but the yellow-ish glow gives me hope that it will have a nice pumpkin orange color to it. If you look at the 10 O’clock position you can see the area that started to tear when it was a little pumpkin. It seems to have healed over just fine and should be able to grow with the pumpkin without much concern of it ripping open and/or splitting.
|
|
|
|
Sunday, July 14
|
View Page
|
 |
1216.5 DeBacco ’11 (x 1676.5 Daletas)
Day: 33
OTT: 259.5”
Est. weight: 390 lbs.
This pumpkin has an interesting shape as it is a basic combination of the parents and I like it. However, it looks like the blossom end will slowly curl under the pumpkin so I am doing my best to inspect it before it goes out of view. There have been no problems and no treatments required so I do not see there being a problem with the blossom end in the future. This is currently my biggest pumpkin in the patch which is encouraging especially when it is your own seed.
|
|
|
|
Sunday, July 21
|
View Page
|
 |
After a long stretch of hot and humid weather it looks like I have lost two pumpkins. They were smaller and even though I did my best to cool them it is possible that they ‘cooked’ so it looks like I will be pulling out both my 1725 Harp ’09 and my 220.3 DeBacco ‘13 “Snowball” plants. It is sad to lose both of these plants as they both looked great and just when I thought I had the chosen pumpkins growing, it looks like, it was just not meant to be.
|
|
|
|
Sunday, July 21
|
View Page
|
 |
1789est Wallace ’11 (x 220.3 DeBacco “Snowball”)
Day: 27
OTT: 222”
Est. weight: 248 lbs.
This pumpkin has been a little slow to get going, but I hope that means this is a heavy to chart pumpkin. Overall the plant is still growing so it should fill-in the space nicely.
|
|
|
|
Sunday, July 21
|
View Page
|
 |
1676.5 Daletas ’12 (x 1216.5 DeBacco)
Day: 35
OTT: 304”
Est. weight: 617 lbs.
This plant had a lengthwise split in the main vine near the pumpkin. You can see a large bamboo stake that is helping hold a plastic plate in place to prevent water from collecting in the vine. So far it does not look like there is much of an issue as the vine just opened up and healed over nicely and the plate is just ensuring that water does not get into the hallow main vine which will most likely lead to rot.
|
|
|
|
Sunday, July 21
|
View Page
|
 |
1630 Colbert ’12 (x 1725 Harp)
Day: 33
OTT: 280”
Est. weight: 486 lbs.
Looks like I am getting more of a wheel shape to this pumpkin than I expected. The leaves on this plant have been noticeably smaller than just about all of the giant pumpkins that I have grown before and while it initially seemed odd, all other characteristics have been normal. The leaf area is still covering the ground, but my leaf count is probably higher due to there being smaller leaves.
|
|
|
|
Sunday, July 21
|
View Page
|
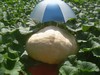 |
1216.5 DeBacco ’11 (x 1676.5 Daletas)
Day: 40
OTT: 288”
Est. weight: 527 lbs.
I like the overall shape of this pumpkin as it does not have any noticeable weak areas. You may notice the dryer sheets around this pumpkin and other than making the pumpkin smell nice, the main purpose is to act as a rodent deterrent. I have heard from people that this simple trick has worked for them, and since it is easy enough to do, I put these around all of my pumpkins. I add another sheet every so often, when I feel the smell has been reduced and so far no evidence of mice damage on any of my pumpkins.
|
|
|
|
Sunday, July 21
|
View Page
|
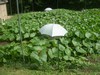 |
220.3 DeBacco ’12 “Snowball”
As the picture shows this plant has a great growth pattern and seems to be very heat tolerant as the leaves did not flag. I guess I just chose the wrong pumpkin. What looked like a wining pumpkin, ended up aborting after record setting heat. So, I reluctantly removed the plant out of the patch. Sadly this same situation happened to my 1725 Harp so I am now down two plants simply because I could not get a pumpkin set on them.
This picture shows the plant just before removal and there are plenty of healthy leaves to push a pumpkin, and after the time I spent breeding Snowball it was hard to pull this plant. I can say that my inspection of the plant during the process showed positives signs with no evidence of disease and a strong root system.
|
|
|
|
Sunday, July 28
|
View Page
|
 |
This does not look good…
Walking by the patch and looking at my 1216.5 DeBacco ’11 plant I saw this, which is something you do not want to see. The main vine and leaves past this pumpkin were showing the symptoms so I basically took the chance and cut the vine at the pumpkin and ripped out the rest of the plant in hopes of stopping this wilt from spreading to any other plants.
The downfall is that I think this is a combination of Pythium and Phytophthora both of which are basically root related. What makes these diseases challenging is the roots from other plants have very likely interweaved with the potentially infected roots which allows for ease of transfer to seemingly healthily plants. The Phytopthora in particular can actually swim on its own in an aqueous (water based) environment and this is why I try and be aggressive by trying and catch the main point of infection as well as some of the new areas it may spread to. This is hard to do, but I would rather sacrifice one plant than lose the entire patch.
|
|
|
|
Sunday, July 28
|
View Page
|
 |
Once I got in the patch I took another picture from this angle of my 1216.5 DeBacco plant. These leaves went from ‘normal’ to this sudden wilt in about 12 hours. When I see this degree of aggressiveness this disease is showing I try and be equally aggressive by removing all sections of the plant plus some that look infected. I know the overall pumpkin growth will suffer but, with some luck, the pumpkin could still make it to a weigh-off.
|
|
|
|
Sunday, July 28
|
View Page
|
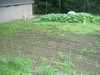 |
Site of my 220.3 DeBacco ’13 “Snowball” plant that I lost the pumpkin due to the record heat we had for an extended period of time. As you can see overall weed control was good, and upon removing the plant I seeded contractor’s grade grass seed along with some Buckwheat. With the heat and rain we have been getting should be favorable for germination and early plant growth. I use this combination so the soil will be covered and there will be added benefit of crop rotation.
|
|
|
|
Sunday, July 28
|
View Page
|
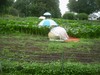 |
Here is the same 1216.5 DeBacco ’11 plant with half of the plant removed that I lost to disease. So, far it does not look like it has spread to other parts of the plant, but it is still early. I plan on letting some tertiary vines grow to try and fill in some of the area as there is still a decent amount of the season left.
|
|
|
|
Saturday, August 3
|
View Page
|
 |
Well it looks like the wilt has now spread to my 1789est Wallace ’11 plant:-( These leaves were fine yesterday and today they do not look right. This plant was right next to my 1216.5 DeBacco ’11 so the same disease is probably spreading. As a last resort I will try and be equally as aggressive as the disease and basically remove the plant as I still have a clone form the 1725 Harp that grew Ron’s 2009 pound pumpkin planted very nearby, that I do not want to lose to this disease.
|
|
|
|
Saturday, August 3
|
View Page
|
 |
This leaf was fine yesterday and seeing this wilt occur so fast suggests that I could be dealing with a disease called Phytophthora. This disease can spread very fast as it has the ability to actively swim on its own and does not need to be carried to its next host.
|
|
|
|
Sunday, August 4
|
View Page
|
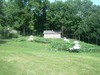 |
Patch Overview…
There have been a few changes over the last two weeks. First off, the 1725 Harp + 220.3 DeBacco “Snowball” plants were removed due to the pumpkins aborting due to a stretch of unusually hot weather. Then, both my 1216.5 DeBacco and 1789est Wallace plants were removed due to both of these plants becoming infected with a combination of Pythium and Phytophthora. Both of these plants had pumpkins so now, just the pumpkins will remain in the field in hopes that I can bring them to a weigh-off.
|
|
|
|
Sunday, August 4
|
View Page
|
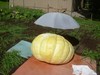 |
1789est Wallace ’11 (x 220.3 DeBacco “Snowball”)
Day: 41
OTT: 261.5”
Est. weight: 399 lbs.
Well, sadly I had to remove this plant so I do not expect any more growth. This plant was hit hard by the witling disease so I decided to try and remove this plant entirely so the odds of it spreading to my other plants will be reduced. There is still no guarantee that this will stop the disease from spreading but I know removing an infected host in the early stages can reduce the odds of the disease spreading.
*I was not able to get a weight on this pumpkin as it rotted while in the patch and I did not save any seeds. Sometimes these things just happen.
|
|
|
|
Sunday, August 4
|
View Page
|
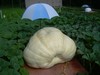 |
1676.5 Daletas ’12 (x 1216.5 DeBacco)
Day: 49
OTT: 364”
Est. weight: 1039 lbs.
So far I am very happy with this plants performance. The pumpkin has a nice stable growth pattern and the plant is holding up nicely. This pumpkin did grow on a side vine early on and now it is too late to move it, so the pumpkin will be growing on it for now. I can always cut it off if I need to, but right now I do not think it is causing any problems, I just cut some of the leaves off to prevent them from scraping against the pumpkin.
|
|
|
|
Sunday, August 4
|
View Page
|
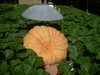 |
1630 Colbert ’12 (x 1725 Harp)
Day: 47
OTT: 330.5”
Est. weight: 785.5 lbs.
The color is getting better on the pumpkin and it seems each week the ribs are getting more defined. It is certainly going to be a wheel shape, and hopefully the ribs are able to hold together as this pumpkin continues to grow. The rate of growth is steady, I hope it just continues.
|
|
|
|
Sunday, August 4
|
View Page
|
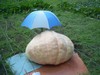 |
1216.5 DeBacco ’11 (x 1676.5 Daletas)
Day: 54
OTT: 317.5”
Est. weight: 699.5 lbs.
It is August 4th and I already have my pumpkin picked for the Woodstock Fair that is 25 days away. Not an ideal situation but I chose to remove the plant as it was continuing to show signs of wilt. It will be a little while before I can put the pumpkin on my trailer, so for now the simple umbrella will hopefully be enough to keep the pumpkin protected.
Also based on previous pumpkins that I have weighed multiple times after harvesting that were around 1,000 pounds I have seen about a 1 pound loss per day after harvest. So, to me a 25 (or so) pound loss was better than potentially loosing the pumpkin to a vine rot that could have entered the pumpkin and caused it to rot from the inside out. Hopefully I was aggressive enough and caught the disease early so this pumpkin can make it to a weigh-off.
|
|
|
|
Sunday, August 4
|
View Page
|
 |
1725 Harp ’09 [2009 Wallace] clone
No pumpkins on this plant, but I just thought I would show a picture of the 1725 Harp clone that grew Ron’s 2009 pound pumpkin that I have. It is not in the best of locations but I am hoping to just keep it alive so if possible I can bring it back into the greenhouse this winter. It looks all alone and that is because the plants around it have been removed, I just hope the wilt disease jumping from plant to plant avoids this one.
|
|
|
|
Sunday, August 11
|
View Page
|
 |
Team-Pumpkin patch tour day! (Day after Topsfield)
Well today was the Team-Pumpkin patch tour! For some growers it was a weekend of pumpkin fun as yesterday there was another patch tour based around the Topsfield Massachusetts area. Today, Team-Pumpkin visited four different patches and had growers of all levels of experience which made for an educational and fun time for all that attended.
Thanks goes out to the entire Team that helped make this tour a success.
|
|
|
|
Sunday, August 11
|
View Page
|
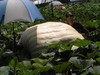 |
1676.5 Daletas ’12 (x 1216.5 DeBacco)
Day: 56
OTT: 381”
Est. weight: 1186 lbs.
For those growers that get the Southern New England Newsletter this is the same picture that appears on page 7 of the ‘September 2013’ edition with special thanks to Steve Connolly for taking this picture so that I can act as the size comparison. I have no complains about this pumpkin or plant since the pumpkin is growing and the plant is still in overall good shape especially considering the high rates of disease I have seen this year.
|
|
|
|
Sunday, August 11
|
View Page
|
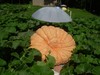 |
1630 Colbert ’12 (x 1725 Harp)
Day: 54
OTT: 341”
Est. weight: 860 lbs.
I like the orange color and the plant seems to be getting some new life by producing some tertiary vines recently. I have been cutting a few tertiary vines out but I will start to leave them alone as this could be beneficial new growth that may help keep this pumpkin growing into September.
|
|
|
|
Thursday, August 15
|
View Page
|
 |
This is a sample picture from my own patch that shows the early stages of Downy Mildew.
This is something you do not want to see on your leaves. If you look closely you will see small circles that have yellow-ish tint. Just looking quick this can be either downy mildew or powdery mildew, however attention to detail is key here for a proper diagnosis. If you inspect the circles very closely you will see that where there is a leaf vein near by it seems to stop the circle or at least make it not quite a perfect circle. This indicates that the problem is an internal one. Downy mildew is more of an internal disease compared to powdery mildew which is more superficial and because of this powdery mildew is easier to control than downy mildew.
There are different strains of downy mildew so there is not just “one” type of downy which can make control of this disease difficult especially for large scale farmers as this disease can defoliate pumpkin plants in as little as 7-10 days, which I have been witness to.
|
|
|
|
Thursday, August 15
|
View Page
|
 |
As with some diseases it is important to closely inspect the underside of the leaves for a proper diagnosis. Looking at these leaves you can see gray or as I call it “dirty” looking areas, which indicates that this is downy mildew. In contrast, powdery mildew has a “cleaner” or whiter appearance which can actually be seen to the left of my thumb as well as closer to the leaf margin in this picture. Often times they are found together but downy mildew is the harder one to control and can also be more aggressive given the right conditions.
|
|
|
|
Sunday, August 18
|
View Page
|
 |
Just wanted to provide a general patch update photo this shows my two remaining pumpkin plants (and three remaining pumpkins) as well as what my grass and buckwheat cover crops that I planted in the sites that I lost plants looks like.
|
|
|
|
Saturday, August 31
|
View Page
|
 |
709 DeBacco ’13 (F: 1216.5 DeBacco x M: 1676.5 Daletas)
Day: 54
OTT: 317”
Est. weight: 696 pounds
So this pumpkin was right on chart.
Woodstock Fair 4th place!
Plant was removed when pumpkin was 54 days old on August 4th. It was weighed on August 31st (27 days post harvest)
This pumpkin had its plant removed on August 4th and even though the pumpkin sat outside most of the time it still made it to the weigh-off as an official entry! This pumpkin also weighed on chart which I was happy with especially since it was harvested so early and was losing weight each day. You always think what could have been, but I am still happy with fourth place at the Woodstock Fair.
|
|
|
|
Sunday, September 1
|
View Page
|
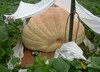 |
1676.5 Daletas ’12 (x 1216.5 DeBacco)
Day: 77
OTT: 415.5”
Est. weight: 1524.5 lbs.
While this may only be an estimated weight from this point forward I am really hoping that the pumpkin just weighs on chart. There is a small hut of white sheets around the pumpkin which makes pumpkin inspections easier. In the past, I have had a problem with small varmints late in the season so I have decided to go with a devise that produces an ultrasonic sound that basically annoys small animals so they leave or do not stay around the area very long. So far, there is no visible damage and I think this is an upgrade over methods I have used in the past that will hopefully eliminate the problem this year.
|
|
|
|
Sunday, September 1
|
View Page
|
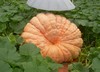 |
1630 Colbert ’12 (x 1725 Harp)
Day: 75
OTT: 370.5”
Est. weight: 1094 lbs.
This pumpkin continues to put on weight and the plant is doing great. However, sadly this is the last picture of this pumpkin as it developed an odd soft spot that I think occurred after a split that may have happened on the underside. Either way, it was a sad loss as this pumpkin was getting more and more color to it as it grew. Also, no seeds were saved due to the condition the inside of the pumpkin was in. Stem, vine, and crown were all in excellent shape even this late in the season.
|
|
|
|
Saturday, September 21
|
View Page
|
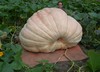 |
1676.5 Daletas ’12 (x 1216.5 DeBacco)
Day: 97
OTT: 425”
Est. weight: 1628 lbs.
Since the sun is setting earlier and earlier and I did not want to be rushed with picking the pumpkin, I decided to take the entire day to check and recheck everything for the grand pumpkin harvest. I was able to get in this picture as I started clearing the area around the pumpkin for the harvest. It was nice to be able to take my time making sure everything was in order. As the tripod was being assembled the neighbors all came out to see the process. I let them know it was going to be a hurry-up and wait kind of scenario but that gave everyone time to talk which had not happened in a long time. It is great how pumpkins can bring people together!
|
|
|
|
Saturday, September 21
|
View Page
|
 |
Hard to believe something the size of my thumb can turn into something I can easily fit inside of in less than 100 days!
Note: this is not the actual flower that turned into my pumpkin but I was moving vines in preparation for the harvest and I am still taken back and amazed at what these plants can do even though I have been growing them for many years and seen just what they can produce firsthand.
|
|
|
|
Saturday, September 21
|
View Page
|
 |
1676.5 Daletas ’12 (crown area)
I know many growers get “foaming stumps” and I am fortunate with my growing methods that I do not see very many at all. Here is a picture of the initial plant site (where the seedling originally went in the ground) to show that the main vine, crown and secondaries are as healthy as can be. There is no rot, foam or other problems. The black fabric around this area is simple weed-block to keep the weeds down which makes inspection of this area quite easy throughout the season. You can also see the label I put at each plant site directly from the initial planting pot as I want to make sure there are no chances of having a plant mix-up.
In addition to the weed-block, I also put a clear piece of glass supported with a little table made from PVC pipe over the area to help keep the area dry while still allowing sunlight to shine on the area. For irrigation, I use drip tapes which I think help quite a bit at reducing the chance of a foaming stump since the plant gets even and consistent water to all of its roots.
|
|
|
|
Saturday, September 21
|
View Page
|
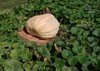 |
1676.5 Daletas ’12 (x 1216.5 DeBacco)
Day: 97
OTT: 425”
Est. weight: 1628 lbs.
Last picture just before harvest! The plant is still in great health and immediately upon cutting the vine water started to drip out of the vine. I take this as a good sign that the pumpkin was being fed right up to the very end.
|
|
|
|
Wednesday, September 25
|
View Page
|
 |
1676.5 Daletas ’12 (x 1216.5 DeBacco)
Day: 97
OTT: 425”
Est. weight: 1628 lbs.
The pictures of the pumpkin are mainly from the blossom end, so I wanted to be sure to include one that shows just how great the stem that helped support this pumpkin looked. This is one of the best stems I have had on a pumpkin, and this pumpkin is 97 days old. Being able to have a pumpkin maintain this very important plant connection is essential for continued growth into the last part of the growing season in my opinion. Seeing this trait is just another positive to the 1676.5 Daletas plant/pumpkin.
|
|
|
|
Wednesday, September 25
|
View Page
|
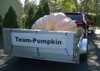 |
Loaded up and heading to the Durham Fair!
1676.5 Daletas ’12 (x 1216.5 DeBacco)
Day: 97
OTT: 425”
Est. weight: 1628 lbs.
A few years ago, I purchased a nice green heavy duty trailer that also has hydraulics to automatically dump which is a nice option and time saver. However, I purchased a 5’ x 8’ size bed which I thought was going to be plenty big for my pumpkins, well in short I had to buy a bigger trailer;-)
I decided to purchase the widest legally available trailer I could find. Also, since the main purpose of this trailer is to be a show trailer I purchased one made from aluminum. The sides, floor, and even the wheel rims are all aluminum which makes it not only look nice but it is also very light and easy to move (when empty). The trailer is 8.5ft wide with an 82” deck width to provide maximum room for the cargo. The tires on both sides have a little scuff make as those toll booths can get a little tight;-) I spent the winter hand buffing the entire trailer in hopes that it would be needed this year, and I am glad I did.
Adding the Team-Pumpkin banner is an obvious choice and I think it adds to the pictures that are taken where ever the pumpkin travels.
|
|
|
|
Wednesday, September 25
|
View Page
|
 |
Special thanks to Scott for hand carving the Team-Pumpkin patch design into a field pumpkin. He even thinned the walls down and added a 40 watt light bulb which was turned on every evening of the fair which added a nice touch to the pumpkin tent. Also, next to the pumpkin is a great looking Goose Neck Gourd, thanks Scott for the bonus items that were used as part of our general display.
|
|
|
|
Wednesday, September 25
|
View Page
|
 |
1676.5 Daletas ’12 (x 1216.5 DeBacco)
Day: 97
OTT: 425”
Est. weight: 1628 lbs.
As the night of pumpkin weighing went on, the 7pm hour came quick which is when I had decided to weigh my pumpkin as I had a few people travel to witness the event.
Thanks goes out to Chris for all of your help rigging, and Norm, for the special bottom strap. The anticipation was building at this point with cameras ready as the pumpkin was heading to the scale.
|
|
|
|
Wednesday, September 25
|
View Page
|
 |
1676.5 Daletas ’12 (x 1216.5 DeBacco)
Day: 97
OTT: 425”
Est. weight: 1628 lbs.
Here is a quick underside picture of the bottom which was approved by all of the judges and was the final point of inspection making this an official entry!
|
|
|
|
Wednesday, September 25
|
View Page
|
 |
1766.5 DeBacco ’13 (F: 1676.5 Daletas x M: 1216.5 DeBacco)
OTT = 425” and heavy by 12% GPC Chart (or 8.5% based on the Team-Pumpkin chart)
The pumpkin hit the scale and needless to say, it went heavy, really heavy! Here I am in shock at the sequence of numbers I am holding up.
Some background information on the pollinator the 1216.5 DeBacco…
The 1216.5 DeBacco plant was the selected pollinator because this plant was a top two plant in the patch at pollination time. Both the 1676.5 Daletas and the 1216.5 DeBacco were the best two plants in the patch. Sadly the 1216.5 DeBacco plant was hit with disease and as a precautionary measure I pulled half the plant out and then since the disease was still spreading I ripped the entire plant out by August 4th where the pumpkin I had sat off the vine for 25 days before being weighed. So, the 709 pound pumpkin was basically the weight of the pumpkin at the end of July which was with-in 100 estimated pounds of what the 1676.5 Daletas was before disease took out the 1216.5 DeBacco plant.
The cross of the 1216.5 DeBacco ’11 is (F: 1325 Hopkins x M: 1725 Harp) and the 1725 Harp pollinator, grew my previous personal best weight of 1465.5 pounds that was damaged by a mouse just prior to the weigh-off which result in it being disqualified. But here again is a great genetic combination with a strong performing lineage. Being fortunate to grow six plants a year provides better odds of selecting the ‘best’ performing plants in hopes of selecting for the strongest performers.
|
|
|
|
Wednesday, September 25
|
View Page
|
 |
1766.5 DeBacco ’13 (F: 1676.5 Daletas x M: 1216.5 DeBacco) 12% or 8.5% heavy (according to GPC and Team-Pumpkin charts respectively)
I had to take a look at the scale myself, just to make sure;-)
All I can really say is… “Wow!!”
|
|
|
|
Wednesday, September 25
|
View Page
|
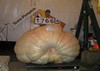 |
1766.5 DeBacco ’13 (F: 1676.5 Daletas x M: 1216.5 DeBacco) 12% or 8.5% heavy (according to GPC and Team-Pumpkin charts respectively)
This picture (curtsey of Steve C.) shows the true width of this pumpkin.
|
|
|
|
Wednesday, September 25
|
View Page
|
 |
1766.5 DeBacco ’13 (F: 1676.5 Daletas x M: 1216.5 DeBacco) 12% or 8.5% heavy (according to GPC and Team-Pumpkin charts respectively)
Here is the Team gathered around the pumpkin. I want to thank them all for their help and support!
|
|
|
|
Thursday, September 26
|
View Page
|
 |
1766.5 DeBacco ’13 (F: 1676.5 Daletas x M: 1216.5 DeBacco) 12% or 8.5% heavy (according to GPC and Team-Pumpkin charts respectively)
Here is the pumpkin on display at the fair. (This is one of my favorite pictures.)
Thanks to Lloyd for display pumpkins and Scott for the carving!
|
|
|
|
Thursday, September 26
|
View Page
|
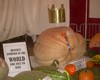 |
1766.5 DeBacco ’13 (F: 1676.5 Daletas x M: 1216.5 DeBacco) 12% or 8.5% heavy (according to GPC and Team-Pumpkin charts respectively)
The Durham Fair wanted a good catch phrase for the pumpkin while it was on display, so I came up with this poster that stayed up for the duration of the fair and it was accurate for the time it was displayed. I knew it was not going to hold forever, but I enjoyed it while it lasted.
|
|
|
|
Saturday, October 26
|
View Page
|
 |
1766.5 DeBacco ’13 (F: 1676.5 Daletas x M: 1216.5 DeBacco) 12% or 8.5% heavy (according to GPC and Team-Pumpkin charts respectively)
Today, I worked on getting my pumpkin to its final display, Foxwoods Resort and Casino in Ledyard, CT. This is where it was going to be carved by Scott Cully. Delivering and moving it with the equipment they had was easy, the hard part was picking the pumpkin up “wrong” so it stood up on end to provide the greatest amount of carving surface. After some planning and strategizing we were able to get the pumpkin properly oriented. This picture actually shows the bottom of the pumpkin over a month from being weighed at the Durham Fair and it was still in great shape.
The stem end is on the top and other than some 2x4’s and a couple of sand bags for increased stability the pumpkin actually sat quite nicely on its own. It was a tough decision to make but in the end it was the proper way to display the pumpkin.
In the background there is the statue that is the center point of the Rain Maker plaza just outside of the buffet area. (For those that have been to Foxwoods.)
|
|
|
|
Saturday, October 26
|
View Page
|
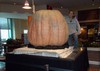 |
1766.5 DeBacco ’13 (F: 1676.5 Daletas x M: 1216.5 DeBacco) 12% or 8.5% heavy (according to GPC and Team-Pumpkin charts respectively)
After all of the work we did get the pumpkin on display for tomorrows carving. The pumpkin looked very impressive in this orientation so it was worth the extra effort on everyone’s part that helped make this possible. I will be back tomorrow to harvest the seeds myself and get to see the carving take place over the course of the day.
|
|
|
|
Sunday, October 27
|
View Page
|
 |
1766.5 DeBacco ’13 (F: 1676.5 Daletas x M: 1216.5 DeBacco) 12% or 8.5% heavy (according to GPC and Team-Pumpkin charts respectively)
Here is the start (late morning picture) of the carving. There are going to be three faces carved into the pumpkin and the sides are already started on but the front was going to be largest and last to be completed.
|
|
|
|
Sunday, October 27
|
View Page
|
 |
1766.5 DeBacco ’13 (F: 1676.5 Daletas x M: 1216.5 DeBacco) 12% or 8.5% heavy (according to GPC and Team-Pumpkin charts respectively)
This shows one of the side carvings. The small holes made for the eyes and mouth helped get some much needed light to the cavity so I could make sure I did not leave any seeds behind. It was nice to see how thick the walls were.
|
|
|
|
Sunday, October 27
|
View Page
|
 |
1766.5 DeBacco ’13 (F: 1676.5 Daletas x M: 1216.5 DeBacco) 12% or 8.5% heavy (according to GPC and Team-Pumpkin charts respectively)
While on the initial look the pumpkin looks impressive, look carefully and you will see large vertical split in the pumpkin that occurred during the carving process which goes from the eye all the way down and through the mouth. It is sad to see all the work put into growing the pumpkin end-up like this in the end. On the plus side the walls were nice and thick all around so there were no internal flaws with the pumpkin. The split occurred due to a carver’s error (by making the walls to thin) and not a pumpkin flaw.
|
|
|
|
Sunday, October 27
|
View Page
|
 |
1766.5 DeBacco ’13 (F: 1676.5 Daletas x M: 1216.5 DeBacco) 12% or 8.5% heavy (according to GPC and Team-Pumpkin charts respectively)
This was the last picture of the evening which shows the near completed carving, but the straps that were put around it to hold it together I think take away from the overall display of the pumpkin.
|
|
|
|
Sunday, November 3
|
View Page
|
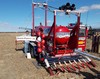 |
This is the World Championship Punkin Chunkin Event held in Bridgeville, DE
At one of the winter pumpkin meetings I attended I met up with some members of the “American Chunker” team. After several other conversations I was welcomed to join them which I agreed. Here I am with the Team-Pumpkin sign next to the air cannon, which is very impressive in the picture but is even more impressive in action. This is a great group that welcomed me and I am glad to be part of their team.
|
|
|
|
Sunday, November 3
|
View Page
|
 |
World Championship Punkin Chunkin Event held in Bridgeville, DE
Here are some of the air cannons that were in a vicinity of ours (American Chunker). Quite the impressive line-up and while I have seen a lot of school buses this was a first to see them equipped with these special modifications;-)
|
|
|
|
Sunday, November 3
|
View Page
|
 |
World Championship Punkin Chunkin Event held in Bridgeville, DE
If the people in the ‘Chunkin Taxi’ look like the Mythbusters, then you do not need to get your eyes checked, as they were there recording portions of the show that will be televised on national TV via the Discovery and Science Channel. This scene was planned to be the show opener. It was neat to get a behind the scenes look at the creation of the show.
|
|
|
|
Sunday, November 3
|
View Page
|
 |
World Championship Punkin Chunkin Event held in Bridgeville, DE
Even though the Mythbusters were busy if you caught them at the right time they were more than willing to stand in for a quick picture. As you can see here I was able to catch Tory Belleci during a morning coffee break and was able to get a picture with none other than the traveling Team-Pumpkin sign!
|
|
|
|
Sunday, November 3
|
View Page
|
 |
World Championship Punkin Chunkin Event held in Bridgeville, DE
Here I am next to the main air cannon and also the scaled down (but still functional) mini-chunker. Both are quite the impressive machines.
|
|
|
|
Sunday, November 3
|
View Page
|
 |
World Championship Punkin Chunkin Event held in Bridgeville, DE
In the giant pumpkin world the main competition is weight, but in the Chunkin world it is distance. Here are the three shots taken by the Team over the course of three days. (You are only given one opportunity to shoot per day.) The first shot was the best of the three and it is actually the best every at this event setting a new record!
|
|
|
|
Sunday, November 3
|
View Page
|
 |
World Championship Punkin Chunkin Event held in Bridgeville, DE
After winning the air cannon category and also the overall championship the Team was presented with the official trophy. Here I am trying to replicate the official “pumpkin head” pose. This was a great event that I enjoyed very much.
|
|
|
|
Thursday, November 21
|
View Page
|
 |
Just another days “Fan Mail”…
Well, here is an actual picture of my mailbox stuffed with mail that I received in just one random day. (Note: I did not add anything to make it look overly dramatic.)
I think that it is amazing how many lives one person can make an impact on. I am just one grower and to see and read all of the notes and to get this volume of requests is certainly heartwarming. Trying to keep the bubbles going out as fast as they are coming in has been a losing battle, but I am trying to at least make progress.
|
|
|
|
Monday, December 2
|
View Page
|
 |
The past year turned out better than I could have imagined. In the same year I not only grew a new personal best and new Connecticut state record, but I also bred a pumpkin in the winter the proved itself out the same year it was weighed.
As a result I have been getting more than a couple seed request;-) Here is the mountain of bubbles that will be going out in round #1. The mail has not stopped on the incoming end but at least I am making progress on the outgoing. Thanks to everyone for their interest in my seeds and I have done the best I can to fill all the requests with the seeds I have available.
DeBacco’s 2013 Season Summary…
1766.5 DeBacco ’13 (F: 1676.5 Daletas x M: 1216.5 DeBacco)
709 DeBacco ’13 (F: 1216.5 DeBacco x 1676.5 Daletas)
220.3 DeBacco ’13 “Snowball” (F: 2009 Wallace x M: 1725 Harp [2009 Wallace] clone)
|
|
|
