| |
|
Click on a thumbnail picture below to see the full size version.
|
288 Entries.
|
|
Sunday, January 1
|
View Page
|
 |
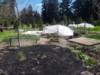
Let's grow a pumpkin...
|
|
�
|
|
Sunday, January 1
|
View Page
|
 |
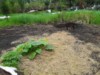
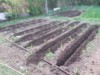
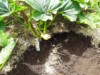
But first... potatoes.
They make digging the grass out more fun... Every bit of grass has potatoes under it.
The advantage of harvesting them in late summer is they will be less muddy, also better quality because later freezing temps will cause the starch to convert to sugar. But the advantage of leaving them in the ground is nearly effortless food security. As long as there isnt sufficient habitat for pests or disease they can just be grown perennially in the same spot. Its a lot less work than digging and replanting.
Ideally I would dig out all the perennial weeds or grasses in the fall and any accompanying potatoes but then do nothing other than add enough compost to get another crop in the same spot the next year.
|
|
�
|
|
Monday, January 2
|
View Page
|
 |
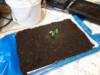
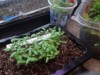
The home made soil from tree duff has the perfect texture for watering and was ok for germination but I can tell the nutrient availability is still off. Probably phosphorous, I'd guess. Round 2 might skip the miracle grow and just use some bone meal and boron.
|
|
�
|
|
Wednesday, January 4
|
View Page
|
 |
One lid of seeds = 1 jar of sprouts. I guess people use broccoli but in this case I am using kale, which is genetically so close it should be pretty much the same. Sprinkle some kale seeds around your garden and grow a few kale plants this year. Capture the seeds to make sprouts otherwise one plant can make this many sprouts appear in your garden...
|
|
�
|
|
Friday, January 6
|
View Page
|
 |
Real or fake, who can tell anymore!
|
|
�
|
|
Wednesday, January 11
|
View Page
|
 |
I have newish ideas to try every year plus I have to relearn all the stuff I've already learned, it seems.
Some great genetics and I feel bad I cant give them all a perfect chance at becoming something great. But depending how this experiment goes... and the next experiment... maybe something is possible.
First thing is I've gotta quit soaking seeds in water and switch to paper towels, as paper towels are much more forgiving as far as rot goes (if I get distracted for 24 hours or more, which I invariably do...).
I'll post more about this silly experiment in about 2 weeks!
|
|
�
|
|
Thursday, January 12
|
View Page
|
 |
YUP, all set!
|
|
�
|
|
Friday, January 13
|
View Page
|
|
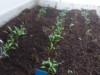
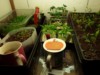
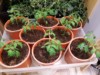
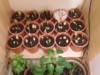
Previous photo/Experiment notes: test subjects starting front right around clockwise, 210 Hochstetler, 528.5 "S. Martin x self", 578 Kibbie, 535 Hockley. Center = 721 Hockley.
|
|
�
|
|
Tuesday, January 17
|
View Page
|
|
Pathogens need mobility because they destroy their host. Hence they have to be mobile, in order to find a new host. The good guys in the soil want a stable, long lasting symbiosis because they benefit from their host. Oversaturation is bad because it gives the bad guys (phytophthora) a way to be mobile, rather than inert. Also reduced oxygen slows down the plant root's respiration/growth which is its main defence. That's my two-prong understanding of why very wet soils are bad... Is there a third prong maybe?
|
|
�
|
|
Thursday, January 19
|
View Page
|
 |
1500 watt hps at 18". I already blanched some plants. Unfortunately the Hockley seeds did not germinate hence its down to a three way competition/experiment now. And yes, I will raise the light up a bit.
|
|
�
|
|
Monday, January 23
|
View Page
|
|
I have a good idea regarding getting a large plant out early. Something you've never seen before. Stay tuned...
|
|
�
|
|
Thursday, January 26
|
View Page
|
 |
Einie meanie minie moe, if it hollers let it grow! Test 2 will get underway soon.
|
|
�
|
|
Friday, January 27
|
View Page
|
 |
First the results of the 1st experiment. I grew these on a tray so the root depth is 2" at most. The amount of dirt is approximately that of a 2 gallon pot (nominal, may not really be 2 gallons).
To keep it short and sweet all I've really learned so far is that I need to be more careful with the fertilizer. The Hochstetler plants are more robust but their leaves got burned by an excess of fertilizer applied to the soil the Kibbie plants didnt get burned even though they are growing in the same tray.
|
|
�
|
|
Sunday, January 29
|
View Page
|
|
(No pic, sorry...) The roots were thickly matted but also nicely spread out on the bottom of the tray. I did plant them, not sure they will survive this next freeze, but had to try because I am ever too hopeful and never sufficiently discouraged...
|
|
�
|
|
Monday, January 30
|
View Page
|
 |
574.5 Mercer, 1676.5 Daletas 2012 and a mystery seed, a pepo I think, maybe a zucchini. The Daletas got a 12 hour head start soaking. These will be round 2.
Round 1 got obliterated by the current arctic air blast, oops.
|
|
�
|
|
Tuesday, January 31
|
View Page
|
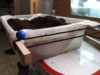 |
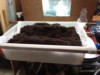
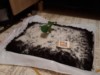
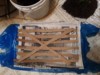
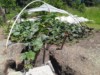
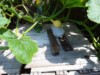
One idea.
The dirt is in a plastic bag/ wood stick medical stretcher. The idea here is that after its planted in a shallow depression I will be able to pull the plastic out, by pulling the bottom layer of plastic which will peel the upper layer out from under the pumpkin plant, and not move or harm the roots.
|
|
�
|
|
Tuesday, January 31
|
View Page
|
 |
Another pic. I dont have holes in the bottom because the roots would come out the holes. Instead, this setup relies on one's "not-overwatering" skills. But there's good air in the dirt and evaporation because the depth of the dirt is relatively shallow, so in case there is any overwatering, it will dry faster and damage the roots less. Lifting the tray should give a good sense of how much water is in the dirt. (I usually only get the top half inch wet when I water the plants, then let the soil absorb it down from there...)
|
|
�
|
|
Tuesday, January 31
|
View Page
|
|
With this setup it may or may not be helpful to have a second person to help with the planting.
Onto the next idea...
|
|
�
|
|
Tuesday, January 31
|
View Page
|
 |
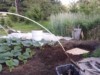
Next idea... Wood frame plus kitchen garbage sack...
Lifted the thin garbage sack with the toolbox on it which weighs 25-30 lbs, and it held. So hopefully it wont fail when I make the frame a bit deeper and add about 5 gallons of dirt. This might give me a really big plant that can easily be moved into the garden. Having all the roots spreading out wide & shallow will (in theory) solve the problem of the low soil temps and less oxygen deeper down in the ground. The plant will have all spring & summer to send roots deeper and my soil isnt deep anyhow so really laterally will be a better direction for the roots to grow anyhow.
So since it will take 4 weeks to get the size plants I want... I figure it will be a month before the next round of plants is ready to go outside.
Some years we've had snow all month in March, other years our last frost was in February... I dont have an accurate 1 month forcast, so rolling the dice here!!!
|
|
�
|
|
Saturday, February 4
|
View Page
|
 |
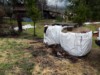
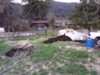
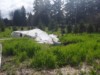
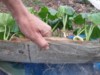
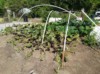
I threw some fertilizer on the ground, now I am pulling the rotten bale over atop the little zone of fertilizer/amendments.
No till/ no dig... just going to percolate water through the rotten bale. I think a soggy hay bale is actually not that friendly to healthy roots, but hopefully there can be a zone of nutrients/healthy roots under the bale...
Target grow area has a little bit of rye. About 1000 ft available, I'd be happy just to get the plant to take up 600-700 ft though. Less is more this year...?
|
|
�
|
|
Saturday, February 4
|
View Page
|
 |
We are gonna try give Dale Marshall an early person to draft off of for a month. By we I mean me and little Monsterette. The Daletas is slow, barely germ @ 10 years old but I think its alive. It will have to in the next tray it would get its butt kicked by these two. Pretty excited to try Suburban's seed, all the way if all goes well.
Ps previous pic, blue line was supposed to show the cable ratchet I was using to tip the round bales over. It worked quite well.
|
|
�
|
|
Sunday, February 5
|
View Page
|
 |
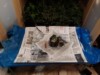
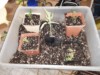
80+ lbs of blood/bone compost. Check.
40 lbs of high potassium fertilizer with micronutrients. Check.
Its easy for certain spoiled city folk to "not believe in using chemicals like miracle grow" but here's the alternative. Yuck! (If you are eating, don't look too closely at this pic.)
|
|
�
|
|
Sunday, February 5
|
View Page
|
|
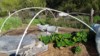
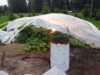
Just one truckload of dirt, and one rickety pvc hoophouse, and one boiling barrel of water away from a 'go for launch.' First week of March maybe?
Ps 7.95 Young tomato came up, only planted 1 so 1/1 germination. (They all look like good seeds.) So I will have an ultra early tomato bush too if things go well.
|
|
�
|
|
Monday, February 6
|
View Page
|
|
Planted an autographed 'DY' 1622 Young 2011. Now thats something you cant do with a baseball card. Maybe that seed was worth a fortune, idk. Too late now, its already gotten soaked for a bit & now its proceeding into the Clayton 2023 lineup... 14 years old so its probably now or never.
|
|
�
|
|
Monday, February 6
|
View Page
|
 |
Since typos are getting the best of me, I'll go with a pic.
|
|
�
|
|
Monday, February 6
|
View Page
|
 |
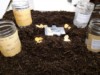
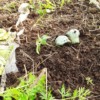
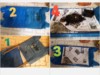
I thought this was a really good look at the affect of seed age on germination!
Left to right, a fresh seed (1 or 2 years), a 4 year old seed, and an 11 year old seed.
These were planted at the same time, (the 11 year old seed was actually presoaked ahead of the other two)... but even so its lagging way behind... this is why old seeds can be started a full week ahead of new seeds for approximately equal planting date! They can be very slow out of the gate.
|
|
�
|
|
Wednesday, February 8
|
View Page
|
 |
1622 Young 2009 gets the old seed "tissue culture style" germination. If its alive it should begin to green up in 2-3 days. If its totally dead it will remain white. I will spray it with H202 and re-rinse as needed. When they are this weak, even the beneficial organisms aren't really beneficial. The way beneficial organisms work is the plant basically pays them to be beneficial (with extra energy/sucrose). And these old seeds simply do not have any extra energy to pay the "good guys". Without that root exudate "payment" they cant do their job so it ends up making more sense to just keep things sterile.
|
|
�
|
|
Wednesday, February 8
|
View Page
|
|
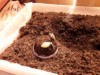
Some further explanation if you want to understand the setup in the previous picture:
The white seed embryo in the pic was taken out of a presoaked seed. The seed was planted in starting mix for a couple days, but no root showed in 48-72 hours, so --in my experience-- that likely means the seed does not have much vigor and its at risk of rotting.
... Thus, since its been moist long enough, its now possible strip the seed coat and embryo sack relatively easily without damaging the embryo (the root tip is the critical part, you can accidently break bits of cotyledon edge off and thats not a huge deal but if you break the root tip off then its all over! So starting at the edge break the seed coat off bit by bit then work your way down until you remove enough of the seed coat to be able to gently free the root tip.)
The soda lid may provide some extra heat and humidity, but its not really necessary, just some occasional misting might be helpful, (or even better) because mold actually needs humidity more than the seed embryo does.
If you have further questions please post in the seed starting forum, or email me!
|
|
�
|
|
Thursday, February 9
|
View Page
|
|
Good weather. First pollen today (on bees legs). Not having much luck with anything other than the weather.
|
|
�
|
|
Friday, February 10
|
View Page
|
|
Planted 6.xx young tomatoes x 4 and 7.95's x 4. Its probably way too early but oh well. Planted 1486 Gadberry. Also too early I'm sure, but I guess I enjoy the challenge/ pushing the boundaries. The 1622 Young 09 appears to be dead... too old. I guess it should have been left in its packet for its "baseball card seed" novelty.
|
|
�
|
|
Tuesday, February 14
|
View Page
|
 |
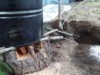
Setting up a "rocket stove" to heat a barrel of water.
|
|
�
|
|
Tuesday, February 14
|
View Page
|
 |
I had infrared foil and sunlight helping. The rocket stove was very efficient it didnt burn much quantity of wood but the wood being a bit wet kept the fire temp a bit low. It heated the water to about 110 degrees, which I then dumped onto the floor of the greenhouse hut.
All of this has no purpose other than trying an alternative heating method (besides electricity). Granted electricity is cheap so it saved very little money maybe $5.
Last year the heating effect lasted about 10 days. Temps in the 20's tonight so wondering how much this heating method can boost that. Just experimenting. It didnt consume much wood, hence the rocket stove setup has proved itself superior to a standard camp fire in that regard.
|
|
�
|
|
Wednesday, February 15
|
View Page
|
|
The heating didnt do as much as I had hoped. It raised the temp 10 degrees or so which is about the same as last year. I think if I had used boiling water I think it would have raised the temp 15-20 degrees, but this requires a foolproof plan to not get scalded and it would also require bone dry wood to fuel the rocket stove.
|
|
�
|
|
Saturday, February 18
|
View Page
|
|
Hopefully just one more cold blast before the winter is done here. 8/8 good germination of the Young tomatoes, which I am excited to try. All 8 could go in a one long hoophouse just for them. I need to remember that lots of healthy roots will be what makes or breaks possibly getting a big tomato. After that, it will probably mostly be luck, since I'm still a bit short on brains, lol...
|
|
�
|
|
Monday, February 20
|
View Page
|
 |
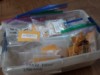
Trying to make apple cider vinegar from the apple pulp from my cider making. Meanwhile, I think I made some pretty good hard apple cider. I dont think the constantly increasing alcohol smell has been good for me though. A 5 gallon bucket of fermented pulp made these halfway finished jars... and a big mess too. The "Roma sauce maker" hand auger press that I used to squeeze the pulp worked like a champ.
|
|
�
|
|
Tuesday, February 21
|
View Page
|
|
Every year I vow "to not do any more gardening" until I build a garden shed, and it never happens... I start a bunch of seeds and the cycle starts all over again, again with no good place to store my tools or fertilizers.
I guess having zero knack for carpentry is whats really holding me back. Maybe I need to watch some of those youtube videos where people make things look easy. Or I could draw inspiration from watching a real dummy-- then I could say to myself, "Gee, I could do better than THAT."
|
|
�
|
|
Thursday, February 23
|
View Page
|
 |
Winter tomato liked the sodium bulb a lot, it went crazy. Pumpkins on the other hand have been unhappy with the homemade potting mix. So... round 3 coming up, one last attempt to salvage this debacle. (There wont be a Round 4/ Round 4 will be the purchase of a bag of potting mix.)
|
|
�
|
|
Thursday, February 23
|
View Page
|
 |
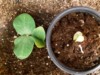
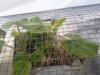
1486 Gadberry is the next contestant.
Shallow tray, only a few inches deep of the home made potting mix, but the roots might spread outward more, which will be an important factor in getting a successful, shock free ultra early start. (My theory.)
The white stuff is just some coarse dolomite. Its basically sand, so coarse it wont change the ph too drastically. Using it to brighten the grow space, since I'm paying for the lights I want to reflect light off the dirt if possible. Save $, or get a slightly more robust plant, maybe? Maybe.
|
|
�
|
|
Friday, February 24
|
View Page
|
|
Suburban gardner-- I will try to keep little Monsterette going as well. No luck with the weather forcast so far though. Going below 20 Fahrenheit tonight Its probably warmer up in Alaska. My redneck foolery cant overcome this level of cold.
|
|
�
|
|
Sunday, February 26
|
View Page
|
 |
The thing about these tray-type setups is that if the dirt gets pushed around at all, big cracks will form and presumably this isnt great for the roots. Here, I thought the dirt was resting (hanging, really) only on the plastic but it was also resting on the bottom of the tray. I know the way Im saying this isnt going to make much sense. Long & short of it is that I want a healthy mat of roots and I dont want the soil to be cracking like this, just because it can!
|
|
�
|
|
Sunday, February 26
|
View Page
|
 |
I spread the coarse dolomite directly onto these pepper seeds, about 1/4 inch so that there would be enough weight on the seeds that they could pull the seed coats off. Thought the high ph might kill them but it worked great. Proves the coarse dolomite isnt too chemically harsh. They look like they are doing well in their miniature "white sands national monument" lol. Peppers are touchy seedlings-- its easy to mess them up especially with overwatering.
|
|
�
|
|
Wednesday, March 1
|
View Page
|
|
The latest redneck attempt-- I heated a barrel of water a bit hotter probably 150. Sure enough when I dumped it some splashed on my boot so it was good that I was wearing boots and that it wasnt boiling.
The soil temp was 40 last I checked. So, maybe it should be 50 now? I also made room for a barrel of organics, to add a natural heat source. So this little hoophouse will be my version of a walipini greenhouse, its dug almost 3' down in the middle. Put some LEDs on my wish list.
|
|
�
|
|
Tuesday, March 7
|
View Page
|
 |
I made a "rocket stove" out of a large round of wood. It worked very well.
But transplanting the pumpkins on the plastic did not go well. The plastic stuck to everything way more than I would have guessed so I couldnt pull it out from under the plants. Then I accidentally broke the largest leaf on Monsterette so Monsterette is rather hopeless now, as with all my punpkin efforts thus far.
I did plant my kid's giant cucumbers though and that went well. I'm not really hoping for a giant cucumber I'm actually just hoping for some edible cucumbers to go with the winter grow cherry tomatoes.
I might regain my sanity and just wait until April or May. The forcast still isnt that good, not even for growing things in a hoophouse.
|
|
�
|
|
Tuesday, March 7
|
View Page
|
|
I couldnt figure out what the heck was wrong with that homemade soil mix, but when I was attempting to transplant the pumpkins today I figured out that they were waterlogged lower down, despite drying out on top. So all of my guesswork about missing nutrients was the wrong concern. It was all because their little feet were way too wet (in my experience this always ruins the uptake of minerals regardless of the prevalence of those minerals).
|
|
�
|
|
Friday, March 10
|
View Page
|
 |
Started 3 x 1133 Yohe Squashkins
1 x 1702 Sherwood
Thanks for the seed exchange seeds everyone!
I got to rethinking the flat tray thing after pumpkinpal sent me an email. I can resolve some of the problems.
Winter is really dragging its feet this year, I think number one on my bucket list: one of these years... is to literally hibernate.
|
|
�
|
|
Sunday, March 12
|
View Page
|
 |
Potted the Young tomatoes up. In front
6.48 x 4 and 7.95 x 4. I'd be quite happy even if this was the only thing I was able to grow this year.
The tomato plant in the back is the 'Koralik' variety this plant was volunteer that sprouted out of my homemade back around Christmas. I had no clue it would go this crazy...
The semi determinate habit is neat it seems like it would be perfect for a porch or patio. It self prunes in a way that just creates oodles of little tomatoes. And they taste good.
The best part is, these 'Koralik' seeds (hopefully!) made it out to most of the seed exchange participants. The original strain was from Territorial Seed Co. but the ones that went into the seed exchange might have been selected from a plant that produced slightly larger tomatoes.
|
|
�
|
|
Sunday, March 12
|
View Page
|
|
*homemade potting mix
(No superb results so far. I hope the Young tomatoes tolerate it well enough.)
Peppers and celery, next.
|
|
�
|
|
Thursday, March 16
|
View Page
|
 |
1487 Gadberry x 1
First nice weather we've had, wish I had a bigger plant to set out. This one took forever tp germinate but its got healthy roots. EZ part done, now just need 21 ft of vine and a female flower!
|
|
�
|
|
Thursday, March 16
|
View Page
|
 |
Weird wint started his tomatoes at about the same time, and used some the same seeds. If you check his latest entry you can see his plants look different. I thought this was interesting. Im not sure whose plants will grow a bigger tomato, all I can say is I took a big risk on my homemade seed mix after poor results the first two times. I spent about an hour trying to figure out what was wrong and finally came to the conclusion that there was excess chloride interfering with sulfer uptake. Anyhow I flushed the soil with dilute magnesium sulfate water. It seems to have worked and they are now recovering and growing. Anyhow, thats some of the difference in how our plants look.
|
|
�
|
|
Saturday, March 18
|
View Page
|
 |
Hut, hut, Grow!
300 sq ft
|
|
�
|
|
Saturday, March 18
|
View Page
|
 |
I used bamboo rather than pvc. Worked GREAT.
Bamboo grow huts this year... environmentally friendly and frankly better than pvc.
This hut is just for stir fry type veggies, 1702 Sherwood planted yesterday in a different hut though. With it I am trying an "almost direct seeding" method where the roots wont be constrained. Adding superphosphate, cal nitrate, blood meal, maybe ammonium sulfate, epsom salt, coarse dolomite lime, and standard mircacle grow. My flash-in-the pan nutrient wake up recipe. I might add bone meal atop the ground too and let the worms deal with it. Fish fertilizer would be really good for early season nutrients but I dont have any.
|
|
�
|
|
Saturday, March 18
|
View Page
|
 |
The variety of bamboo I have to work with is called incense bamboo. If you're up for trying growing bamboo, I recommend this variety. Ive had it for a number of years, its over 20 feet tall but the canes are still getting bigger every year. If you're slightly clever, its like free pvc!
|
|
�
|
|
Saturday, March 18
|
View Page
|
 |
My Stihl electric chainsaw works good on it. A miter-box type hand saw should work...? Something with fine teeth.
Spring is finally here!
Have a great year...
|
|
�
|
|
Saturday, March 18
|
View Page
|
 |
Advancing Eco Ag Nutrient Diagram... their website is what helped me diagnose the chloride problem. Lots of other stuff to try to understand.
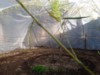
Part of the experiment with the 1702 Sherwood is to add no heat at all. Today was sunny, so off to a good start. Two layers of clear plastic on the ground around the plant, one layer over the plant (for a grow hut) plus an extra layer at night. With just one sunny day measured the soil at 80 degrees 2" down and 56 degrees 5" down. So perhaps the root zone currently just 3" down was right on target at 70 or so.
I wish I had a large plant to set out, but maybe it is for the best, because a large plant could outgrow my gimpy grow tents a bit too fast.
|
|
�
|
|
Sunday, March 19
|
View Page
|
|
I burned the grass off some new plots. Unfortunately, the rhizomes are still there. Its really great to get rid of the slugs and bugs and disease though. I wonder if there is a cover crop that could be burned off, but not have the pernicious rhizomes? It takes a somewhat thick layer of thatch to get an effective burn and I'm not sure the best way to recreate that.
|
|
�
|
|
Tuesday, March 21
|
View Page
|
 |
Uh oh, nearly potbound. 1133 Yohe Squashkin needs a new home.
|
|
�
|
|
Tuesday, March 21
|
View Page
|
 |
Tray method, 3rd try...
I decided on seven layers of newspaper because its already soaked from the potting mix and it needs to have some integrity to survive pulling the plastic out from under it later. Damp newspaper is of course very weak. I could have used a number of other things to give a biodegradeable platform for the dirt to sit on such as very thin strips of wood lathe or cardboard but hopefully this will be enough strength (I may let the soil dry a bit prior to planting through.)
|
|
�
|
|
Tuesday, March 21
|
View Page
|
|
The plastic bags were cut on the bottom corners on the inside where they are crimped. This is important to create a space for the holder sticks, which will lift everything off the tray, and later at planting another cut will be made up the edge of the bag, at which point the bag will just be a doubled layer of plastic and pulling the bottom layer will theoretically free the plant from anything non-permeable/ non-biodegradable.
|
|
�
|
|
Tuesday, March 21
|
View Page
|
 |
Two yellow/golden chain trees from the seed exchange sprouted which is cool, although I think I planted around 10 seeds. They are showing a severe iron or zinc chlorosis whereas the tomato looks to be ok.
Its interesting that some plants will give indications of soil deficiencies which are more easily observeable than others. Any signs of a deficiency in the tomato plant is much more subtle.
The onions are from seed I saved. I've got a large amount but I wasn't sure if the seed was any good so I didnt include it in the seed exchange. Good germination, well then... if it grows some nice onions I can send it in next year.
|
|
�
|
|
Tuesday, March 21
|
View Page
|
|
My new favorite tool is a two prong broad fork. Its doing great at harvesting potatoes and its quite effective against my wire grass and bindweed/morning glory nemesii and it tills the soil almost effortlessly, with the least damage to the soil tilth and worms... I wasnt too keen on it when I first contructed it (destructed, really... took two center prongs off of a four prong tool) but now its like, how could I live without it! Might post a pic of it tomorrow.
|
|
�
|
|
Tuesday, March 21
|
View Page
|
 |
Winter is over, my winter tomato grow yielding some ripe cherry tomatoes. Might be sick of cherry tomatoes soon. I didnt know what variety it was when it sprouted. Obviously not how to grow a big one.
|
|
�
|
|
Wednesday, March 22
|
View Page
|
 |
Possibly should have divided the plastic into four pieces for the 'tray method.' Adding some cardboard should help instead. Just redoing it to give more depth. I don't see how this could fail. Famous last words:)
|
|
�
|
|
Wednesday, March 22
|
View Page
|
 |
The tray holds about 2 gallons of dirt. Using my best garden dirt rather than potting mix, I deep froze it to give a bug free start. The cots are weird at the moment, so soaking 1643 Kisamore's as backups.
So the current lineup is:
1133 Yohe x 2
1487 Gadberry x 1
1702 Sherwood x 1
1643 Kisamore x 2
Whichever plants seem the most promising by the end of April will get the most care, and I will try for a decent result from one or two of them.
|
|
�
|
|
Friday, March 24
|
View Page
|
|
Some observations here, first is that everything is struggling with nitrogen despite my attempts to care about that early season issue, I'm probably just not adding enough. Low oxygen, low temps, less-than- sunny-days, nothing favors root growth. But if the nitrogen is very close to the existing roots the plants can maybe pick it up and thrive, some are doing ok, maybe in the spots where some blood meal was very close to the roots? So a bit of improvement is needed either targeting the small roots directly or via foliar spray. The nutrients need to be very close, basically in contact with the roots. Kind of a 'duh' thing I guess.
Second is the soil temps were as good or better under the double layer of plastic laid on the ground for simple solar heat collection than in the area where I dumped 55 gallons of hot water?? So it seems the single or double plastic (or a lasagna of plastic scraps) achieves what I want, which is an acceptable soil temp. for the top 6" for less work. Interesting.
Last of all the rotted round hay bales started to further "spontaneously combust" they used to be cold but now one is at 70+ the other is at 90 degrees. This is providing as much heat as running a small heater. They have a lot of mass plus they generate a bit of their own heat plus they are wrapped in white plastic so they reflect light well. They generate CO2 (...maybe too much, if I close the tent, between them and the soil they might be stealing all the oxygen).
Anyhow, I think all this new info I am getting could help me be successful. Its exciting.
|
|
�
|
|
Friday, March 24
|
View Page
|
 |
Using the envelope the SNGPG newsletter came in to sketch out a possible 150 sq ft solution. I have plenty of indestructible 5 ft cedar to make square garden beds.
|
|
�
|
|
Friday, March 24
|
View Page
|
|
I've figured out that
Four 3,4,5 right triangles = 24 sq ft.
Add in five 5x5 squares = 125 sq ft.
Equals 149 sq ft total. With these basic shapes there should be endless good and bad configurations.
I'll do most of the work, but maybe I will let the younger kids pick the seed, plant the seed, and/or design the patch. Three kids x three tasks, so no fighting right??? This should be fun for them and it may be interesting for me.
|
|
�
|
|
Saturday, March 25
|
View Page
|
|
Again, seeing how effective the clear plastic is at keeping the ground warm. Ground temp measured 65 this evening 5-6" down, even with one end of the hut open. No heating cables, in the midst of a horrible spring cold front! The plastic on the ground IS the way to go. My other double plastic tent gets quite hot during the day, but the ground temp there is 10 degrees cooler. I'm sure if I put plastc on the ground there, the temps would go up there as well.
The tomatoes will need to be transplanted out soon. This could make a huge difference, it will help avoid a total disaster anyhow.
|
|
�
|
|
Tuesday, March 28
|
View Page
|
 |
150 ft idea. This design has a perimeter equal to Steve's 6x25 setup.
I'm not having any luck with the AGs this year.
I haven't got any plants I feel good about yet.
I guess I'll just keep trying. I would like to pick a pumpkin in mid August for the southwest WA fair but if I get it one on track for a personal best it will be tempting to leave it on longer. Its been a frigid spring so far. Dandelion #2 was in full bloom today but all the fruit trees, daffodils, etc. are budded up tight still.
|
|
�
|
|
Thursday, March 30
|
View Page
|
 |
Main patch today. I started a whole bunch of seeds, only looking for two good plants, can sell any extras on the side of the road, but at the rate I am going its going it may take 40 or so seeds to get two good plants. Considering I have about 4,000 AG seeds of my own and 400 packs from other growers, even at this rate I still have a lifetime's worth.
Giant celery from GiantVegSeeds.com came up/germinating well. Thank you Mr. Fortey. A bit of a late start on these but oh well...
|
|
�
|
|
Friday, March 31
|
View Page
|
 |
Two 150 ft configurations. Perimeter (P) should be 61 for the one on the left, not 63. Steve's winning pumpkin had a patch perimeter of 62 ft. I dont want to fudge with the perimeter in ways that would be unsportsmanlike. Even though my chances of winning are around 10,000:1 against I'm nevertheless still interested "in what would be fair." Even a regular patch 1375 would still be quite an acheivement for me.
Anyhow, those are the two designs I came up with. Both designs based on 5 ft squares, half squares, and 3,4,5 triangles.
|
|
�
|
|
Friday, March 31
|
View Page
|
 |
Or here, back to the Easter themed 150 sq ft pumpkin patch. This would have a perimeter of 70 (14 x 5' sides).
Fair competition wise, it looks fair enough to me, although having more perimeter does give places to hang some extra leaves out past where the vines must end.
|
|
�
|
|
Saturday, April 1
|
View Page
|
 |
Finally growing, tucked in the jungle here is the 1133 Yohe squashkin which will compete directly with some of my 541 seeds.
The plants like the hps bulb, its a lot like growing in Florida sunshine, although it costs 3x more to run than a strong LED would. HPS is costing me $1 a day not too bad, using it since Christmas = $100. (An expensive cherry tomato plant, they are ripe now and they are quite delicious, the quality is same as the best outdoor tomatoes, no joke!!!)
An LED would pay for itself in a few years. On the other hand, every LED I've ever had has broken within a few years.
The T-5s win for best all around setup. They score points for being pleasantly trouble-free, very little can go wrong.
|
|
�
|
|
Saturday, April 1
|
View Page
|
|
Snowing. Nature's way of saying that starting things here prior to April 1st is foolish.
|
|
�
|
|
Monday, April 3
|
View Page
|
|
Tomatoes have gotten fully acclimatized to very cold outdoor temps not sure thats a good thing though. I can see the first flower buds, but I'm worried I wont be able to get any of them to grow properly because the plants have switched to survival mode. Frigid & snowy weather for the past few days, with more to come. I think at this point only some some fish fertilizer could snap them back to life, but I dont have any on hand. Such a cold spring.
|
|
�
|
|
Monday, April 3
|
View Page
|
 |
Well the tomatoes needed to get planted so they went into this tent. The other area where they were going to go can be used for something else.
The home made potting mix was again surprisingly soggy, I could try airpots or something. The problem is that it isnt wicking the water up very well. When the surface gets dry but it doesnt wick the water up from the bottom of the pot.
I made the some bee tea since I dont have any fish fertilizer. The bee tea is good amino acid type stuff, but it might not have enough calcium.
Horrible weather. Just doing the best I can.
|
|
�
|
|
Tuesday, April 4
|
View Page
|
|
Such a terrible spring its like we are having a second winter... Its forcing me to rethink everything.
|
|
�
|
|
Tuesday, April 4
|
View Page
|
 |
Good weather for growing... moss?
|
|
�
|
|
Wednesday, April 5
|
View Page
|
 |
Pumpkin off the plastic tray now, and into the grow tent... will this new method work?
|
|
�
|
|
Wednesday, April 5
|
View Page
|
 |
The plastic bag was stuck solid to the newspaper but eventually I successfully pulled it free. My conclusion here was that a thin layer of sand/grit could possibly reduce the stickiness between the newspaper and the plastic.
|
|
�
|
|
Wednesday, April 5
|
View Page
|
 |
2nd piece was easier. So I think I did the impossible, and got this method to work. It really went well. Better than the gallon pots I've used in the past.
I surrounded the tray with the compost so the roots can continue to spread laterally which is what I want this time of year.
I put blood meal and rock phosphorous under the plant and gave it a little "beehive tea." I'm very curious to see if this setup results in a good plant.
BTW the best plant in these pictures is the 1133 Yohe squashkin, but there is also a 1643 Kisamore and a couple of my 541's. These would all be fun to grow, but it will slowly get thinned to a one-plant PB attempt, the other plants might get used for tissue tests and/or as pollen.
A big problem with an ultra early start is there wont be a lot of males around.
I have a pot of my 424's for my 150 sq ft entry, but after that no backup plants, so I guess I need to start even more seeds.
|
|
�
|
|
Thursday, April 6
|
View Page
|
 |
Trying a new tray, this time with some sand/grit between the plastic and the newspaper.
Other gardening news, the wyoming rhubarb from the exotic seed exchange is sprouting...
Which is cool, rhubarb doesnt always have the best germination but there's 13 of em up so far.
|
|
�
|
|
Thursday, April 6
|
View Page
|
 |
It took 4 of the orange pots to fill this tray, which are nominal 1 gallon size but I think they only hold a half gallon, so about 2 gallons of dirt. Next year I could try a bigger tray but I'm not sure how much that would really help grow a bigger pumpkin, since a really large plant really early would quickly be subject to half a dozen or so other limiting factors.
|
|
�
|
|
Thursday, April 6
|
View Page
|
|
The newspaper wicks excess water out from under the plant which is useful especially because the main problem with my potting mix was not wicking any water up. Its too bad my supply of newspaper (kids wont even know what it is) is coming to an end...
I think brown paper bags would be the next best thing.
Caught up on reading everyone's diaries, now I gotta find a few hours to tackle Jadam/Korean farming.
|
|
�
|
|
Thursday, April 6
|
View Page
|
|
Posting too much. But still there's a lot I don't post, lol.
I started my 378 squashkins for backups. Both plants had good traits, it would sure be crazy to end up growing two squashkins but I havent saved any other seed in the past three years (if I have I cant find it) so for vigor and maybe an orange pumpkin (I read that green x orange should = orange) its a logical choice. Smaller parentage so maybe not weigh-off winner but maybe its got some potential for nice porch pumpkins.
|
|
�
|
|
Sunday, April 9
|
View Page
|
 |
Soil temp 60 outside temp 50. Nicer weather next weekend. No hurry, but probably run the space heater a bit to keep things from stalling completely.
|
|
�
|
|
Sunday, April 9
|
View Page
|
 |
4" so far. About 15 ft to go lol.
Having the grow light over to the side in the direction I want the plants to go is helping, even the smallest one which is the McMillan is tipping in the correct direction. So I should have three going in the correct direction.
I will probably not cull any right away despite being cramped. There is a benefit to having more than one plant which is it effectively divides the number of insect pests by the number of plants and they do better as a group kinda like wildebeests huddled together on the Serengeti do better than a single one out on its own.
But most growers have other ways to get rid of any bug pest pressure, and for them there wont be a benefit to grouping plants together other than to compare the growth rates.
|
|
�
|
|
Monday, April 10
|
View Page
|
|
I've started some La Rue marrows and the 2356 Booth. Not sure what the plan is yet for the Booth, maybe a pollinator, idk.
I want to do the master gardener thing. Not at all in an I-want-to-win way but just as a challenge to see if I can do it. In order to enter the minimum five categories, I will attempt a pumpkin, field kin, marrow, watermelon, and tomato.
|
|
�
|
|
Monday, April 10
|
View Page
|
 |
This is a different sort of paper towel method: I dried these tomato seeds on a paper towel but then as they dried they got stuck to it so then I just figured, "what the heck" and I planted the whole piece of paper towel, with the seeds from an entire tomato on it. If I can separate them, a month from now I will be selling or giving away some nice tomato starts!
|
|
�
|
|
Tuesday, April 11
|
View Page
|
|
No 60+ degree weather in the 10 day forcast... uggh. Pacific Northwest gardening calendar 2023: January, February, Marchuary, Apriluary... & Mayuary next I suppose. The daffodils did finally bloom though. Nary another bud has popped.
|
|
�
|
|
Tuesday, April 11
|
View Page
|
 |
Soil fertility experiment/ extra plants to sell.
|
|
�
|
|
Tuesday, April 11
|
View Page
|
|
Trying the best I can but after 2 days of no sun the plants have stalled, it has literally been raining 48 hours straight with no breaks. Its driving me nuts. I took the heater away from the plants because I figured I didnt need "fast" growth but that was a mistake because now I've got no growth. Moved the grow light closer; its been dark out even during the day.
|
|
�
|
|
Thursday, April 13
|
View Page
|
|
I put a thermometer in the grow hut overnight and it showed the plants have been colder at night than I thought, even though the soil temp reads 60 and the daytime temps are 60-80, the temp last night hit a low of 39 inside the hut... this is a good explanation for why they seem hesitant to grow at full speed. I guess I was being na�ve and over optimistic. If thats the only problem, then that will be an easy fix!
In other pumpkin news, I used a new method to do a seed germination test of an old Mombert x Halbert seed I grew quite awhile ago. I used a rinse & repeat method very similar to the method making alfalfa or broccoli sprouts, where I soaked ALL of the seeds (200 or so) in a quart jar for half a day, and after that I i drained the water, and after that I rinsed them with water twice a day. The germination was poor, only about ten seeds sprouted, but nevertheless it seemed like a good method, and if growers had chlorinated water, I think it would work even better. I could see this being a useful technique for selecting the last good seeds from hundreds of old seeds where most are dead. With this method, its easy to spot the roots and pick out the ones that are still good. It doesn't require a large amount of paper towels or potting mix to narrow it down to the best ones. Just water and a mesh screen
But it only makes sense to do this for very poor germinating seeds where whole lot is otherwise slated to be compost/trash, and the opportunity to plant them is now or never... Because once they are soaked there is no turning back.
|
|
�
|
|
Thursday, April 13
|
View Page
|
|
Just water and a mesh screen, and some hydrogen peroxide maybe.
A shorter soak time might reduce rot a bit, but either way as long as the water is clean and fresh and the seeds are rinsed regularly then its not a bad method. Rinsing them 3-4 times a day might be better but twice a day seems to be ok. No pics yet, sorry.
|
|
�
|
|
Friday, April 14
|
View Page
|
 |
I have one tomato plant which is crazy strong, but of course I forget what various things I gave that plant. For all the posting I do its far from adequate in terms of record keeping. I still dont have a simple logbook of what I've done each day. Nor do I have a plan for how to spend my time and resoucres wisely, except I am getting a truckload of free compost from my neighbor every saturday.
My scattershot approach has hit the mark a few times this year. I have one tomato plant that looks like it is on steroids. I did something right, not sure exactly what. Now I can try to get them all to look that way.
|
|
�
|
|
Friday, April 14
|
View Page
|
|
Season is over. Elaine has decided to allow contempt of court charges to proceed against me, will be spending 90 days in jail during the height of summer... my guess is that will affect my ability to garden.
Anna, on the other hand, declined to persue any contempt of court charges against me.
You can guess which ex I like better right now! Thanks a lot Elaine.
|
|
�
|
|
Friday, April 14
|
View Page
|
|
I learned a lot this year already though, so its all good. Someday I'll be back at it...
Grow big y'all.
|
|
�
|
|
Monday, April 24
|
View Page
|
 |
Hang in there, grower friends. And to my non-grower frienemies, God's blessings be upon you.
|
|
�
|
|
Tuesday, April 25
|
View Page
|
|
"Scribbling and bibbling, bibbling and scribbling." -Amadeus
Gonna be so hot later this week maybe I can direct seed some field kins. Maybe even solarize a spot for a watermelon.
|
|
�
|
|
Tuesday, April 25
|
View Page
|
 |
It's a beautiful day in the neighborhood.
|
|
�
|
|
Tuesday, April 25
|
View Page
|
 |
...Won't you be my pumpkin.
I haven't babied this plant too much, just trying to avoid any epic fails. The 1" hardware cloth is useful in that regard, its quite sturdy really.
Dealing with the usual cold weather bs nutrient-wise, I believe critically low in manganese & zinc mostly. Pretty sure the nitrogen is there, it just cant process it & make chloroplasts without the manganese.
I did overestimate how warm the plant was at night plus and while the roots probably arent too cold the compost/soil/soil biology I'm using is maybe only halfway awake from its winter slumber... adding heat is like a person setting an alarm for 5 am, the micro organisms keep hitting the snooze button, you just cant fool them into working 12 hour days, not without giving them a triple-overtime pay raise anyhow.
|
|
�
|
|
Tuesday, April 25
|
View Page
|
 |
Straight from grow huts to sun shields, which is just a matter of fastening the plastic higher up and leaving at least one side open.
Foreground: I am not sure if the biochar thing is helping other than darker soil warms up faster. It has a high CEC so I can be wishful and think it will maintain higher levels of soil fertility rather than to have all the nutrients getting washed away. I actually applied a nutrient drench directly onto the "straw charcoal". Maybe this will cause amazing results. Who knows.
|
|
�
|
|
Wednesday, April 26
|
View Page
|
 |
150 sq ft plant has a ways to go. The "tray method" needs further revision, these plants are effectively potbound because the roots are choosing to not penetrate the damp newspaper despite it being soft. Also I think the newspaper (plus my homemade potting mix) holds moisture too well. Other than that, there's lots of roots extending outwards which was the goal. Hence it's not a total fail, but it does needs some improvement. As it currently is, it's creating as many problems as it solves.
|
|
�
|
|
Saturday, April 29
|
View Page
|
 |
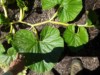
Garlic (foreground) looks identical to rye (background).
2nd day of solarizing Ive got about 300 feet under clear plastic which will be lightly toasted by this evening... helps with weeds and bugs. The remaining 400 ft can get solarized later in June if the plant needs more space. If everything goes well the final 1133 Yohe plant (or 541 Clayton) can be 650-750 sq ft. Unfortunately the McMillan isnt looking like a viable choice.
|
|
�
|
|
Thursday, May 4
|
View Page
|
 |
Slow and steady.
Secondaries are coming along well, the sunny weather helped. Back to cool rain now.
Should be on track for a mid or late June pollination I think.
|
|
�
|
|
Thursday, May 4
|
View Page
|
|
...and speaking of that upcoming pollination, I need to remember to not cull anything that might provide some male blossons at the right time.
|
|
�
|
|
Thursday, May 4
|
View Page
|
 |
Battling some nutrient & cool weather issues. The compost I am using is poor quality, its got some severe issues which I am trying to fix.
|
|
�
|
|
Thursday, May 4
|
View Page
|
 |
Its time for some more gardening thoughts so here it goes: I think morning glory is harboring potato virus Y (or whatever else) not to mention the potatoes themselves. The virus got into my best tomato plant, which is annoying. Enough of the interplanting/companion planting! It is good to some extent but I do need to switch how I do things so that I am planting only the healthiest spuds, etc. into the cleanest dirt possible. So basically I need to do a better job of crop rotation and composting. So that weeds and diseases arent getting moved around.
Ps ^ new hoop and new light, looks like the sun just came out and this week's forcast changed!!! Hopefully this adds 100 lbs to my next pb.
|
|
�
|
|
Wednesday, May 10
|
View Page
|
 |
The young tomatoes produced excellent megas, however I dont expect any to set good tomatoes because I've neglected them too much. Neglect/poor care aside, I can tell they've got some fantastic genetics it's just a shame I can't focus more attention on them.
|
|
�
|
|
Thursday, May 11
|
View Page
|
 |
Overcoming a severe magnesium deficiency. Looking better now than it did. It has been a bit short on copper and phosphorus too. Self diagnosing all of this... but partly based on past tissue tests from past years. Plenty of nitrogen at the moment.
|
|
�
|
|
Thursday, May 11
|
View Page
|
 |
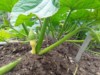
Off life support and ready to roll down the runway. Seed is the 1133 Yohe squashkin.
Favorable forcast, so aiming for mid June pollination.
|
|
�
|
|
Thursday, May 11
|
View Page
|
 |
From winter to summer!
|
|
�
|
|
Sunday, May 14
|
View Page
|
 |
The Young tomatoes are impressive, very robust flowers, my plants/ leaves are lagging a bit behind though. I've got a yard of compost which may help I think its contaminated with extra chloride though. But maybe I can drip irrigate the extra salt out of it. Salty tomatoes... they should taste good anyhow.
|
|
�
|
|
Monday, May 15
|
View Page
|
 |
Red rover, red rover, send CO2 over... to all the other pumpkin growers east of me (which is most of you). Vine measures 6 ft. today so I'm behind quite a few growers (and ahead of others) exceptional weather but barely eeking out 6" or so growth per day. I wish it was more, but its solidly on track for a mid June pollination at 16-17 ft out and thats good.
|
|
�
|
|
Tuesday, May 16
|
View Page
|
 |
Solarized a spot here in case I need more garden space.
In this picture its sharply apparent where the heat was! It helps to seal the edges with something to hold the plastic down so the heat doesnt escape. Even a 1" gap lets a lot of cold air in/ heat out. And a summer weather sidenote, don't leave pets or children in a car with the windows up. This shows clearly what will happen.
|
|
�
|
|
Tuesday, May 16
|
View Page
|
 |
I solarized this area as well. I planted a row of field kins x 2 ea: 16.50 Peine 105.5 Cleaview 35 Peine 102.5 Goodwin and 46.25 Ives. I'll probably plant a couple 130.5 Treece and 111.5 Handy kins elsewhere as well. Just one more category, and then I can qualify for the master gardener competition! I've got tomato, field kin, AG, and marrow so next will probably a watermelon.
|
|
�
|
|
Tuesday, May 16
|
View Page
|
 |
Corn with potatoes in between. Unlike the three sisters planting combination, which I've never seen work, this combo will actually work. Potatoes and garlic will work also. Carrots and lettuce in the smaller area in back.
|
|
�
|
|
Wednesday, May 17
|
View Page
|
 |
...I'm also doing corn with swiss chard which has been a successful combo in the past.
Overwintered kale would be good with potatoes possibly, too, if it was spaced on at least a 2' x 2' grid. But kale is a real hog for water and nutrients and light, maybe even more so than corn or potatoes, so idk...
|
|
�
|
|
Friday, May 19
|
View Page
|
|
Started some Ciesielski watermelons with these couple weeks of 80 degree weather I feel like I am a month behind on starting these. Starting a few more tomatoes and a butternut and some odds and ends.
Trying to keep the tomatoes pollinated and to get better than 6" a day from the 1133 Yohe pumpkin vine but don't know how. I think its putting its extra energy into roots and secondaries right now. Plenty of room for improvement...
|
|
�
|
|
Saturday, May 20
|
View Page
|
 |
9 ft. 1133 Yohe
|
|
�
|
|
Saturday, May 20
|
View Page
|
 |
Breakfast/lunch for a few bees tomorrow. No pesticides...
|
|
�
|
|
Sunday, May 21
|
View Page
|
 |
The last tray test. After a month or so a couple roots penetrated the newspaper. Cardboard would work also. If either method could be made concave up then excess water could drain away easier. A sand or compost layer for good drainage might be worthwhile too.
|
|
�
|
|
Monday, May 22
|
View Page
|
 |
This is not half uncovered for to take a picture, its half uncovered because the spring weather turned a bit Dr. Jeckyll/ Mr. Hyde. I figure the barrel of grass clipping is putting out about 500 watts of heat, its quite warm. That plus the rotting round bales makes a noticeable difference. The hay bales arent putting off as much heat as the fresh cut grass but every little bit helps...
|
|
�
|
|
Wednesday, May 24
|
View Page
|
 |
Coulda had my first successful May pollination! 15 secondaries behind it, but sticking with the mid-June plan which if all goes well, may have an outrageous 28-30 secondaries behind it... Not the biggest vines ever, but there will be plenty of them.
|
|
�
|
|
Thursday, May 25
|
View Page
|
|
Past 5 days growth = 2 ft. So growth dropped to just under 5" per day during the cool, cloudy weather. I found myself wishing I was growing on some sort of reflective plastic mulch like McMullin. I think it would help a bit, on the less favorable days... Maybe on the sunny days too, idk.
|
|
�
|
|
Thursday, May 25
|
View Page
|
 |
Nutrient guesses...?
|
|
�
|
|
Thursday, May 25
|
View Page
|
 |
Nutrient guesses # 2.
|
|
�
|
|
Thursday, May 25
|
View Page
|
 |
Nutrient guesses #3.
|
|
�
|
|
Thursday, May 25
|
View Page
|
 |
No more guessing :)
|
|
�
|
|
Saturday, May 27
|
View Page
|
|
Have a blossom about 5 days out and another about 15 days out. Its been tedius chores up until now, but now I am excited as I've ever been. The prize for all the effort is already within sight.
|
|
�
|
|
Sunday, May 28
|
View Page
|
 |
Rye made it to 6' tall, not sure if any of the seed heads will mature before the pumpkin vines reach them though. I discovered two more little pumpkins in the vine tip so my guess now is I could have a main vine pollination in about 4, 14, 18, or 20 days.
|
|
�
|
|
Sunday, May 28
|
View Page
|
 |
It would be a good idea to turn this couple feet of lawn into a garden bed so the pumpkin roots can extend all the way around the rotting hay bales and have full access to those nutrients. Granted, the local grass hay here is quite deficient in certain nutrients. But... the bales will make a nice buffer zone if I water the correct nutrients down through the bales??? I must be high on something huh. Anyhow, redneck pumpkin growing at its finest :).
|
|
�
|
|
Wednesday, May 31
|
View Page
|
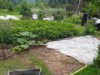 |
My original plan was to have the potato patch become a 150 sq ft pumpkin patch, but the potatoes are doing so well that now I figure I ought to give the pumpkin vines their own 150 sq ft area in front of the potato patch rather than interfere with the potatoes. The question is, can I grow more lbs of pumpkin in 150 sq feet, or more lbs of potatoes. Pumpkin vs potatoes.... the competition begins!
|
|
�
|
|
Wednesday, May 31
|
View Page
|
|
Pollination attempt #1 is coming up soon.
1133 Yohe x self.
|
|
�
|
|
Wednesday, May 31
|
View Page
|
 |
Pic.
|
|
�
|
|
Wednesday, May 31
|
View Page
|
 |
Its Beauty & the Beast time. And (unfortunate for my attempt at a pb) it looks like he is the beast and she is the beauty. Well, whatever. This dude's gonna Netflix and chill in the refrigerator for at least 36 hours.
|
|
�
|
|
Saturday, June 3
|
View Page
|
 |
Cold night, copious dew on the tomatoes. Pic doesn't do justice.
|
|
�
|
|
Saturday, June 3
|
View Page
|
 |
Not sure if this pollination will take. Male was in refrigerator 55 hours, a bit faded. Female looks worn out too, like the past few days were too cold.
|
|
�
|
|
Monday, June 5
|
View Page
|
 |
Frost damage. At least 50% of my plant killed. The leaves have yet to droop, they are still frozen.
|
|
�
|
|
Monday, June 5
|
View Page
|
 |
This is what did it, I live under the clear band of air in the middle of all the clouds.
I wasn't sleepy late last night... I guess that's God's way of saying I should have been awake doing something... like irrigating the patch to keep the frost away...
I knew it would be cold, and we had one other frost in June before, but I thought to myself, "oh but whats the chance of THAT happening again."
Answer: 100%.
|
|
�
|
|
Monday, June 5
|
View Page
|
|
I am so disgusted. I want to tear the whole plant out... but I know I could probably still produce a nice orange pumpkin. So, quick change of goals. Goal now is back to the usual... a small orange blossom down pumpkin.
|
|
�
|
|
Monday, June 5
|
View Page
|
 |
Miniscule frost damage on my 541 plant. This was the one I pulled out and replanted.
I also lost one patch of corn, and some potato plants. The thermometer on my porch says it was 38 last night. But there was ice on my vehicle this morning! The radient heat loss dropped things below freezing.
Damage to the 1133 was 100% preventable, the plastic covers are still lying on the ground. That, or irrigation, either would have been enough. The bit of plastic over the stump preserved those leaves perfectly even though its not an enclosed space it prevented radiant heat loss in that area.
Anyhow, now we'll see what the 1133 Yohe can do with one arm tied behind its back.
Cover your plants Gads & Elaine, it might be you guys next...
|
|
�
|
|
Monday, June 5
|
View Page
|
 |
Right side more damaged than left side. Still have one undamaged baby pumpkin on the main. But I bet that cost me 300 lbs. Darn it.
|
|
�
|
|
Wednesday, June 7
|
View Page
|
 |
Ouch! But... its acting like it still wants to grow.
|
|
�
|
|
Thursday, June 8
|
View Page
|
 |
The June 3rd pollination didnt take, either because of the 2 day old pollen or the freezing weather stressing it. But look at that color! The early bright canary yellow showing on the edges means that if I do grow a pumpkin... she aint gonna be white or green.
Backup pollination, on the best side vine, will be open tomorrow. The last one on the main will be pollinated a day or two after.
|
|
�
|
|
Thursday, June 8
|
View Page
|
 |
Some other gardening stuff.
The garlic has been pushing up a pound of garlic scapes every day for the past few days. The potatoes are filling in nicely between the garlic rows. I could even see tomatoes and garlic working together but tomatoes have long roots that would be disturbed when the garlic was dug. Potato roots dont go as far. Poppies or sunflowers between the garlic? Maybe. But the fact that I can hill up the potatoes as I harvest the garlic makes that a logical choice. Carrots & garlic has worked in the past but I forget the planting dates that worked.
|
|
�
|
|
Friday, June 9
|
View Page
|
 |
About 16 ft out it was half open today.
Wasnt ready for it to open today, the pollen might not have been the best. The backup pollination has a bad case of seeds in the blossom but its a huge flower with 7 stigma parts...
The plant has a lot of energy.
The soil is challenging me, it wants to dip below 6.0 acidity in places. I ought to try to get my water up to 7.0 to offset this.
|
|
�
|
|
Friday, June 9
|
View Page
|
 |
Big baby! Vine position is good.
|
|
�
|
|
Saturday, June 10
|
View Page
|
 |
Excavating some space... these roots were off a node five nodes back from the pumpkin I just pollinated. Unfortunately about 2/3 of them broke, but some got reburied. The longest root was about 2 ft long.
|
|
�
|
|
Saturday, June 10
|
View Page
|
 |
The recent pollination was just a bit short of where I need it to land. I cant move the pollination so instead everything else gets moved. Trying for a blossom down pumpkin.
If it grows, I'll switch over to the blossom-down diary.
|
|
�
|
|
Saturday, June 10
|
View Page
|
 |
Took till dark to get it done. Well, you get the idea. But I should say: I had some badly warped plywood that was perfect to make a curved wall to hold the dirt. I didnt measure exactly but I think I've got about 5 ft diameter here now... which would be a 1343 lb pumpkin according to the formula I use. That would be a personal best.
I know my plant looks like crap now with the freeze damage and a bit of spray damage, but nevertheless its nearly 300 sq ft... lost about 100 square feet to the freeze. Anyhow, it should be filled back in within a couple weeks, just in time to put on some pounds!
|
|
�
|
|
Monday, June 12
|
View Page
|
 |
80+ today, but Junuary returns after today.
I guess my main goals this year are the watermelon, an XL butternut, and the field kin breeding selection project. All 10 field kins came up, direct seeded in the ground, even with the Iles seeds being 7 years old.
|
|
�
|
|
Monday, June 12
|
View Page
|
 |
5 gallon plant has a double (upper left) and some bigger blossoms on the way. I might not win, but for once its not looking like I will finish in last place.
Growing in shade really helps the plant conserve water.
|
|
�
|
|
Monday, June 12
|
View Page
|
 |
Low boron, high potassium? Similar to the exploding baby pumpkin thing, I think.
|
|
�
|
|
Wednesday, June 14
|
View Page
|
|
Pollinated yet another backup on the 1133 Yohe squashkin. X-Self. She is a hungry momma plant. Magnesium sulfate is what's on the menu for this evening.
|
|
�
|
|
Thursday, June 15
|
View Page
|
 |
"A split decision."
|
|
�
|
|
Thursday, June 15
|
View Page
|
 |
A smaller split on the other side as well.
Other than the splits, its a decent one, figure it could reach 4-5 lbs. Looking ahead I cant see any better ones.
|
|
�
|
|
Friday, June 16
|
View Page
|
 |
7 DAP, cool weather, and the plant is deficient in magnesium and phosphorus. Not gonna be keeping up with the greenhouse growers this week...
I have come to the realization that the plant is going to demand all the things I didnt add or balance into the soil previously, so maybe I should just be like everyone else and add these things in ahead of time. Nevertheless, if I didnt have other things going on that get me behind on the feeding, then I think my methods would be viable. The plant seems superbly happy when I do have the time to feed it what it wants.
Feed me, Seymour!
|
|
�
|
|
Wednesday, June 21
|
View Page
|
|
I have asked Elaine to stop posting unflattering pictures of me, but I guess thats the karma I get for refusing to marry her... As the bible says, a scorned woman is indefatigable.
|
|
�
|
|
Wednesday, June 21
|
View Page
|
 |
I've never seen so much oozing, it seems to be due to sun/rain damage. Coming out of a stretch of damp and un-pumpkinesque weather recently. In hindsight, I guess these baby pumpkins might appreciate a baby size blanket! First time seeing this.
|
|
�
|
|
Wednesday, June 21
|
View Page
|
 |
Shopping at the Mega-mart...
This probably isnt joined together but its what I would call a double mega bloom. So many big blossoms... 4 or 5 on this plant alone.
|
|
�
|
|
Wednesday, June 21
|
View Page
|
 |
Smallest plant, but also the one with the most megablooms. Earlier this year I gave it a pep talk. I was like, "you're a small runty plant now, but you're gonna be my best plant". A little faith can do even more than fertilizer, I guess.
|
|
�
|
|
Wednesday, June 21
|
View Page
|
|
A boring gardening tidbit here, I tried a lot of companion plants with celery this year and my conclusion is that onions would be the perfect companion plants for celery.
Ps... go read that Altitude Maters guy's diary he is funny.
|
|
�
|
|
Wednesday, June 21
|
View Page
|
 |
Kinda small for 7 DAP, but smack in the middle of the plant. There's a fourth, fifth and sixth possibility as well. But no good news lately, getting busy with other work, the ph of the rootzone is all haywire, and still have excess potassium and nitrogen, so I don't know if I should get my hopes up at all this year. May not break 1k. Automatic irrigation/fertigation would help about now.
|
|
�
|
|
Friday, June 23
|
View Page
|
 |
I still can't believe how much damage this pumpkin sustained, my guess is still sun damage, but it may have been aggravated by a bit of acidic fertilizer salt, idk. I had a tomato look this miserable after an excessive dusting of elemental sulfer. Possibly urea was the culprit for the pumpkin, not sure the exact when or how of it.
The 541 is looking fantastic. Should have an early July pollination.
|
|
�
|
|
Friday, June 23
|
View Page
|
 |
Garlic and potatoes are being perfect companions. And, speaking of perfect companions and gardening: those who dont enjoy fighting shouldn't start fights... because they will reap what they sow. Lesson learned, hopefully.
|
|
�
|
|
Friday, June 23
|
View Page
|
 |
On a happier note, the 1133 Yohe blossom down attempt #2 is looking really good. This little pumpkin froze. So I was hesitant to use this pumpkin, was fearing some internal scars/ cell damage but it looks flawless now.
I think I will name her Elsa, (after the character in the movie 'Frozen' who freezes but with some sisterly love-magic becomes unfrozen.)
Anyhow, Elsa won't be huge, but hopefully pretty.
I learned my lesson: no sun-of-a-bee directly on her delicate squashkin-skin. She will be lightly shaded the rest of her days!
I'll put Elsa updates in the the BlossomDown diary, so yall can enjoy watching her grow and ignore my other nonsense!
|
|
�
|
|
Friday, June 23
|
View Page
|
 |
Good companions don't fight, cont'd: Chard and corn, potatoes and corn.
I dont know enough about how to get people who want to fight, to not fight. But I do I know the key to mixing potatoes and corn is to plant the corn first and get it well established, otherwise the potatoes could smother it. The potatoes don't mind a bit of shade, but the corn needs full sun. Plants are so easy compared to people.
|
|
�
|
|
Saturday, June 24
|
View Page
|
|
This is an offshoot from my main diary...
Email contact for this diary:
[email protected]
(same as Little Kins)
|
|
�
|
|
Saturday, June 24
|
View Page
|
|
Oops already bungled that..
|
|
�
|
|
Sunday, June 25
|
View Page
|
 |
5 gallon bucket beauty. This plant is getting big and thirsty, this blossom is on the lowest lateral branch. Probably will do ok with a gallon a day of water, if I can remember.
|
|
�
|
|
Sunday, June 25
|
View Page
|
 |
It's quite a plant! It was one of the Young seeds. Plus as a backup there is a little sprout with a good size blossom, maybe 10 days away. Just want to document it that its nearly as good as my other plants so that if it grows a big tomato you'll believe it!
|
|
�
|
|
Monday, June 26
|
View Page
|
 |
All on the same plant, all fully connected. All 9 may be cut off, because the 10th one (not pictured sorry) may be growing the best!!! Its been nuts trying to get these all pollinated. Buf its going to be even more nuts cutting them all off!!! Dont know how I am going to cope with it lol.
|
|
�
|
|
Tuesday, June 27
|
View Page
|
 |
This is a first for me. An elk took a bite or two. The day after I narrowed it down to two, I am already down to one. Figures...
|
|
�
|
|
Tuesday, June 27
|
View Page
|
 |
Best tomatoes cloned, one clone each, already lost track of which was which. I'll probably try to do a controlled pollination at the end of the year between the best plants. I can see both domingo and megazac traits in these plants, the one that threw out ten megablooms probably deserves to be out-crossed with whatever plants grow the heaviest/fattest ones, or selfed.
These plants do seem to be a genetic potpourri so maybe there is room for improvement.
|
|
�
|
|
Thursday, June 29
|
View Page
|
 |
Woohoo. Bye clouds. Plant is near 500 sq ft. I will let it grow another 250 feet or so, if it wants to (it surely will). & Terminating everything by mid July. DAP 15 today, going to start keeping track of daily gains. Off to a slower start than the greenhouse growers, my DAP 15 is more like their DAP 10. But for me the real goal is to have high daily gains in the middle of the growth curve. That will affect my results more than being quick out of the gate.
|
|
�
|
|
Thursday, June 29
|
View Page
|
 |
150 sq ft patch, 541 Clayton 2017. I am not exactly following the rules for the contest because I think maybe I am supposed to mark the boundry ahead of time, and I have yet to mark an exact boundary. But this is just for fun and maybe another 500 lber. Couldnt ask for a better plant.
|
|
�
|
|
Friday, June 30
|
View Page
|
 |
150 sq ft layout. I will hopefully find time to put a nice wood border so I'm not guessing. I'll probably have a couple pollinated by July 4th-5th. Last year the pollinations dragged on well into July on Ivy's plant, but she still hit 700 lbs. So maybe the goal this year should be 800 lbs. Wouldn't it be ironic if it grew bigger than the one in 600+ sq ft. That plant will be 4-5 times larger, yet I am not expecting a pumpkin 4-5 times larger... Interesting.
|
|
�
|
|
Friday, June 30
|
View Page
|
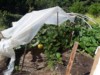 |
Just needs to get 100 x bigger. But I'll settle for 50 x bigger. Got the sifted dirt under it. I sifted it at 1/2 inch mesh the skin can handle loose little pebbles, but not rocks not so well.
I have mill fabric but since its growing on a pallet I can nudge it around that way if I really need to. I'm sure throwing dirt on a pallet makes you wonder what planet I am originally from...
|
|
�
|
|
Friday, June 30
|
View Page
|
 |
Seven ovaries, 13 rib segments. These two were both on secondaries. In theory they should yield a 30% larger pumpkin. A normal pumpkin would have 10 rib segments.
Its the extra rib segments that would add extra weight, not the ovaries. The ovaries are mostly spongy and hollow. These two would have made nice pumpkins. I'm not a top grower, so nothing I grow will be impressive, but if I was a top grower I would be vexed thinking about whether a bigger baby on a side vine might grow a bigger pumpkin than a smaller baby on the main vine...
|
|
�
|
|
Sunday, July 2
|
View Page
|
 |
An big baby pumpkin on a side vine. 7 sepals, not sure the stigma lobes yet. The stigma lobes= ovaries and the ovaries are basically hollow so that part isn't important to me.
|
|
�
|
|
Sunday, July 2
|
View Page
|
 |
I think I just joined Team Miracle Grow. No offense pumpkinpal but this is me and you... lol.
|
|
�
|
|
Monday, July 3
|
View Page
|
 |
7 sepals. 8 petals. 6 lobes. (Stigma lobes.) Which matters?
|
|
�
|
|
Monday, July 3
|
View Page
|
 |
These green partitions are the pumpkins ribs. These ribs mostly correspond to... petals, lobes, or sepals? Well not ever flower conforms to the rule but most flowers conform to the rule: sepals x 2 = ribs. This one does, it has 14 ribs. Thats a lot of pumpkin! In theory this one could have 40% more potential (more cells to start with) than a standard 5 sepal/ 10 rib pumpkin. But of course not all the ribs are equally sized plus this one might be prone to a stem or blossom crack or difficult wheel shape. For most growers these differences in flower construction arent the limiting factor in growin a bigger pumpkin. And even the top growers might not benefit from choosing a flower like this because there could be those additional issues associated with the extra ribs.
It is interesting though!
|
|
�
|
|
Monday, July 3
|
View Page
|
 |
These are the sepals. There can often be a missing sepal (where one should have been but it didnt form) or an extra sepal that doesn't really belong, so they arent totally reliable, but other than that, they do correspond better with the # of RIBS of the pumpkin than either the petals or the stigma lobes. I know that info is as mushy as oatmeal but consider yourself as edumacated as myself, lol.
The good news is there will be no test, so relax.
|
|
�
|
|
Monday, July 3
|
View Page
|
 |
EZ decision on the right, tough decision on the left. There are some even tougher decisions ahead. 2nd BER the first was on the 5 gallon tomato. I guess 30 minutes of drip line was too much, I usually run it for 10 or so. Will prob. run some cal nitrate today they are getting hungry.
|
|
�
|
|
Monday, July 3
|
View Page
|
|
Note to self, no irrigation = less calcium, light irrigation = more calcium, heavy irrigation = less calcium.
|
|
�
|
|
Monday, July 3
|
View Page
|
 |
First clone I tried was a success. Thanks Scott (Attitude Matters/ Altitude Maters) for posting! If I may recap your recipe: 1) potting soil, 2) water water water 3) low intensity or indirect light 4) wait about a week then switch back to normal plant care
I checked, and it does have roots.
|
|
�
|
|
Tuesday, July 4
|
View Page
|
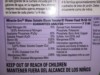 |
My 4 lb box of MG. I was surprised that they discontinued zinc. Gotta watch the labels, they change this stuff every year it seems.
|
|
�
|
|
Friday, July 7
|
View Page
|
 |
5 gallon bucket beauty. This plant is low on calcium though, and its already got some BER. One last chance, a big double blossom, next week.
|
|
�
|
|
Friday, July 7
|
View Page
|
 |
150 sq ft. pollination day.
541 Clayton
x 378 Clayton (Squashkin)
Some sun damage plus a little bit of calcium shortage already but the forcast is good.
|
|
�
|
|
Saturday, July 8
|
View Page
|
 |
A winter cover and oilseed. Always thought peppercress (confuseable with pennycress) could be bred for this, but thats a long ways away, this camelina stuff sounds about right. Might try it. One cooler day and I'm already thinking about how to wrap this season up.
|
|
�
|
|
Tuesday, July 11
|
View Page
|
 |
I think my soil acidity has become a problem. I'm going to try an instant fix.
|
|
�
|
|
Tuesday, July 11
|
View Page
|
 |
I am applying the stuff the plant needs but its not getting into the plant. Acidity in some spots has dropped below 6.0 so Im going to try some calcium hydroxide for an immediate fix. Pumpkin is growing ok but I know it wants to grow faster.
|
|
�
|
|
Thursday, July 13
|
View Page
|
 |
So true, but so easy to get tripped up on our own understanding of things!
|
|
�
|
|
Friday, July 14
|
View Page
|
 |
This lineage still has some 1812.5 Sherwood genes in it, really great length. I'm tempted to cull the other pollination and make a canoe out of this one!
Suburban, it looks like a dehydrated deer has run out of juicy things to eat. In my experience the deer around here usually sample them but then dont return. (But later you might want them to... free labor. Thats a very fine pruning job they did on those vines.)
|
|
�
|
|
Friday, July 14
|
View Page
|
 |
Temperature and phosphorus seem to be limiting factors, nutrients still off a bit, mostly due to variable ph across the patch, which is another limiting factor. Lastly, didn't fill in the full 1,000 square feet... I even planted some other veggies in the space where the additional growth ought to be. It should have been an 1100 sq ft plant but not everything went to plan! Its about 700 square feet. And only half of that is contributing meaningfully to the pumpkin... Oh well.
|
|
�
|
|
Friday, July 14
|
View Page
|
 |
Measure mania... based on circumference, which in the past has been plenty accurate.
I really hope the Patons succeed, and don't get discouraged, but yeah they probably don't need my help, but who am I to judge what help they may need... All I know is, if you want to hit the ball... you gotta swing the bat.
|
|
�
|
|
Sunday, July 16
|
View Page
|
 |
Auxin experiment with the only vine past the pumpkin. It might cripple the pumpkin, or it might help draw resources forward, or both...? Ideally it would invigorate everything, the idea here being that the vine being vertical gets it to signal something positive to the rest of the plant, like 'woah come check this out, we might have something here...'
The stump has a lot of energy now that everything is terminated and the phosphorus is now becoming adequate. Its trying to push lots of new growth but Im keeping it under control. Its pretty clear the back 200 ft or so of the plant isnt contributing to the pumpkin.
|
|
�
|
|
Monday, July 17
|
View Page
|
 |
150 sq ft... Well at least I'm not a coke head.
|
|
�
|
|
Monday, July 17
|
View Page
|
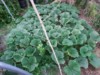 |
Goofiness aside, and trying to comply with the competition rules, the 150 square ft patch is full.
|
|
�
|
|
Monday, July 17
|
View Page
|
 |
The keeper @ 10 days old isnt looking great. Plenty of other ones to choose from at the end of the secondaries. So I will probably pollinate some backups. Not totally sure what the nutritional issue is here but its the exact same thing I saw in this spot last year. Probably zinc, boron, copper, calcium, and phosphorus. The usual suspects. The soil here is shallow so there's not a lot of room for water or soil biology either, but at least there's very little disease pressure here. Super healthy plant, far more likely to be one of my known soil deficiencies than disease-related.
|
|
�
|
|
Monday, July 24
|
View Page
|
|
Painfully academic, but the point is, magnesium is closely associated with plant energy and it could end up traveling out of the leaves & into the roots... in fact, it probably does so all the time, a big circular transport we never notice, until the roots decide not to release it back into the xylem, where it could return to the leaves... at that point the cycle is wholly or partly broken, and the interveinal chlorosis sets in,
https://www.pnas.org/doi/10.1073/pnas.1406251111#:~:text=MgATP%20is%20the%20substrate%20of%20numerous%20phosphorylating%20enzymes,of%20ADP%20and%20magnesium%20release%2C%20and%20vice%20versa.
Hopefully a good link.
|
|
�
|
|
Wednesday, July 26
|
View Page
|
 |
Star of the week goes to the beans... red runner beans they're 14 ft up and interfering with their own overhead sprinkler. I have a bunch of types, they've been an easier crop than I was expecting and they really do require less nitrogen than other crops which is great. But without question the red flowered ones are the most aggressive (so much so that I'll probably segregate them out from the others in the future.)
|
|
�
|
|
Wednesday, July 26
|
View Page
|
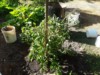 |
5 gallon tomato... I thought I had a real chance at this, this year. But BER got every one of them. The plant was so big with so many roots that properly watering became impossibly tedious. Too many other things to do, so its in the ground now and once again I have failed at this competition! The biggest tomato I got before BER set in was probably only a couple ounces.
|
|
�
|
|
Saturday, July 29
|
View Page
|
|
940 Gerry
1128 Swenson
1317 Clementz
1502 Wallace
1692 McMullen
1880 Bernstrom
2068 Stelts
2256 how could I be stumped on this one too much duh factor here I guess... 2356 Booth, off by 100. 2255 Eddy Z. off by 1.
Off the top of my head... Its official, I'm nuts!
I know some of those aren't exact.
Ah, 2068 Skinner/ 2069 Stelts, how could I forget... 1990 Bernstrom not 1880... Aye aye aye.
Well, obviously I have been amply entertained by this hobby. Glad to have a reason to break out my 1317 next year... a perfect seed to try to hit the 7 lb per leaf / 1316 benchmark with.
|
|
�
|
|
Saturday, July 29
|
View Page
|
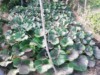 |
I decided maybe I should try the 188 leaf competition this year myself, but I was surprised to count 288 leaves on my 150 sq ft plant. So the God of pumpkins has spoken, and 288 it ought to be, and I already like that number better because it will be more of a mid level competition, where weights could average in the 1200-1500 lb range, with some possibly near 2k?
I counted the leaves by throwing grit on them one by one, otherwise it would have been hopelessly difficult task for me. I can wash the grit off tomorrow.
This will be good for me, I was starting to wonder if I had run out of new things to try. My attitude is one where I may as well throw in the towel if I dont have something slightly new to try next year.
|
|
�
|
|
Sunday, July 30
|
View Page
|
 |
5.03 and 4.76
SinglePowers! For team MegaPowers!
Lots more to come .01 lbs away from a pb.
|
|
�
|
|
Sunday, July 30
|
View Page
|
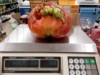 |
Big single grown off a Young seed. (The tags are buried so I wont be able to say which exactly until the end of the season.)
|
|
�
|
|
Sunday, July 30
|
View Page
|
 |
Not as big.
|
|
�
|
|
Sunday, July 30
|
View Page
|
 |
The cool thing is there are multiple tomatoes on all the plants. There was another single I just weighed at 3 1/2 lbs on the plant that grew the 5 lber... I got 8.5 lbs of tomato both ripe at the same time. Such good plants this year. I can even go so far as to speculate that if I had gotten the right blossom and culled everything else, I honestly think it could have grown an 11 pound tomato... I know I'm not there yet, but I'm way closer to being a top tomato grower than a top pumpkin grower.
|
|
�
|
|
Monday, July 31
|
View Page
|
|
700 sq ft x 3 inches = 175 cubic feet of water
175 cubic feet of water x 7.45 gallons per cubic ft = 1303 gallons of water.
Thats what I figure i need to bring my plant up to field capacity. I dug around and sure enough... while the plant is not wilting (its a tough old bird) the soil is at the wilting point.
So that's only 26 barrels of water filled nearly full or about 12 hours of irrigation... Oops, guess I havent been watering enough. Plant looks good, but the pumpkin growth is a bit on the dry side.
|
|
�
|
|
Monday, July 31
|
View Page
|
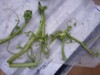 |
Tendrils. Wow its... August already.
|
|
�
|
|
Tuesday, August 1
|
View Page
|
 |
Androgynous. Looks like a turban kin, I wonder if the turk's turban appearance is derived from some degree of male genes/hormones acting upon the females. This is from the same area of the plant that is growing tumorous tendrils.
|
|
�
|
|
Tuesday, August 1
|
View Page
|
 |
If you're curious to know how this tomato turned out...
|
|
�
|
|
Tuesday, August 1
|
View Page
|
 |
Here she is (cut in half). No rot, well callused, although it looks like there was a slight bit of mildew at one point, but its totally dry now. It would meet GPC standards.
|
|
�
|
|
Tuesday, August 1
|
View Page
|
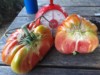 |
I had to cut it in half to weigh it on my 1 kilo scale... sum of both halves was 1370 grams/ or 3.02 lbs.
Whatever deficiency (or excess) caused it to split also made it a fair bit smaller than it should have been... Over in Porkchops tomato patch it would have been at least a 6 lber!
For me... it should have been a 5 lber.
|
|
�
|
|
Wednesday, August 2
|
View Page
|
 |
Coal cars... about 100 of them. The city of Tacoma is going to send some C02 your way, just in time to add a few extra lbs to your pumpkin!
Non-pumpkin related: Why is it we are not using thorium?! We could leave some of that carbon in the ground...
|
|
�
|
|
Thursday, August 3
|
View Page
|
 |
Reference material. Advancing eco agriculture nutrient diagram.
|
|
�
|
|
Friday, August 4
|
View Page
|
 |
4 lb 2.1 oz (4.13) and 4 lb. 14.5 oz (4.90 lbs)
|
|
�
|
|
Friday, August 4
|
View Page
|
 |
Bigger one, on the scale, sorry its not fully in the pic but the gal at the post office did the best she could.
|
|
�
|
|
Friday, August 4
|
View Page
|
 |
Badly cracked, but met GPC standards when picked. I nicked the skin placing it in the basket, which gave it a fingernail sized wound, not sure if that would DQ it, all I can say is when they are ripe be very careful....
Its the opposite of a pumpkin, the pumpkins start soft skinned but get tougher as they get older, the tomatoes start out fairly tough, but they get quite soft when fully ripe.
|
|
�
|
|
Saturday, August 5
|
View Page
|
 |
Another one that felt light, but didnt disappoint.
|
|
�
|
|
Saturday, August 5
|
View Page
|
 |
Top.
|
|
�
|
|
Saturday, August 5
|
View Page
|
 |
Bottom good, except where it was resting on the basket... again, wow they are delicate.
|
|
�
|
|
Monday, August 7
|
View Page
|
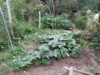 |
Pollinated 56 Ruthruff? butternut today... my first real attempt at a butternut and the last pollination for the year.
The 150 sq ft plant (in back) has been a total failure. I'm confused as to exactly why. Guessing calcium, zinc, phosphorus, and poor pollination. It has never produced good male blooms and the tertiary buds have been weak. I wouldn't mind if it grew a small pumpkin... but basically its looking like no pumpkin this year.
(The plant looks great... Based on the appearance of the plant, it looks like it should be cranking out 15 lbs/day! Its nice to look at but its an emtpy hull of a vehicle, equivalent to a Porsche with no engine.)
|
|
�
|
|
Monday, August 7
|
View Page
|
 |
Lbs of tomato balanced on a crazy person's head, ha ha. Hope you enjoyed your disappointment, be sure to share your disappointment with others, but... please pretend its the new record on the message board, CUZ we gotta get Dan to worry a little :) :) :)
In picture is my 5.03, 4.76, 4.90, and 5.52.
...And let me just say this would be easier with green tomatoes!!!!
|
|
�
|
|
Tuesday, August 8
|
View Page
|
|
This gorgeous thing is my 150 sq ft kin. There's one last flower opening tomorrow, which I will pollinate, but this one here may end up being my keeper despite being the Quasimodo of pumpkins. I've grown enough pumpkins that I dont care about perfection, I'm game for trying a risky but more interesting one.
Plant looked good before, added a huge heap of boron, copper, zinc, and I forget what else, looks super amazing now. I think it actually wants to grow a pumpkin now! The other kin is a fair distance from this one, so no immediate resource conflict, I'll let both grow for couple more weeks then decide.
I guess the question is, which micronutrient was the original cause of all the shrivel trouble? (Or was it indeed all 3...?)
|
|
�
|
|
Tuesday, August 8
|
View Page
|
 |
It blanked me, here it is, culled the other one which was smaller and a less interesting shape. Oops forgot the pop can. This pumpkin is larger than it looks, the stem on it is an XL size stem but it looks small in the picture.
|
|
�
|
|
Thursday, August 10
|
View Page
|
 |
RIP Geoff Clayton.
^ My dad, who knew me better than I knew myself, at least for the first 20 years of my life or so. He took me to see some giant pumpkins at Geneva Emmons' place when I was a youth. Of course she had something special going there, but all I had was a snide teenage attitude of: "K, whatever... Know I cant do that." I didnt bother to ask for seeds or advice or anything, it was just straight out, "I know I cant do that."
My oldest kids are nearing that age. And I AM growing a Geneva sized pumpkin this year, and I'd say this to my kids: You can also do much more.
Presumably, I know them as well as my dad knew me... While I don't appreciate my dads effirts to change me... I do appreciate the fact that he understood some good things about me and my potential.
Thanks for being so smart, dad!
|
|
�
|
|
Thursday, August 10
|
View Page
|
 |
Butternut. Not bad for 3 DAP in cool weather? I thought these needed heat. I hope this one turns out really big.
|
|
�
|
|
Friday, August 11
|
View Page
|
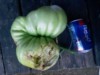 |
6.25 DMG. It would have been 6.5 if all had gone well. Might have been caused by sloppy watering. What an unpleasant surprise!
|
|
�
|
|
Sunday, August 13
|
View Page
|
 |
Weighed a couple of 28" tomatoes.
I took lots of pics and a video.
The 6.25 lber in front... not sure if it should be DQ'd there was a tiny bit of rot, slightly smaller than a quarter size. Might be my 2nd "6.25 DMG" this year.
The tomato in the background weighed 7.78 and it was all legit (I think!) however it did have a small blemish that looked like rot but actually wasnt. But i took a video of cutting the blemished area open, and it was all healthy, firm green tomato underneath. So... up to the judges to decide.
|
|
�
|
|
Sunday, August 13
|
View Page
|
 |
7.78 Clayton grown off of one of John Young's 6++ or 7++ lbers.
|
|
�
|
|
Sunday, August 13
|
View Page
|
 |
Closer view of the blemish.
|
|
�
|
|
Sunday, August 13
|
View Page
|
 |
Screenshot from the video I took. The video is a good video, it shows everything, but its 260 megabytes. Not sure where I could post that big a file. If needed, I can show the video to Jack LaRue later this year. Or whatever...
I'll post more pics later.
Brandon
|
|
�
|
|
Sunday, August 13
|
View Page
|
 |
Logging competition. Lumberjacks and lumberjills, showing off their skills.
Falling piece of wood in the yellow circle.
|
|
�
|
|
Thursday, August 17
|
View Page
|
 |
10 DAP butternut... maybe on track to be the largest non-pumpkin thing I've grown???
|
|
�
|
|
Thursday, August 17
|
View Page
|
 |
Zinc deficiency in grape leaves. I sometimes see this chlorosis in the pumpkins too this time of year, and its a slightly different chlorosis than a magnesium deficiency... I know what Im talking about (truly, for once!) because the tissue test last year said magnesium was ok... Also when I added zinc, it went away.
|
|
�
|
|
Thursday, August 17
|
View Page
|
|
For my recordkeeping, 150 sq ft my 541's last attempt was pollinated on August 9th with the best 424 plant. Its lookin like yet another poor pollination, with zinc being the most likely culprit.
|
|
�
|
|
Friday, August 18
|
View Page
|
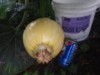 |
10 DAP on Lilly Paddy (or whatever her name is, I forget)... which is a cross of my 2 best plants this year, 1133 Yohe & 378 Clayton, both are squashkins. I will be subjecting her to a "no leaf" challenge shortly after the end of the month, so I need to track her growth to see what happens.
|
|
�
|
|
Saturday, August 19
|
View Page
|
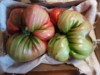 |
Turned out good. Flawless as far as meeting GPC rules.
|
|
�
|
|
Saturday, August 19
|
View Page
|
 |
Just wanted to show my rickety tomato hut which worked so well. Only space for four plants really (and I crammed in 6).
The "20% shade cloth" is just some plastic fencing I pulled out of the garbage. Anyhow, unless your neighbors are going to complain, things dont need to be fancy. This setup is better and cheaper than anything else I can imagine.
...The 2 pieces of pvc, and the 6 mil plastic, was salvaged years ago from a nursery that went out of business and I am still getting use out of it.
I finally settled on victor type mole traps as being the best clamps for securing the plastic to the pvc.
|
|
�
|
|
Sunday, August 20
|
View Page
|
 |
The internet is tempting me...
Prob. not a good idea.
|
|
�
|
|
Monday, August 21
|
View Page
|
 |
Salad.
Boo. I didn't realize the Washington State fair isn't doing a weigh off until last night when I tried to register. Silly me, I planned my whole season around it...
|
|
�
|
|
Tuesday, August 22
|
View Page
|
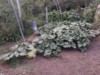 |
18 DAP and pretty sure its more than 18 lbs.
56 Ruthruff butternut
|
|
�
|
|
Friday, August 25
|
View Page
|
 |
This is a little blurry but this was one where my sloppy watering caused a water droplet to hang from the tomato, which then was the only place that got BER.
|
|
�
|
|
Monday, August 28
|
View Page
|
 |
Meet Quasi Mojo, my 150 sq ft pumpkin.
In addition to his good looks, he even has a good amount of slimy boogers in one spot.
When it comes to the green stuff, he is loaded. But overall, things just aren't working out for Quasi Mojo.
|
|
�
|
|
Thursday, August 31
|
View Page
|
 |
Koralik tomatoes. The tomatoes in the tray was off one plant. These were in the exotic seed exchange.
|
|
�
|
|
Thursday, August 31
|
View Page
|
 |
Corn and giant kale got along well enough. There were potatoes companion planted in here too. A triple combination that worked, which is rare. The Pacific Northwest "three sisters" is corn, kale, and potatoes, ha ha. In my garden, the traditional three sisters, beans, squash and corn... they don't get along very well.
|
|
�
|
|
Thursday, August 31
|
View Page
|
 |
Pinhole crack on the butternut. Patched it but I think the plant knows its no good. This thing was growing crazy fast and would surely have been some sort of record.
|
|
�
|
|
Sunday, September 3
|
View Page
|
 |
Holding my butternut baby. Stopped growing, harvested today @ 27 DAP/55 lbs, blossom end split... She was a big baby.
|
|
�
|
|
Wednesday, September 6
|
View Page
|
 |
Wow, Crews had an early frost!
The day there isnt 100 lbs of apples sitting in this ditch is the day I believe there's a food shortage. Streets may not be paved with gold, but the ditches are like a well stocked pantry.
How lucky we are, if we would only value the things we already have.
|
|
�
|
|
Saturday, September 9
|
View Page
|
 |
Seed exchange carrots turned out good enough. Genetically, it was a mix of Chantanay (left) & Nantes (middle) and a hybrid/off type? (right).
|
|
�
|
|
Saturday, September 9
|
View Page
|
 |
4.42 lbs off the 7.88 Butler I believe. Had to cut it in half to weigh it on my kilo scale. This was the best of my 2nd round tomatoes, so this was a first truss blossom. Not a terrible result but if I took better plant care of the plant early on it might have weighed in the 6-7 range.
I'd say with tomatoes that 2/3 of any success happens prior to pollination. I'd say you really have to set yourself up for success prior to and during the flowering phase. Then the last 1/3 of any success is the relatively easy part... basically you spend a just a month watching it grow plus some minimal efforts to avoid BER or early ripening, or rot. (Keep things from getting to hot, too dry, or too wet.)
There's not much to it.
|
|
�
|
|
Saturday, September 9
|
View Page
|
 |
Top. 4.42 Clayton uow
|
|
�
|
|
Saturday, September 9
|
View Page
|
 |
Bottom.
So back to what I was saying, this tomato didn't have the best childhood, so to speak. Read Porkchop's diaries for tomato tips... he says it better than I'm saying it.
Amongst outdoor growers, Porkchop is maybe the best tomato grower? Hmm.
|
|
�
|
|
Sunday, September 10
|
View Page
|
 |
Copper deficiency tomatoes?
Pretty sure they have enough boron. Calcium might be low, but they're not BER'd. So... low copper I guess.
This time, in 3 out of 3 cases, it occured on the sunny SW side of the tomato, so maybe heat or sun, is a factor also. But I dont think that was a cofactor earlier this year, when they were growing in the protected hut... maybe it was, I dont remember.
|
|
�
|
|
Tuesday, September 12
|
View Page
|
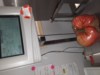 |
6.58 Clayton
I never added the photos for this one, too busy/ distracted.
|
|
�
|
|
Tuesday, September 12
|
View Page
|
 |
Top.
|
|
�
|
|
Tuesday, September 12
|
View Page
|
 |
Bottom
|
|
�
|
|
Tuesday, September 12
|
View Page
|
 |
Around the outside. It was healthy/ met gpc standards. The photos are confusing, in particular there is a green tomato in the background that was a different tomato.
Also its more ripe on the scale, since I weighed it twice and it was a bit more mature (and lighter) than the first time I weighed it. The first weight was accurate, 6.63 I think, but... oh well, whatever. The inspection tags were newer on the second scale... It lost .05 lbs over a few days.
|
|
�
|
|
Tuesday, September 12
|
View Page
|
 |
This was a 6.03 and the 6.63/6.58.
I still haven't submitted the 7.78/7.69 to the gpc. Weighing things more than once is confusing as heck. Its a numerical nightmare.
|
|
�
|
|
Tuesday, September 12
|
View Page
|
 |
Here is the bottom the first time I weighed it. The ripeness matches the other pics better... still confusing as heck. I look at those side pics and I can hardly figure out what's what. The dang thing looks completely different from each angle.
|
|
�
|
|
Wednesday, September 13
|
View Page
|
|
Some notes, basically to myself. If I grow a pumpkin again, rather than digging a hole to get a better vine angle/ more space for a blossom down pumpkin, I should definitely create that extra space by growing the vine farther upwards, and leave the level of the soil alone. This is for multiple reasons, the biggest reasons being, its easier, the plant will like it as well or better, and there will be an easier time of moving and loading the pumpkin if there are no holes for a vehicle to get stuck in, or drag a pumpkin out of. The last issue being my current concern.
I should try the diamond pattern, small square footage, and come up with the easiest care/fertilizing/watering system possible.
If I want to grow a nice size pumpkin, I'll probably want to try the 288 leaf competition next year, I've had yet another failure in 150 sq ft. And part of that failure was, I dont think crowding the plant was helpful. Its a big, lovely, dense plant. It just lost any & all focus on growing an actual pumpkin. Lack of calcium being the most critical factor, I believe. I put a lot of calcium on the soil surface but apparently it wasnt actually available to the roots. Its not even a lack of calcium in the soil, it was more just a lack of calcium in the plant itself. (I may have induced a calcium deficiency simply by doing a "too good job" of supplying ALL the other nutrients.)
I could try the 150 sq ft competition again though. Especially with some orange genetics, genetics that go lighter to chart but wont abort/ be such hogs for calcium.
Its the ratio of roots-to-leaves that messes up the calcium levels in the plant? A better pruned plant will have a better ratio of roots-to-leaves? My 150 plant this year was a perfect example of too much salad/ a top heavy plant, with not enough roots spparently. And its possible there was an excess of nematodes or other soil bugs in that spot and that they reduced the root volume, even though the top of the plant always looked totally healthy, it just couldnt overcome the soil pests pressure get the critical mass of roots established. Hence not the correct ratio of roots to leaves, hence not the correct calcium levels despite that there may have been at least minimally adequate levels in the soil.
|
|
�
|
|
Wednesday, September 13
|
View Page
|
|
As for my regular patch, I am definitely well into new pb territory, if that pumpkin makes it to a weigh off. Why was the regular patch moderately successful (by bp standards or very successful by my own standards), and yet the 150 sq ft plant was such a failure? Of course, last year was the opposite, the main patch was a failure and the kid's 150 sq ft plant was a success. So then, is it genetics... random luck with nutrient ratios... or something unseen beneath the soil, like nematodes?
|
|
�
|
|
Saturday, September 16
|
View Page
|
|
bigmoon,
my understanding of aphids is that greenhouses do offer them protection from rain, wind, and sun, but especially from predators. Wasps and ants and carnivorous beetles regulate the aphid population in outdoor settings but those predators arent adapted to clear plastic, since they all rely on flying as part of their lifecycle and none of them are smart enough to fly around the plastic?
Aphids/whiteflies would disperse naturally but they are also not smart enough to fly around the plastic. Hence this is a big factor in why greenhouses get worse infestations of these bugs??? Its just the plastic is an impediment to basic predatory/prey population movement or migration.
If the wolves cant follow the sheep and the sheep can't make their way to new grass...
|
|
�
|
|
Monday, September 18
|
View Page
|
 |
Had to screenshot this error its supposed to say "trumpet" but trump works, too, lol. Clearly the daily verses site isnt a Democrat owned website lol.
If your sense of humor is broke then sorry... it wasn't me who broke it, lol :(
|
|
�
|
|
Wednesday, September 20
|
View Page
|
 |
Summer ending right on schedule this year.
|
|
�
|
|
Sunday, September 24
|
View Page
|
|
Being stalked on here... by a woman who accused me of rape and even called the cops on me (Elaine) for it despite getting into bed with me fully undressed AND never telling me to stop... YET she called the cops on me. If I am such a bad guy then you'd think she would just leave me alone rather than having the third kid with me...
I am tired of being pushed around by people who are nuts.
Go Russell Brandt, and all real men, who dont stand a chance in this modern world.
Kiss my rear everyone! BUT mostly YOU, ELAINE.
Get off the soy, fluoride and fentanyl, folks, you are being destroyed.
And I dont care.
|
|
�
|
|
Sunday, September 24
|
View Page
|
 |
We all know the truth. Even if bp censors me, even if I go away (which I will) the truth will never go away.
|
|
�
|
|
Sunday, September 24
|
View Page
|
|
That verse was Luke 12:3.
Anyhow, I'm done on here... Sorry to those who I offended over the years.
You are now free to create your utopian bp.
|
|
�
|
|
Sunday, October 8
|
View Page
|
 |
This is my 150 sq ft entry. Ugh. Let's name it... 105 Clayton UOW. Aka Quasi-Mojo. It had the genetics for HVY, but it was short on calcium, etc. It really lacks nothing in the ugliest pumpkin dept. especially the human corpse skin color and random-direction scars, XL stem and XXXL blossom nipple.
One tomato left to weigh...
|
|
�
|
|
Sunday, October 8
|
View Page
|
 |
Not as big as it looks... It was way too lethargic for the first few weeks... low calcium, zinc, boron? But it was the perfect shape to have been a monster so I kept it for that reason. It was a good year.
|
|
�
|
|
Sunday, October 8
|
View Page
|
 |
This hill/ patch was neglected. It ended up being a genetics test plot... There were three of the same seed (my 424) here and in this case the runt of the three produced nothing, and the other two produced 2 different shades of orange. The smaller one is only 1 ft from the stump. Probably 200 and 50 lbs respectively. My soil isnt super rich, nor deep, so unless I invest a lot more into them this is about the size they get.
|
|
�
|
|
Sunday, October 8
|
View Page
|
 |
I've grown more than my share of phallic or even female, veggies... this is a Peter pepper which, no joke/no photoshop... literally has two small balls. I mean, c'mon... seriously?
|
|
�
|
|
Sunday, October 8
|
View Page
|
 |
Side view. This is absurd.... I dont know what to say.
|
|
�
|
|
Sunday, October 8
|
View Page
|
 |
Here's the plant I am most proud of... it survived 5 months in its original pot from spring. Some good luck or good genes... too bad its not spring, cuz that plant would get a prime spot.
Kids can have their wagon back now :)
|
|
�
|
|
Tuesday, October 10
|
View Page
|
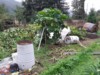 |
DAP 110-115 ? Not sure exactly.
Crews says his kin was still gaining weight past day 100. I'll do a measurement and see what these last couple weeks add, if anything.
I'm trying to keep my mouth shut about non pumpkin stuff... Season just drags on & on. I wanted to go to the first weigh off, instead hopefully will make it to the last one.
|
|
�
|
|
Sunday, October 22
|
View Page
|
 |
Crazy for pumpkin boating. Did Rome build the Colosseum or did the Colosseum build Rome. Chicken or egg question for the day...
|
|
�
|
|
Sunday, October 22
|
View Page
|
 |
Gotta do the tailgate shot. Bigger truck but aye, aye, aye, almost didnt fit. Its a game of lbs but for me it was also a game of inches. I can see the top growers use trailers. I really didnt need that extra inch. Snug as a bug in a rug...
|
|
�
|
|
Sunday, October 22
|
View Page
|
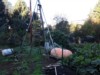 |
On the final evening before the weigh off, the only secret sauce was lots hard work.
Be strong and make your goals happen.
|
|
�
|
|
Sunday, October 22
|
View Page
|
 |
I know it sounds weird to say this but God chose the seed this year, and even the pumpkin itself, and the venue. For better or worse, pretty much nothing went "my way" this year, and I'm not sure it ever will because I'm not the one who is in control.
Thanks for following along, its a bumpy road, eh?
Thats it for pumpkins. If you have ears to hear more about God this is interesting:
Neither shalt thou swear by thy head - This was a common oath. The Gentiles also used this oath. To swear by the head was the same as to swear by the life; or to say, I will forfeit my life if what I say is not true. God is the Author of the life, and to swear by that, therefore, is the same as to swear by him.
Because thou canst not make one hair white or black - You have no control or right over your own life. You cannot even change one single hair. God has all that control; and it is therefore improper and profane to pledge what is God's gift and God's property; and it is the same as swearing by God himself.
|
|
�
|
|
Thursday, November 9
|
View Page
|
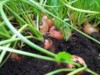 |
Seed exchange carrots turned out really good.
|
|
�
|
|
Monday, November 20
|
View Page
|
 |
I didnt realize the same plant could make two sizes of seeds.
527 uow is the smaller seeds. Is it nutritional or is it an affect of the pollinator? The pollinator had XL seeds, so maybe its just nutritional, I doubt the seeds could be made smaller by the pollinator when the pollinator had large seeds.
Again, both of these were grown on the same plant... Of that I am certain.
|
|
�
|
|
Tuesday, November 21
|
View Page
|
 |
I suspected a copper deficiency about mid season... So this is one possibility. The pumpkin with the smaller seeds only drew nutrients from the stump, not any of the nutrients I added along the main vine, so there could be differences in the micronutrients that would explain the difference in seed size. Maybe there is a genetic component if the plant is heterozygous (two different genes) for seed size then it can choose which gene to express based on the plant hormones/ environmental conditions. Its possible that subjecting a homozygous plant to the same changes in nutrients or environmental factors would NOT result in a change of the seed size.
Anyhow, its quickly getting beyond the limits of what I am going to figure out.
|
|
�
|
|
Tuesday, November 21
|
View Page
|
|
I guess NOW the season is finally over... Its not over until the seeds are dry and the cover crop is planted. Cover crop this year might be... garlic???
Well, guess Id better get to work.
Who does this, who plants a cover crop of garlic, lol.
|
|
�
|
|
Tuesday, November 21
|
View Page
|
 |
One last thing I may not have realized, the flesh color of the pumpkins is perhaps a genetic trait. And it may or may not be related to the skin color, because both these were a similar color skin, but the flesh was different. These sections were not from the same plant, however the pumpkins were both light orange. I think the more intense orange might be unusual? I dont remember seeing any with flesh quite this orange.
|
|
�
|
|
Monday, December 18
|
View Page
|
 |
An odd tidbit here, the bit of rye that matured (pumpkin plant didnt quite use all of the space I planted in rye last year) I threshed with a weedwacker in a 5 gallon drum. My original intention was only to replant it but it turned out so good & clean, I got 5 lbs of edible quality grain, so ground some of it with a coffee grinder and made some rye/garlic bread with it. PS for those that react badly to bread, what Ive found is that its usually the milk or soy that is added to the bread, which makes it problematic. But also the bread at the store may be made from wheat that isn't very fresh and it also could have glyphosate residue or be missing key minerals because of glyphosate?
Anyhow, a bit the of rye in the extra space that the pumpkin plant utilize, has now become a loaf of bread.
Its been a warm fall. I wouldnt be surprised if its a record. A few dandelions blooming here December. This will change soon no doubt. Still looking forward to taking next year off!
Happy winter, pumpkinheads!
|
|
�
|
|
|
