|
Wednesday, February 21
|
View Page
|
 |
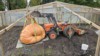
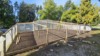
Pic for previous post
|
|
�
|
|
Monday, February 26
|
View Page
|
|
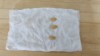
The moment that changed my life ! While registering for the Las Vegas GPC Convention a very nice man gave me a seed. I didn't know who he was and had never heard of him. That seed produced a 1911 Chan for me. We became e-mail friends and a few years go by and this same guy gave me another seed. He said this is better than the 1st seed he gave me. It was a 2183 Mendi that grew a 2212 Chan. 5 years later we end in Kasterlee for the GPC Convention and this is where I finally meet the guy who changed my life. His name Don Barron (big guy on the left). By now, everyone knows who is standing beside him !! What a ride !!!
|
|
�
|
|
Monday, February 26
|
View Page
|
|
Kasterlee was a really neat experience meeting growers from around the world and comparing notes. I'm also pumped up to better my pb from all the enthusiasm these growers have generated. At Half Moon Bay and Kasterlee I met the Spanish champion, Ruben Mendi, big guy on the left, one of the most enthusiastic people you will ever meet. And because it was his seed that produced the 2212 we have decided to attend the Spanish weighoff in September.
|
|
�
|
|
Monday, February 26
|
View Page
|
 |
So my seed selection for this year takes me back to where it all started....with Don Barron. With his new Michigan State record of 2404 I will be gunning for the guy standing beside him. Watch out Travis...lol !!! One night at Kasterlee he had a little too much to drink and gave me all of his secrets !!
|
|
�
|
|
Monday, February 26
|
View Page
|
 |
Why only 1 seed/plant you might be asking? 17 years ago when we moved to our current house, my wife said that I could only grow every other year. After growing for 15 years in a row, I owe her big time for missed holidays.
We are leaving Holland for Rome to board a ship to cruise the Mediterranean. Between Kasterlee and Amsterdam, we have seen many amazing sights in Belgium. Next year I'm growing 3 plants!!
|
|
�
|
|
Monday, March 11
|
View Page
|
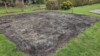 |
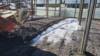
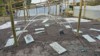
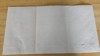
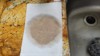
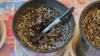
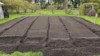
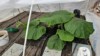
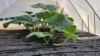
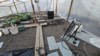
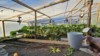
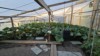
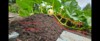
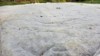
After the longest holiday of my life, I'm back from Europe and the 1st thing I did was take a soil sample this morning. Actually 14 years of retirement has been one big long holiday lol !!! Because I wasn't able to sow a rye cover crop last fall I decided to keep the patches weed free. The white spots you see on the soil is a combination of crushed oyster shells and PerLite. The oyster shells are applied in the fall to allow them to break down over winter. About 25 lbs per 1000 sq ft. The other white specs you see is Perlite. I've been adding it every year since 2016 at a rate of approximately 7 x 4 cu ft bags per 1000 sq ft. My soil is a clay loam.
|
|
�
|
|
Wednesday, March 13
|
View Page
|
 |
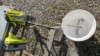
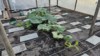
Weather in Richmond has been fairly dry and mild. Perfect for the 1st step of soil preparation....subsoiling.
Subsoiling is performed by dragging long tynes through the soil to breakup the hard pan underneath the topsoil. Subsoiling requires a lot of power so that's why you only see 1 blade on my homemade setup. I drive back and forth in 1 ft rows. Local farmers feel that this 1st step is 1 of the most important steps in preparing the soil for any crop.
|
|
�
|
|
Wednesday, March 13
|
View Page
|
 |
Weather in Richmond has been fairly dry and mild. Perfect for the 1st step of soil preparation....subsoiling.
Subsoiling is performed by dragging long tynes through the soil to breakup the hard pan underneath the topsoil. Subsoiling requires a lot of power so that's why you only see 1 blade on my homemade setup. I drive back and forth in 1 ft rows. Local farmers feel that this 1st step is 1 of the most important steps in preparing the soil for any crop.
|
|
�
|
|
Monday, March 18
|
View Page
|
 |
The 1st amendment I've always used but not often mentioned is Granular Humic. It's a really old product that has been used in gardens for decades. I thought it was for organic growers and flowers but wouldn't hurt the pumpkins. Now they are discovering that humic and fulvic are very important to the biologicals in the soil. Maybe it's helped more than I thought!!!
|
|
�
|
|
Monday, March 18
|
View Page
|
 |
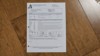
If you can see the recommended application rate you will see that it suggests 89 lbs per acre. I've always applied it 25lbs per 1000 sq ft.....a lot more than the suggested rate !!
|
|
�
|
|
Sunday, March 24
|
View Page
|
 |
So you've spent a lot of money and time on soil tests, analysis of the tests and purchasing all the amendments. Now the hard work. Spreading hundreds of pounds of fertilizers. If you don't spread the amendments equally, all your analysis and tests are a waste of time !! Too much in one spot and you have an excess. Too little in another won't be enouigh. I divide my patch into 6 sections. Then I weigh the amendments into 6 portions ...especially the small amounts of micros and borax etc. Then add 5 to 8 lbs of something bigger like SOP or gypsum in a 5 gallon pail and mix with a paddle mixer in an electric drill as in the pic I posted. Spreading and mixing will give a much better distribution and less problems.
|
|
�
|
|
Tuesday, March 26
|
View Page
|
 |
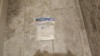
This my soil test for this month. I'll calculate the amendments with the Langley soil analysis and post later
|
|
�
|
|
Tuesday, March 26
|
View Page
|
 |
Same analysis enlarged so that it can be read easier...I hope
|
|
�
|
|
Tuesday, March 26
|
View Page
|
 |
These are the amendments I added to 1930 sq ft :
13 Lbs SOP
150 lbs gypsum
20 lbs Manganese sulphate
2 lbs Borax
2 lbs Zinc sulphate
0.2 lbs Copper sulphate
30 lbs Urea
30 lbs Calcium Nitrate
|
|
�
|
|
Tuesday, March 26
|
View Page
|
 |
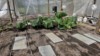
Amendments added along with 12 bags of PerLite and cultivated .
|
|
�
|
|
Tuesday, March 26
|
View Page
|
 |
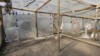
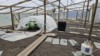
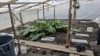
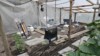
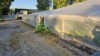
2 soil heating cables buried in a 6ft x 6ft square pattern. Frame erected over the soil heating cables ready for 6 mil greenhouse poly.
|
|
�
|
|
Tuesday, March 26
|
View Page
|
 |
A list of materials needed for this hoop house. 4 x 12ft 1/2" PVC pipe. Specify Sched 40 because it's thicker and stroger than the cheaper pipe. 1 x 10 ft Pipe for the center ridge beam. 8 x 3.5 ft 1/2" rebar. Space the rebars 9 ft apart. Poly cover is 6 mil greenhouse poly but any poly will do 13ft x 11 ft. And enough poly to enclose the sides. Use extra large binder clips to fasten poly sheet to PVC pipes.
|
|
�
|
|
Tuesday, March 26
|
View Page
|
 |
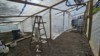
For a really efficient hoop house you need 3 more items. A small space heater, a small fan and a set of grow lights.
|
|
�
|
|
Tuesday, March 26
|
View Page
|
 |
Clamp poly on with binder clips. Add end covers.
|
|
�
|
|
Saturday, March 30
|
View Page
|
 |
This is the line up for 2024. My choice is based of 2 factors, luck and genetics. Don Barron has generously provided me seeds in the past 3 winning years . Hope to make it 4 in a row ! So this year I'm growing Don's winninig seeds from last year. The genetics of both seeds have grown some of the biggest best pumpkins in the world.
|
|
�
|
|
Saturday, March 30
|
View Page
|
 |
I'm detailing my filing method for some new growers I'm mentoring
|
|
�
|
|
Saturday, March 30
|
View Page
|
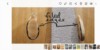 |
File the edges until you can see the joint between the 2 seed halves. Don't touch the tip.
|
|
�
|
|
Saturday, March 30
|
View Page
|
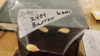 |
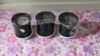
Soak the seeds in room temperature water for 5 hours. The dark color of the water is from a pinch of kelp powder. I've been doing that for years but can't remember why..lol...old age.
|
|
�
|
|
Saturday, March 30
|
View Page
|
 |
After a 5 hour soak we're going to place the seeds on 3 moist paper towels.
|
|
�
|
|
Saturday, March 30
|
View Page
|
 |
Fold the 3 paper towels over each other.
|
|
�
|
|
Saturday, March 30
|
View Page
|
 |
Pour some of the soaking liquid on the paper towels.
|
|
�
|
|
Saturday, March 30
|
View Page
|
 |
Sqeeze out as much water as you can with your hands. One big error in starting seeds is having the paper towels too wet.
|
|
�
|
|
Saturday, March 30
|
View Page
|
 |
Place the seeds on the "dry" paper towels and fold in half. Place them carefully in the ziplock bag. Make sure the seeds are in the same position within the folded paper towels.
|
|
�
|
|
Saturday, March 30
|
View Page
|
 |
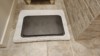
If you are lucky like me you will have a built in seed incubator. This is in the form of heater floors in a bathroom or kitchen. Place the ziplock directly on the floor.
|
|
�
|
|
Saturday, March 30
|
View Page
|
 |
Cover seeds with a heavy folded towel or bath mat and cover the mat with a cookie sheet. This will keep the seeds warm and dark.
|
|
�
|
|
Saturday, March 30
|
View Page
|
 |
Set the thermostat to 76 to 78 degrees F. Check the seeds in 48 hrs. I've had 99.9 % success with this method. If heated floors are not available then a heat matt will need to be purchased.
|
|
�
|
|
Saturday, March 30
|
View Page
|
 |
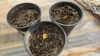
Prepare 1 gallon pots by washing them clean with dish soap and water. Fill with ProMix potting soil. Soak the ProMix until water flows out of the holes in the bottom of the pot. Discard the water in the trays. Cover with plastic wrap to prevent drying. Leave them on a heated floor or heat matt for the 2 days while you're waiting for the seeds to germinate.
|
|
�
|
|
Monday, April 1
|
View Page
|
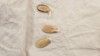 |
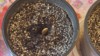
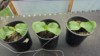
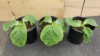
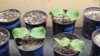
47 hrs later and all 3 seeds have germinated.
|
|
�
|
|
Monday, April 1
|
View Page
|
 |
Make a small hole in the soil ablout 2 inches deep. Use anything to make the hole. I always use a Sharpie pen. Top of the seed is about 1 inch below the surface of the soil.
|
|
�
|
|
Monday, April 1
|
View Page
|
 |
Drop the seed in the hole root side down and cover with the ProMix. The plants should breal ground in 2-3 days.
|
|
�
|
|
Monday, April 1
|
View Page
|
 |
I just want to mention that we often talk about deficiecies when looking at soil tests. The other reason to analyse soil is to look for excesses. I recently saw a soil test that was ecessively high in pottassium(600+ppm), phosphorus(600+ppm) and manganese(250+ppm) but extremely low in calcium(1000 ppm). I only mention this because I think one is working blindly without a soil tests. It may be the most important step in growing a giant. The soil that I'm discussing grew a 2000 plus pound pumpkin in 2023! The soil test in the picture is a random test to grab your attention (not the one I'm discussing).
|
|
�
|
|
Wednesday, April 3
|
View Page
|
 |
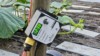
It's nice to know if your hard work is doing something. This meat cooking probe thermometer is ideal. Top temp is outside air. 2nd is outside soil temp. 3rd is inside hoop air temp. 4th is inside hoop soil temp over heating cables. Ready for the babies.
|
|
�
|
|
Thursday, April 4
|
View Page
|
 |
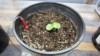
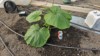
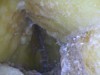
This picture was taken at 8am . The plants are almost out of the soil and the seed coat is trying to get off. If it looks"loose" then you can try to gently tease it off...or wait a little longer for it to come off by itself.
|
|
�
|
|
Thursday, April 4
|
View Page
|
 |
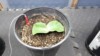
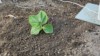
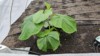
This pic taken at 6 pm on the same day as the the previous pic....10 hours later. Shell is off( Iteased it off) and the 2 cot leaves are spread out and growing. At this stage your potting soil should be moist enough so that no watering or fertilizing will be needed.
|
|
�
|
|
Saturday, April 6
|
View Page
|
 |
Exactly 1 week since filing and soaking seeds.
|
|
�
|
|
Tuesday, April 9
|
View Page
|
 |
10 days since filing the seeds. No water or fertilizers have been added to the ProMix.
|
|
�
|
|
Tuesday, April 9
|
View Page
|
 |
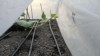
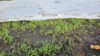
The soil is warming up. This the weed germination of my outside patch.
|
|
�
|
|
Wednesday, April 10
|
View Page
|
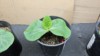 |
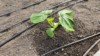
2nd true leaf starting to form.
|
|
�
|
|
Thursday, April 11
|
View Page
|
 |
Day 12 Fiirst watering yesterday for the Barron 2404
|
|
�
|
|
Thursday, April 11
|
View Page
|
 |
Big day yesterday in my outside patch. All amendments added and patch cultivated. The soil in this patch has never looked better. Usually at this time of year we are very wet but BC is in a drought.
|
|
�
|
|
Thursday, April 11
|
View Page
|
 |
The Langley calculations for my 770 sq ft outside patch
|
|
�
|
|
Friday, April 12
|
View Page
|
 |
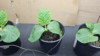
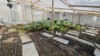
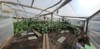
We start many seeds (if we're lucky enough to have them) to see if there's a better one or a poor one. The center plant has always looked best and it's proving itself now. Everything is good to go in the greenhouse so I will betransplanting the middle one tomorrow.
|
|
�
|
|
Saturday, April 13
|
View Page
|
 |
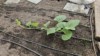
Transplanting the 15 day old starter plant is quite simple. Prepare a large space for the plant and sprinkle some Mycorrhrizae and Azos (azospirillium) in the hole and mix into the soil.
|
|
�
|
|
Saturday, April 13
|
View Page
|
 |
Remove the plant from the pot and lay it in the hole. It's important to note which is the 1st true leaf (the largest leaf) and place it in the opposite direction you want the pumpkin vine to grow in. You can also see that I've laid the whole plant at an angle pointing to the direction you want the vine to grow.
|
|
�
|
|
Saturday, April 13
|
View Page
|
 |
One thing I forgot to mention is to water the planting spot before you cover the plant. Then water the soil around the plant some more to make sure roots and surrouding soil is moist...not drowning!!
|
|
�
|
|
Tuesday, April 16
|
View Page
|
 |
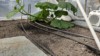
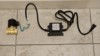
This is my CO2 setup for the hoophouse. The gas regulator is set on the lowest setting and I'm hoping a tank will last at least 10 days. We'll post when the tank empties. The 2 black lines runnig into the greenhouse are power and the other is the CO2 feed. This tube is strapped to the ridge beam to allow the CO2 to drop onto the plant.
|
|
�
|
|
Tuesday, April 16
|
View Page
|
 |
This "black box" monitors the CO2 and regulates it between a high of 900 ppm and a low of 700 ppm. The only thing I can't automate is shutting it off when the sun goes down. I need to go in the greenhouse and turn it off manually.
|
|
�
|
|
Thursday, April 18
|
View Page
|
|
I'm a guy. I don't read instructions. But when I did, I discovered that the black box has a built in light sensor that shuts off the CO2 at night. It also has a setting to shut down the CO2 when the temperature gets too high.
|
|
�
|
|
Thursday, April 18
|
View Page
|
 |
The Barron 2404
|
|
�
|
|
Friday, April 19
|
View Page
|
 |
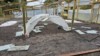
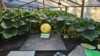
When I'm transporting pumpkins to weighoffs, I place them on 1.5" thick 4'x8' sheets of inexpesive styrofoam. One side of these sheets of styrofoam is coated with a very shiny reflective aluminum foil. Since the north side of a greenhouse provides very little if any light to the plants, I decided to reuse these sheets to line the north side of my greenhouse to reflect some light toward the plant. The effect is quite obvious. Hope this will lots of pounds ! The orange outline is the impression the 2212 that went 2500 miles to Sacremento and Half Moon Bay and back to Richmond.
|
|
�
|
|
Tuesday, April 23
|
View Page
|
 |
Just an update on the Barron 2404
|
|
�
|
|
Tuesday, April 23
|
View Page
|
 |
The Barron 2144's starting
|
|
�
|
|
Saturday, April 27
|
View Page
|
 |
Barron 2404. Now if only the main vine would settle down !!
|
|
�
|
|
Wednesday, May 1
|
View Page
|
 |
Just an FYI picture for CO2. The tank was left over from last year and I don't know how much was in it. I started CO2 on April 16th and now 2 weeks later we are on the same tank. On a daily basis I can't see the gauge on the tank going down. The CO2 concentration is set at 900 ppm. It doesn't take much to fill the hoop.
|
|
�
|
|
Wednesday, May 1
|
View Page
|
 |
The 2404 Barron yesterday. It's well ahead of the 2183 Mendi of last year. We still haven't given it any fertilizers with any macro or micro nutrients. Only biologicals containing kelp, azos, mykos, subtilis bacteria, humic and fulvic, enzymes and chitin have been given as a drench every other day. Today we start adding a vitaminB complex to the above mixture.
|
|
�
|
|
Saturday, May 4
|
View Page
|
 |
Barron 2404 about 6 ft long 37 days from soaking. Today was the 1st day of vine burying because the secondary roots are popping out of the nodes. I'm trying a slightly different method of burying vines this year. Last year I mixed everything into the mixture and then covered the vines. This year I'm spreading some Azos and Mykos under the node and then burying with a 50/50 mixture od compost and sand. Diluting with sand because the compost is super rich. Last year I didn't water in the burying mixture. This year I'm drenching the mixture on the vines with a concocotion of biologicals. So just to repeat myself, which I do a lot more of as I get older, I still have not given the plant any "fertilizer" of any sort. I know everything the plant needs is in the soil. The experiment is to see if adding lots of biologicals will make the system more efficient. Seems to be working. Those big leaves are 2 ft across. I don't know if that's a good or bad thing.
|
|
�
|
|
Monday, May 6
|
View Page
|
 |
I ran out of cylinder tank CO2 feeding the small hoop so I started up the propane CO2 geneartor. I ran it for 7 hrs and it couldn't make enough CO2 in such a large greenhouse (2000 sq ft). Then I got a brainwave at 3am !!! Ya, I know , we're sick !!
|
|
�
|
|
Monday, May 6
|
View Page
|
 |
The brainwave was to make a section of the greenhouse smaller. It worked. Reducing from 2000 to 500 sq ft allowed the CO2 generator to get to 900 ppm in about 5 to 10 minutes. Also, I didn't know how much heat the generator was going to make. As it turns out the heat loss through the single layer of poly was much more than the heat generated and the temp in the greenhouse didn't rise.
|
|
�
|
|
Wednesday, May 8
|
View Page
|
 |
She hit the end this morning.....9 ft long.
|
|
�
|
|
Wednesday, May 8
|
View Page
|
 |
Barron 2404
|
|
�
|
|
Wednesday, May 8
|
View Page
|
 |
Everything is dialed in nicely. Top temp was 45 F earlier this morning. Cooler than normal for Richmond. Next temp is the outside soil temp. This is the first day outside soil temp is over 60 F. Weeds are growing like crazy and I've covered a lot of bare soil with weed cloth to save myself a lot of time. 3rd temp is the air temp inside the hoop. Bottom temp is the soil temp over the soil heating cables.
|
|
�
|
|
Wednesday, May 8
|
View Page
|
 |
The previous thermometer pic was taken at 6:50 am. At 11:59 am it was 95 F.
|
|
�
|
|
Wednesday, May 8
|
View Page
|
 |
!8 minutes later it was over 100 F! Needed to turn the misters on for the 1st time this year.
|
|
�
|
|
Saturday, May 11
|
View Page
|
 |
A senior moment. Forgot to open the greenhouse in the morning to attend a breakfast event. By noon the temperature was 115 F. The thermometer says 110 but that pic was 10 min after I opened everything. Also, the exhaust fan was on but clearly not powerful enough. I installed another fan.
|
|
�
|
|
Saturday, May 11
|
View Page
|
 |
This is the effect of 115 F temps. The next post will show how it rebounded by this morning.
|
|
�
|
|
Sunday, May 12
|
View Page
|
 |
Luckily I think she'll be alright. One young leaf was damaged but the plant seems to be OK this morning. I'm wondering if all the biologicals are working to increase the stress tolerance?
|
|
�
|
|
Sunday, May 12
|
View Page
|
 |
Up until today I set my CO2 generator to 900 ppm. After seeing Travis's YouTube yesterday I increased it to 1200 ppm.
|
|
�
|
|
Sunday, May 12
|
View Page
|
 |
My CO2 generator is an 8 burner model with only 4 burners installed. The other 4 are plugged. I did this hoping I could generate a slow steady amount of CO2 without creating too much heat. It works well but is slow. This morning I installed a space heater which I used last year to make CO2. It can generate 300 to 400 ppm in minutes. Once it gets up to 1200 ppm, it gets turned off and the "real" CO2 generator will maintain.
|
|
�
|
|
Thursday, May 16
|
View Page
|
 |
Barron 2404. Main vine 13 ft long. Leaves are very big ...2ft across. The plant is doing well but right from the beginning I noticed that the 1st and 2nd secondaries on the right were runts. The long secondary on the right is #3. Number 2 secondary on the left is also a runt. All other secondaries are developing normally. I'll fill the empty spots with tertiaries and hope for the best. I'll also delay pollination to allow the plant to form a few more secondaries to make up for the missing ones. Fingers crossed!
|
|
�
|
|
Monday, May 20
|
View Page
|
 |
A fun picture....for a pumpkin grower....lol. Stakes are showing daily gains with the orange stakes at the 15 ft mark. Vine burying is happening but very few tertiaries popping up! 15 good secondaries formed.
|
|
�
|
|
Wednesday, May 22
|
View Page
|
 |
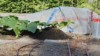
We had a wind storm 2 nights ago. The last hoop was blown upwards 2 ft off the rebar and the poly was sitting right on top of the vines and leaves.
Luckily no damage to the Barron 2144.
|
|
�
|
|
Thursday, May 23
|
View Page
|
 |
This is my new toy. It's a 24 volt solenoid activated water control valve. I'm hoping to plug the transformer into a temperature regulated controller to turn my mister system on when the temps get over 80 F. On a sunny day it means that the valve will be activated for about 5 hours. My question is : Will that solenoid valve survive being on for 5 continuous hours? Please feel free to comment.
|
|
�
|
|
Thursday, May 23
|
View Page
|
 |
The picture is named "Pumpkin Sunrise".
|
|
�
|
|
Sunday, May 26
|
View Page
|
 |
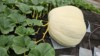
Barron 2404. 1st female on the main vine at 16.5 ft. It looks like a keeper!
|
|
�
|
|
Sunday, May 26
|
View Page
|
 |
Barron 2404. 17 ft main x 20 ft wide. It could have been bigger but weather has been cold and wet during the last week. In vancouver June weather can be terrible hence the nickname.....Juneuary...like January weather. This year it's Mayuary ?*@!#...lol.
|
|
�
|
|
Tuesday, May 28
|
View Page
|
 |
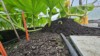
There's the reason why we bury vines....extra roots. I add more soil on top of the roots that expose themselves like this. Btw that root wasn't there yesterday.
|
|
�
|
|
Sunday, June 2
|
View Page
|
 |
2404 Barron pollinated by self
|
|
�
|
|
Sunday, June 2
|
View Page
|
 |
!9 secondaries with tetiaries filling in for 2 missing secondaries (should have had 21 secondaries). Baby is at 16ft. Plant is 20 ft x 22 ft.
|
|
�
|
|
Sunday, June 2
|
View Page
|
 |
This is a side view. Longest vine on the left is a secondary. This plant is about the same size as last year which is pretty good considering that the amount of sunshine was less in May.
|
|
�
|
|
Monday, June 3
|
View Page
|
 |
Building a ramp for the main vine . Hopefully this will help the pumpkin's stem final position. I'm just a copycat. Travis looks like he does it lol. Makes sense.
|
|
�
|
|
Monday, June 3
|
View Page
|
 |
Forming an "S" bend to give the pumpkin lots of room to grow. A difficult task this year as the vines are so big.
|
|
�
|
|
Monday, June 3
|
View Page
|
 |
Last night's growth was shocking! It's now 21fy x 24ft.
|
|
�
|
|
Monday, June 3
|
View Page
|
 |
This is what happens (overnight) if you get super fast growth and you try too much bend at once.
|
|
�
|
|
Tuesday, June 4
|
View Page
|
 |
This is the control center. The large black box is a CO2 generator controlled by a "small black box" under the aluminum flashing . The space heater (glowing) is turned on to give an instant boost of CO2 to the greenhouse raising CO2 to 1500 ppm in about 10 minutes. It's turned off and the CO2 generator will maintain levels of CO2 approximately 1000 ppm. I could increase the output of CO2 but I want to balance CO2 production and heat build up. The large plastic drum is where I mix my concoctions of biologicals and a pump, via a hose and spray wand, will drench each mound of vine burying soil. The leaves are never hit with anything but water. I.e. no foliar feeding. The concoction consists of liquid kelp, liquid humic and fulvic, an enzyme that breaks down dead root matter to prevent root rot, a natural plant immunity booster made from chitosan, a microbial inoculant composed of 5 different Bacillus species and a mixture containing all the B vitamins. Since amendents were added in March no macro or micro fertilizers have been added to the soil or concoction. A new soil test last week has shown that Potassium, Manganese and Boron are being used up so I'll start adding those soon. The lounge chair is where a refreshing beer is consumed after a hard day of vine burying.
|
|
�
|
|
Tuesday, June 4
|
View Page
|
|
A couple of biologicals I forgot to mention. These 2 ingredients seem so common place now compared to 10 years ago. Azos and Mykos and lots of both !
|
|
�
|
|
Friday, June 7
|
View Page
|
 |
Morning coffee in the parch.
|
|
�
|
|
Friday, June 7
|
View Page
|
 |
Leaving the baby for a couple of days and it"s sticking almost straight up. I built a landing pad for it .
|
|
�
|
|
Sunday, June 9
|
View Page
|
 |
It worked perfectly !!
|
|
�
|
|
Sunday, June 9
|
View Page
|
 |
Barron 2404 #2 pollenated x self.
|
|
�
|
|
Sunday, June 9
|
View Page
|
 |
Nice looking male right?....Wrong !!
|
|
�
|
|
Sunday, June 9
|
View Page
|
 |
Previously, I would cut males off and start pollinating. Not all males are created equal !! This male has a lot more visible pollen than the previous pic(male) and it was used to pollenate the female.
|
|
�
|
|
Sunday, June 9
|
View Page
|
 |
Side view of the 2404 Barron #2 at 20 ft on the main.
|
|
�
|
|
Sunday, June 9
|
View Page
|
|
Just a thought and a scientist may be able to answer the question as to whether bigger pollen is better. My pollen/male flower theory was my own personal theory.
|
|
�
|
|
Monday, June 10
|
View Page
|
 |
This morning I removed the leaf, tendril and secondary from the #2 Barron 2404. I'm hoping this will be an easy way of arranging vines as the pumpkin grows. The main vine past the pumpkin will be left to grow as much as she wants as I have lots of space for it. My plan this year is to grow a plant larger than my usual 1000sq ft. ...1400 sq ft.
|
|
�
|
|
Monday, June 10
|
View Page
|
 |
Barron 2404 #1 at 8 dap.
|
|
�
|
|
Tuesday, June 11
|
View Page
|
 |
The stem of a 3000 pounder !! lol DAP 9
|
|
�
|
|
Wednesday, June 12
|
View Page
|
 |
Barron 2144. This the Gienger Ramp. The main vine is raised with soil to lift the potential pumpkin up without disturbing any roots. The secondaries grow down the ramp and should make it easier to position pumpkins without disturbing roots. I've done this with the Barron 2404 and I love the way the it places the pumpkin in relation to the vines. Vine burying is continued normally...on top of the vines up the ramp.
|
|
�
|
|
Thursday, June 13
|
View Page
|
 |
Finger nail biting time. Dap 11 and I'm leaving for 4 days!! Barron 2404 #1
|
|
�
|
|
Sunday, June 16
|
View Page
|
 |
The Barron 2404 survived my absence well. I had to got out and take a picture of it at 11pm whem we got home. Now for hours of vine burying!!
|
|
�
|
|
Wednesday, June 19
|
View Page
|
 |
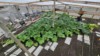
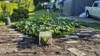
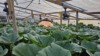
Pic of the patch 2404 Barron. Plant is growing really well and all this is without adding any fertilizer since the soil was amended in March following the Langley recommendations. The only "nutrients" were the biologicals. Yesterday was the 1st addition of Mn, K and Boron according to my soil test showing slight deficiencies in those elements.
|
|
�
|
|
Wednesday, June 19
|
View Page
|
 |
Barron 2404 DAP 17
|
|
�
|
|
Thursday, June 20
|
View Page
|
 |
I'm growing a bushel gourd. Haven't got a clue as to what I'm doing ! Do you bury vines ? Any suggestions will be appreciated.
|
|
�
|
|
Thursday, June 20
|
View Page
|
 |
Today we did what I think is the hardest job in growing pumpkins. That is, placing the growing board under the pumpkin when using an "S" bend. Success!! Barron 2404 DAP 18
|
|
�
|
|
Friday, June 21
|
View Page
|
 |
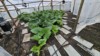
Barron 2144. Just a quarter of the size that the Barron 2404 in the greenhouse is. Both have been fed nothing but a lot of biologicals which only goes to point out that without higher tempertures, you can throw anything at a plant but heat is the key ingredient. British Columbia has been cool and wet all spring and the plants show it. A female is on the main and ready for pollination tomorrow.
|
|
�
|
|
Saturday, June 22
|
View Page
|
 |
Barron 2144 pollinated by Barron 2404.
|
|
�
|
|
Monday, June 24
|
View Page
|
 |
Dap 21 The Barron 2404 blew a hole in all my growing theories! June 15th soil test almost perfect. Too much water?????
|
|
�
|
|
Tuesday, June 25
|
View Page
|
 |
AUTOPSY: Can't see a reason. Split isn't close to a rib. ???? One of the joys of growing giants.
|
|
�
|
|
Tuesday, June 25
|
View Page
|
 |
Barron 2404 #2 backup DAP 15
|
|
�
|
|
Tuesday, June 25
|
View Page
|
 |
How do you get rid of a post that grew in front of a backup pumpkin?
|
|
�
|
|
Tuesday, June 25
|
View Page
|
 |
The post is buried 4 ft into the ground and used a bottle jack to push it up a few inches at a time. Now for the hard work...rearranging the vines.
|
|
�
|
|
Tuesday, July 2
|
View Page
|
 |
This is the Barron 2144. I'm growing it on a "Gienger ramp" where the main vine is grown on ramp leading up to the pumpkin and the secondaries are growing down the sides of the ramp. Hopefully we can remove some soil under the pumpkin as she grows leaving the main and secondaries high enough so that they will not be disturbed as the pumpkin gets larger. I think , hopefully, that it will serve 2 purposes. Not disturbing mains and secondaries as the pumpkin gets bigger. And, 2, we will have every root available for maximum growth. You can't see it but there are roots growing into the ramp from the node that the pumpkin was started from.
|
|
�
|
|
Wednesday, July 10
|
View Page
|
 |
Perfect 5 lobe females do not nessarily make beautiful pumpkins ! But the world record wasn't very pretty neither lol. This the Barron 2404 Dap 30 Ott 254. Gained 51 lbs yesterday.
|
|
�
|
|
Wednesday, July 10
|
View Page
|
 |
Barron 2404 top view.
|
|
�
|
|
Friday, July 12
|
View Page
|
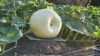 |
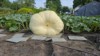
The white ghost ! Barron 2144 Dap 20 Ott 159
|
|
�
|
|
Tuesday, July 16
|
View Page
|
 |
Every leaf counts !!!
|
|
�
|
|
Tuesday, July 16
|
View Page
|
 |
Barron 2404 Dap 36 Ott 308 Picture is a little distorted because it's taken on "panorama" mode. Plant is about 1300 sq ft with 200 sq ft of space to fill....which it will. As most of you know, the plant will really slow down when the pumpkin sets. I really like Ruben Mendi's method of curving the 4th or 5th secondary backwards and the next secondary curved forwards. The main vine is about 1/2 inch in diameter while the 4 secondaries are still growing and are over an inch in diameter with leaves twice the size of the main.
|
|
�
|
|
Sunday, July 21
|
View Page
|
 |
Barron 2404 Dap 41 OTT 342.5" About 920 lbs. The plant is 1500 sq ft with another 100 sq ft to go. About 1100 sq behind the pumpkin. The 4 Ruben Mendi secondaries behind the plant are still growing wildly with leaves nearly 30 inches wide and huge vines and stems. This is the 2nd pumpkin that set after the 1st one cracked on dap 22. Lucky for backups but the vine grew into the lowest and most awkward to work with part of the greenhouse. It's hard on my back but I shouldn't complain as it's averaging ove 49 lbs per day for 12 days. It's starting to get exciting for sure and it is graphing at a higher growth rate than last years' 2212.
|
|
�
|
|
Monday, July 22
|
View Page
|
 |
Barron 2144 Dap 30 Ott 265 Weight 429 lbs. So far it's my fastest growing outside pumpkin.
|
|
�
|
|
Wednesday, July 24
|
View Page
|
 |
First noticed this morning on the Barron 2404. Will decided tomorrow morning where to open the split to relieve pressure. Pumpkin, stem or both. Will use a new blade to make the relief cuts and then dust with sulphur powder.
|
|
�
|
|
Friday, July 26
|
View Page
|
 |
This is the bad.....of good, bad and ugly. The small crack was noticed yesterday morning and this morning it did not grow any larger or longer.
|
|
�
|
|
Friday, July 26
|
View Page
|
 |
The good... hopefully. With a new blade I extended the stem crack and left the pumpkin alone. In past years' stem cracks appear and usually do not cause problems. I made a mistake though, in that, I could have made the cut more parallel to the fibers.
|
|
�
|
|
Friday, July 26
|
View Page
|
 |
Sulphur powder brushed onto the crack and split. Fingers crossed.
|
|
�
|
|
Friday, July 26
|
View Page
|
 |
Amazing !! I'm talking about my Barron 2404 plant. The picture shows a tertairy that escaped out of the door onto the gravel driveway. It's about 15 ft long with no vine burying and no watering other than it's supply from the secondary vine. The whole 1600 sq ft of plant is like this! Not a spot of PM or an aphid! The main vine was terminated today. About 25 ft before the pumpkin and 35 ft past the pumpkin. DAP 46 OTT 368 Weight 1118
|
|
�
|
|
Saturday, July 27
|
View Page
|
 |
36 hrs after cutting the stem, it has opened and elongated to the full length of the cut. The pumpkin crack has remained the same. This is what we predicted and were hoping for.
|
|
�
|
|
Monday, July 29
|
View Page
|
 |
I think this is my worst split / best fix !!
|
|
�
|
|
Monday, July 29
|
View Page
|
 |
Wow is that split growing fast! I'm glad I relieved the crack early as it is following the cut perfectly. Crack on pumpkin skin is widening but not lengthening. Surgery is credited to Glenn (Northshore Boyz) . He taught me that trick over 10 years ago.
|
|
�
|
|
Tuesday, July 30
|
View Page
|
 |
Barron 2404 DAP 50 OTT 385.5 inches Weight 1279 lbs. High hopes for this baby. 130 lbs ahead of last years 2212 on DAP 50. It also has a much better daily weight gain than the 2212.
|
|
�
|
|
Tuesday, July 30
|
View Page
|
 |
Barron 2144. If you look back on this diary you will see the ramp I built up to support thr main vine and secondaries. Well, the ramp worked beautifully for the vines but a disaster for the pumpkin !! As you can see I couldn't place a growing board under the pumpkin because it was too heavy. Actually my fault as I didn't place it soon enough and the pumpkin grew so fast it caught me off guard. Today is DAP 38. OTT 322 . It's the 1st time I could measure accurately as the stem side of the pumpkin was buried into the ramp. Amazingly both the Barron 2404 (greenhouse) and the Barron 2144 (outside) were 769 lbs on Dap 38.
|
|
�
|
|
Tuesday, July 30
|
View Page
|
 |
The soil of the ramp was almost up to the stem and the lower portion of the pumpkin was covered with soil. Five inches of soil was removed from the ramp to expose the pumpkin.
|
|
�
|
|
Tuesday, July 30
|
View Page
|
 |
With no growing board under the pumpkin, I dug a trench to prevent a buildup of water. Let's hope its not a path for critters to make a nest !!
|
|
�
|
|
Friday, August 2
|
View Page
|
 |
My latest soil analysis taken on July 22nd. My analysis 6 weeks ago indicated low Mn, Mg, S, N and B. I used 2 Tbsp of Manganese Sulphate powder twice a week and it seems to have worked nicely. I used Calcium Nitrate granules at the same rate of 2 Tbsp twice a week and that worked very well. I used 1 Tbsp Solubor twice a week and that really took the Boron to the highest levels I've ever seen in my patch. I tried not to take any of my compost vine burying mixture with the soil sample but with an OM of 24.4 I must have, which makes everything quite high as the compost is high in most elements .So just to put things in perspective, I will brag about my 1600 sq ft of the most beautiful plant that has no issues ! The point I'm trying to make with all this is that I didn't spend any money on fancy preparations to correct my soil. The powders and granules I used are readily available and cheap. I probably used less than a dollars worth of product. Btw all the powders were dissolved in 40 gallons of water, mixed with a number of biologicals and pumped through my drip tape system.
|
|
�
|
|
Friday, August 2
|
View Page
|
 |
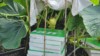
I'm posing with the Barron 2404 and the biologicals that were provided to me to use as a test to see how they would work with pumpkins. Hygroben is a mixture of 5 different species of Bacillus bacteria. Hygrozyme is an enzyme product that breaks down dead and decaying organic matter to release their elements faster. Hyshield is a chitin made from crab shells. Chitin imparts a lot of immunity to disease for the plant. Hyclean is an organic plant safe detergent that was designed to clean irrigation systems including drip tape. You add 2 tablespoons to your fertilizer mixtures every time you apply. My drip tape is in it's 4th season and working very well. I can tell it cleans the scum that forms on everything during the growing season. This company focused primarily on the cannabis industry but is also expanding into agriculture.
|
|
�
|
|
Friday, August 2
|
View Page
|
 |
I'm starting to worry about the stem crack on the Barron 2404. It's been widening but isn't getting any longer. So I've decided to lengthen the crack approximately 1 ". The funny looking stuff on the top end of the blade is black electrical tape to protect my fingers from the blade.
|
|
�
|
|
Friday, August 2
|
View Page
|
 |
You should be able to see the new cut continuing from the crack.
|
|
�
|
|
Friday, August 2
|
View Page
|
 |
A new dusting of sulphur powder to protect the new cut.
|
|
�
|
|
Saturday, August 3
|
View Page
|
 |
Thanks for the suggestion Ruben !! The inside is dry...I think. As expected the stem is hollow. The clear tubing goes in 5 inches !!
|
|
�
|
|
Saturday, August 3
|
View Page
|
 |
Thanks Ian and Glenn !! The sand is placed !!
|
|
�
|
|
Tuesday, August 6
|
View Page
|
 |
Barron 2144 DAP 43 Weight 900 lbs
|
|
�
|
|
Tuesday, August 6
|
View Page
|
 |
BUT....it split !! BES.....or just BS will do...lol.
|
|
�
|
|
Tuesday, August 6
|
View Page
|
 |
Cool pic of the inside of the Barron 2404 split stem with my new toy. An inspection camera. All looks dry and healthy.
|
|
�
|
|
Thursday, August 8
|
View Page
|
 |
This is a BES from the inside. Looks like there was solid pumpkin at one time but literally pulls itself apart from rapid growth. Or any other theories out there ?
|
|
�
|
|
Thursday, August 8
|
View Page
|
 |
So PM started on the 2144 Barron yesterday. Amazing how it shows up in 1 day !!
|
|
�
|
|
Thursday, August 8
|
View Page
|
 |
The leaf on the right is sprayed with an oil called "Hygropunch". It is produced near me in BC, Canada and is certified for use in USA but not in Canada!! It's an oil based product (not neem). If you look closely at the 2 leaves , you can see that the right leaf is a bit shiny...the oily coating. It can be used as a preventative or as a treatment. I've been using it on the Barron 2404 plant and is working better than some of the chemicals I've used this year. It halts the spread of the PM. You can see a shadow or a halo of the PM spots after spraying and they haven't spread or gotten any larger since. July 30 th was my 1st spray of oil and PM has not progressed. In some areas where I missed with the sprayed oil, the PM pops up very quickly and I spray the missed areas. The concentrated oil is recommended to be used at a 2% solution. I'm going to try 3% in some spots to see if any leaf damage will occur. I'm amazed with this product ! Check out their web site " Hygrozyme.com. Pumpkin is still growing (1544 lbs today) so it seems like it's not harming the leaves. Will post pictures of the same 2 leaves in the future.
|
|
�
|
|
Friday, August 9
|
View Page
|
 |
The stem is massive and the split is widening. Decided to extend the stem split again(2nd time) and start a slit on the pumpkin skin with a cross hatch. The pumpkin is still growing so I'm not worried about the crack going into the cavity.
|
|
�
|
|
Friday, August 9
|
View Page
|
 |
Barron 2404 DAP 60 OTT 419" Weight 1592 lbs. Hard to get decent pictures as the pumpkin is growing very close to the greenhouse wall.
|
|
�
|
|
Saturday, August 10
|
View Page
|
 |
Last year I focused on keeping all the elements in the soil balanced according to the Langley estimator. This seemed to work well and stopped the guessing game of the "Moron" grower.....put more on ! (2212 lbs) This year I've also done the soil analysis and balanced stuff with the Langley....same as last year. This year I'm becoming a "Moron" grower again but with a difference. I'm applying beneficials and biologicals to excess. Here's a list of things I'm applying every day in 40 gals water and pumped through the drip system. BTW I also used this concoction twice a week during the growing season. The pumpkin is over 1600 about the same as last year's 2212. The plant is bigger and in better shape but that could be the different genetics. The real test will the weighoff...lol.
1) 2 Tbsp Bud Candy
2) 2 Tbsp B52 viatmin complex
3) 1/2 Cup Hygrozyme ....an enzyme OM digester
4) 1/2 Cup Hyshield...a chitin product derrived from crab shells
5) 1/2 Cup Hygroben...a mixture of 5 species of Bacillus
6) 1/2 Cup Affinity ...a mixture of kelp, humic and fulvic acids
7) 1/2 Cup Eco Tea Catalyst...a mixture of simple and complex sugars(smells like molasses)
8) 1/2 Cup liquid kelp
9) 1/2 Cup KTS 0-0-25...not the common 0 0 25. This is Potassium Thiosulphate. It's slightly acidic and mixes well with the other ingredients.
10) 2 Tbsp of Hyclean...an organic, plant friendly deterrgent to clean the drippers.
|
|
�
|
|
Monday, August 12
|
View Page
|
 |
Because we only grew 1 pumpkin in the greenhouse, we had extra space to try a few veggies in there. Tomatoe plants(edible) went wild but very few pollinations so not many toms. Conversely, The jalopena peppers were being harvested in the middle of july. Easily a month earlier than growing outside. The veggie plants loved good pumpkin soil !
|
|
�
|
|
Monday, August 12
|
View Page
|
 |
The Barron 2404 is still growing and widening the stem split. This shows the slits in the pumpkin skin I made a couple days ago. With all all the splits happening around the world, I'm measuring every day to check for growth...or not!
|
|
�
|
|
Monday, August 12
|
View Page
|
|
When I posted my daily feeding schedule a few days ago, some people were wondering about the EC of the mixture. In my OCD fashion I measured the ppm's of every addition and will post them here. All measurements taken after the addition was made into 40 gallons water.
1) 0-0-25 KTS 1/2 Cup= 260 ppm
2) CalMag 4 Tbsp=24 ppm
3) Bud Candy 2 Tbsp= 0 ppm
4) B52 Vit 2 Tbsp= 6ppm
5) Hyclean 2 Tbsp=0 ppm
6) Affinity 1/2 Cup= 15ppm
7) Hygroben 1/2 Cup=0ppm
8) Hyshield 1/2 Cup= 0ppm
9) Hygrozyme 1l Cup= 10 ppm
10) EcoTea 1/2Cup=15 ppm
11) Liquid kelp 1/2C = 22ppm.
Total ppm of the solution was 386. Not very high IMO
|
|
�
|
|
Thursday, August 15
|
View Page
|
 |
OUCH !!! lol 11" deep Barron 2404
|
|
�
|
|
Thursday, August 15
|
View Page
|
 |
The crack Barron 2404. The pumpkin crack has not moved since surgery. The stem crack is widening as the pumpkin grows. From this picture, you can see that the point of the crack is going in different directions. I'm going to extend the crack another 1/2 ".
|
|
�
|
|
Thursday, August 15
|
View Page
|
 |
She's a beauty !!
|
|
�
|
|
Friday, August 16
|
View Page
|
 |
Yesterday I decided to lengthen the slit by about 1/2". The fine line past the crack is the new cut. It's definitely widening as the pumpkin is growing.
|
|
�
|
|
Friday, August 16
|
View Page
|
 |
Just a pic showing the size of the stem and the position of the stem crack.
|
|
�
|
|
Sunday, August 18
|
View Page
|
 |
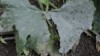
On Aug 8 th I posted a picture of PM starting on the Barron 2144. The pumpkin went down to BES but I kept the plant growing as a testbed for this new fungicide called "Hygropunch". The leaf on the lower right was sprayed on Aug 8th when the picture was taken. 10 days later and the PM is gone! As you can see the other leaves are getting seriously infected.
|
|
�
|
|
Sunday, August 18
|
View Page
|
 |
This a picture of the 2404 Barron growing inside the greenhouse. The PM had started inside 2 weeks before the outside plant. I was trying to be proactive and had sprayed the plant 6 times with agricultural grade fungicides. As with past growing years I knew that those fungicides would only slow the PM but not stop or eradicate it. This year was no different. The PM continued to develop. Since this year I wasn't going to grow a pumpkin( but I did!!), I experimented with a few different things and on Aug 2nd I gave the plant a heavy spray of "Hygropunch" oil fungicide delivered through my overhead mister system. 16 days later there is no sign of PM !! About a week after the initial spray, I could see the "shadow" areas of where the Hygropunch had not reached the leaves. I hand sprayed those areas. I have never had such a clean looking plant. My biggest worry using the oil was clogging the stomata or some other function of the plant and slowing the pumpkin growth. BUT... since Aug 2nd the pumpkin has gained over 400 lbs !!
|
|
�
|
|
Saturday, August 24
|
View Page
|
 |
The official name of the Barron 2404 is...................................."Pucker Lips".
|
|
�
|
|
Saturday, August 24
|
View Page
|
 |
Barron 2404 DAP 75 OTT 448.5" 1883 lbs Smooth shiny skin. No canteloping
|
|
�
|
|
Saturday, August 24
|
View Page
|
 |
An update on the stem split. Looking GOOD !!
|
|
�
|
|
Saturday, August 24
|
View Page
|
 |
This is an update for the organic Hygropunch oil fungicide. The leaf is from my zucchini which split naturally. I think the sprayed side is pretty obvious and amazing !! This fungicide has definitely lessened the number of applications of harsh chemicals on my pumpkin plants.
|
|
�
|
|
Tuesday, September 3
|
View Page
|
 |
So I was away from the patch for 3 days and these tertiaries popped up. I try very hard to cut them off all through the season but at this time of the year it's a struggle. I would like to know what you growers out there would do? Cut them off or let them grow? The leaves are showing their age and the gains per day are really slowing down. I'm always looking for new babies and cut them off ASAP. Please leave your comments. Thanks
|
|
�
|
|
Wednesday, September 4
|
View Page
|
 |
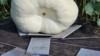
Pucker Lips just broke 2000 !! One of my OC measurements I do at this time of year is measuring the height of the pumpkins. This one is my tallest and 3 inches higher than the 2212. It's 45 inches tall !!
|
|
�
|
|
Wednesday, September 25
|
View Page
|
 |
The gains are really slowing down so a few leaves were sacrificed to get the picture. Hope she's packing it on inside.
|
|
�
|
|
Friday, October 4
|
View Page
|
 |
Who's lifting who??? See you at the weighoff.
|
|
�
|
|
Friday, October 4
|
View Page
|
 |
Big pumplins require big toys to move. Many thanks to fellow pumpkin grower, Harman, for lifting my big one with his big toy !!!
|
|
�
|
|
Friday, October 4
|
View Page
|
 |
Big pumpkins need big trailers to carry them to weighoffs. Thanks to fellow pumpkin grower, Andy, for the use of his trailer!!!
|
|
�
|
|
Saturday, October 5
|
View Page
|
 |
Meeting up at Krause Berry Farm weighoff with good friends Jake Van Kooten, past world record holder of 2008 with a 1536 lb beauty, Scott Carley who broke Jake's long standing BC record and earned his jacket and Trevor Halliday who earned his jacket and 2 Howard Dills in his 2nd year of growing.
|
|
�
|
|
Sunday, October 6
|
View Page
|
 |
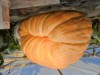
She had an amazingly flat bottom.
|
|
�
|
|
Sunday, October 6
|
View Page
|
 |
Many thanks to Don Barron for great seeds, my wife, Janet, for putting up with a LOT of pumpkin BS, and many friends and family who helped along the way. Also, Hygrozyme for supplying great soil beneficials and Carpinito Brothers Pumpkin Patch for a great venue and prizes.
|
|
�
|
|
Sunday, October 6
|
View Page
|
 |
No words needed !!!!
|
|
�
|
|
Wednesday, October 9
|
View Page
|
 |
Every year we strip off the poly to allow nature to do it's thing to the soil. Fall rye will be sown in a couple of days.
|
|
�
|
|
Thursday, October 10
|
View Page
|
 |
Fall rye seeds are sown and then covered with ReMay. This helps in keeping the patch from being a giant bird feeder and helps germinate the seeds a bit faster. You can see that the grass lifts the ReMay as it grows. Bricks are used at the edges to hold the cloth down as it is so light that slight winds will blow the ReMay off.
|
|
�
|
|
Thursday, October 10
|
View Page
|
 |
Fall rye about 10 days old. Remay can be removed anytime after the grass grows to about 4 inches. Just to be clear, this is my outdoor patch which I had sown the seeds a couple of weeks ago.
|
|
�
|
|
Sunday, October 13
|
View Page
|
 |
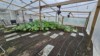
The patch is cleaned out and poly removed. The ceiling of the greenhouse has been raised because I made it too low on the short side. Now my poor back won't have to bend over so much. Rye seeds will be sown today. ReMay will be applied over the seeds. Now all there is left to do is wait!! But impatient for next year to start.
|
|
�
|
|
Sunday, October 13
|
View Page
|
 |
Previous pic was the old roof and this pic is the new higher roof.
|
|
�
|
|
Thursday, October 17
|
View Page
|
 |
I was a little worried that the truck crane was too small !!! Don't forget to vote if you liked my diary
|
|
�
|
|
Thursday, October 24
|
View Page
|
 |
Returned to the scene of the crime today!
|
|
�
|
