|
Wednesday, January 1
|
View Page
|
 |
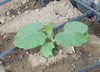
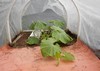
Picture taken: December 2013
It may be snowing outside but I am still growing pumpkins as part of another winter project. While last winter yielded a little 220.3 pound pumpkin named “Snowball” the results that seeds from that pumpkin went on to produce were simply amazing. This provided proof that my winter growing set-up can produce seeds that can be very competitive which was a relief after all the time and work that goes into such a project.
There are never any guarantees in growing and in the winter the risks are even higher as just one night where the heating system fails can mean the end to the entire project. However, I am going to make another attempt to grow a pumpkin this winter.
|
|
|
|
Wednesday, January 1
|
View Page
|
 |
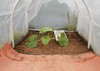
Picture taken: December 2013
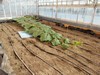
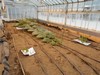
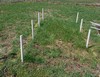
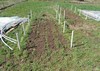
Last spring I had to remove all of the soil I had in place so a new heating system could be installed. Since I had to bring in new material I decided to work with actual “field soil” that I worked on tweaking about three years ago. It has grown a nice pumpkin (Howard Dill winning) with little effort so I am confident that this soil can produce.
This image shows the area where basically the top 6-9” of soil was removed. While equipment was used for this part of the process, to get the soil in the greenhouse there is a small entrance door that required manual labor. While over 20 yards was delivered just feet from the growing site all the soil had to be carried in by hand. I want to thank all the members of the Team that helped on a variety of days to get the soil in the greenhouse before it snowed.
|
|
|
|
Wednesday, January 1
|
View Page
|
 |
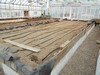
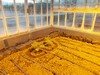
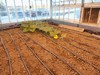
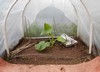
Picture taken on December 2013
The area I grow in is basically a large raised bed that is about 9ft. x 26ft. It is made-up of two rows of small bench plots and an aisle way that I cover with weed block. To ensure maximum depth you can notice wooden sides to allow for a greater volume of soil. All totaled it takes at least 10 yards of soil to fill this area where I plan on growing one pumpkin plant in this year.
|
|
|
|
Wednesday, January 1
|
View Page
|
 |
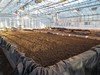
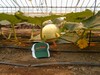
Picture taken on December 2013
Here you can see some of the weed block pulled back to show the cement bins that are typically used to replicate small micro-plots to allow many small replications for research. For this experiment these were all filled in and the extra wooden sides allow for greater soil depth to allow for an extensive root system and avoid plant stress.
|
|
|
|
Wednesday, January 1
|
View Page
|
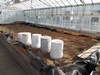 |
Picture taken: December 2013
This is the same bed that the famous 220.3 DeBacco ’13 “Snowball” was grown in but the soil is completely new and different for this year. The white 5-gallon pails were the ones used to fill this entire area up. This takes some time and energy which at the end of the season can be hard to come by, however the threat of cold temperatures and snow is an extra motivator to get it done. Also, if you want to find out who your real friends are show them a shovel;-)
|
|
|
|
Wednesday, January 1
|
View Page
|
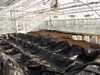 |
Picture taken on December 2013
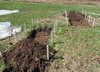
Here is the comparison between a completed raised bed and one that still needs filling. The first raised bed went easy mainly because, there have been drought conditions in the area so the soil did not have a lot of extra water weight. However, the next delivery of soil received a month’s worth of rain on it in under a week so needless to say it was a lot heavier and took a lot longer to move.
|
|
|
|
Wednesday, January 1
|
View Page
|
 |
Picture taken on December 2013
If you compare this picture to the other raised bed you will noticed quite the difference. This is what happens when you move a wet soil. While this is not my ideal situation, since the soil structure now is almost not existent, one positive is there were earthworms present. Also, the soil will be in a warm and protected environment so hopefully I can work toward improving the overall soil condition. This did take a lot of extra effort to get in place but now I have all the soil I need ready to go for my winter project. Thanks again to all that helped move the soil!
|
|
|
|
Wednesday, January 1
|
View Page
|
 |
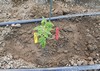
Picture taken: December 2013
Here is the original bed that is warming up and drying out so it is ready for planting. Here you can also see that I have installed the drip irrigation system. While this field soil does hold moisture very well, I want to have this system installed before the plant grows over the entire area. I find this makes watering the entire plant (root zone) consistent and simple. No plants in yet, but that is going to change very soon.
|
|
|
|
Wednesday, January 1
|
View Page
|
 |
1734.5 Steil ’13 (F: 220.3 DeBacco ’13 “Snowball” x self)
While this seed is unproven (remember, so was the 2009 Wallace I planted last year) I think this was a great cross. Taking the 220.3 DeBacco “Snowball” and producing a pumpkin of this size and having it selfed strengthened the strong 2009 Wallace / 1725 Harp background which I think compliments the other seed I chose nicely. The shape and growth rate of this pumpkin are all traits that I want to see incorporated into future genetic lines and the fact that it was selfed increases the odds of these traits being seen in the offspring.
335 Scherber ‘11 (F: 1421.5 Stelts [1663 Zoellner] x M: 1161 Rodonis [1725 Sweet])
This seed is a result of a cross Joe Scherbert made where he crossed two of the clone plants together that I kept alive over the winter. This has been a very over looked seed in my opinion. The 1725 Sweet was #2 in the world and the 1663 Zoellner was #6 in the world for the year they were grown. Both of these pumpkins were and grown in two different states but this cross essentially brings two well know and well producing genetics together in one super seed.
As an added bonus the plant that produced the 1663 Zoellner seems to have disease resistance. I noticed it in the greenhouse as well as other growers that planted seeds from the 1663 Zoellner pumpkin have reported an increased healthy appearance when compared to other plants in their garden. The diseases resistance trait is difficult to define, but hearing this commonality shows some degree of consistency. If we want to continue to progress the genetics further disease resistance is a good step forward to ensuring extended periods of growth.
The 1725 Sweet pumpkin was quite the impressive sight inside and out;-) Having this as part of the cross is very encouraging that top genetics are present on both sides of this cross and as a result it made the winter project line-up.
|
|
|
|
Wednesday, January 1
|
View Page
|
 |
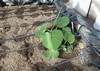
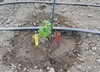
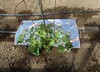
Picture taken on December 11th, 2013
335 Scherber ‘11 (F: 1421.5 Stelts [1663 Zoellner] x M: 1161 Rodonis [1725 Sweet])
Planting day (and yes that is snow outside).
Today I planted two 335 Scherber (F: 1421.5 Stelts [1663 Zoellner] x M: 1161 Rodonis [1725 Sweet]) plants in my first raised bed. I will select down to one plant and I already think I know which one I am keeping, but I have to be independent as I cannot call up a grower and get a back-up plant in December.
|
|
|
|
Wednesday, January 1
|
View Page
|
 |
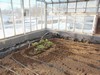
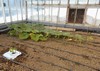
Picture taken on December 16th, 2013
Well this side is starting to dry out and I have been working to pick out the rocks and level the surface. To help the process along I have also been pitch-forking the area (like it was a broad fork) to help aerate the soil. It is still not in the best of shape but it should work for my intended purpose.
|
|
|
|
Wednesday, January 1
|
View Page
|
 |
Picture taken on December 16th, 2013
335 Scherber ‘11 (F: 1421.5 Stelts [1663 Zoellner] x M: 1161 Rodonis [1725 Sweet])
Overall the plant is doing quite well. The heat in the greenhouse section is keeping it like it was a July day so there is plenty of warmth to push growth.
|
|
|
|
Wednesday, January 1
|
View Page
|
 |
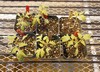
Picture taken on December 18th, 2013
335 Scherber ‘11 (F: 1421.5 Stelts [1663 Zoellner] x M: 1161 Rodonis [1725 Sweet])
This is the rate of development that I want to see which is very similar to the 2009 Wallace I grew last year. To make watering easier while the plant is small I dug a shallow mote to hold the water in the area around the plant. I am trying to keep the surface as dry as possible to keep the amount of weeds down.
|
|
|
|
Wednesday, January 1
|
View Page
|
 |
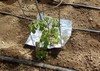
Picture taken on December 18th, 2013
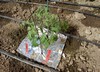
Planting day for the 1734.5 Steil ’13 (F: 220.3 DeBacco ’13 “Snowball” x self)
These seeds were stared a little after the 335 Scherber as I wanted to make sure I had all the soil in place before starting the seeds. It was a good thing I did as it took a lot longer than expected to move the same volume of soil that had become water logged. Thanks again to all those that helped!
|
|
|
|
Wednesday, January 1
|
View Page
|
 |
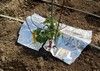
Picture taken on December 18th, 2013
1734.5 Steil ’13 (F: 220.3 DeBacco ’13 “Snowball” x self)
Always interesting when you can look at your newly planted seedling and there is also snow in the image.
|
|
|
|
Wednesday, January 1
|
View Page
|
 |
Picture taken on December 21st, 2013
335 Scherber ‘11 (F: 1421.5 Stelts [1663 Zoellner] x M: 1161 Rodonis [1725 Sweet])
Plant is doing well and there is evidence of a main vine starting to form. We are experiencing some cloudy days so I am glad that I have some supplemental lighting that can help not only increase the day length but also provide some extra energy to the plants. I am using new light bulbs this year to help ensure everything is at its maximum.
|
|
|
|
Wednesday, January 1
|
View Page
|
 |
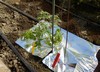
Picture taken on December 21st, 2013
1734.5 Steil ’13 (F: 220.3 DeBacco ’13 “Snowball” x self)
I just finished installing the drip irrigation system for this raised bed which I may not need to turn on very much, but at least it is there if needed.
|
|
|
|
Wednesday, January 1
|
View Page
|
 |
Picture taken on December 23rd, 2013
335 Scherber ‘11 (F: 1421.5 Stelts [1663 Zoellner] x M: 1161 Rodonis [1725 Sweet])
This image really shows the amount that the supplemental light can add to the growing area. Also, because the lights I used last year were on for an extended period of time I have upgraded to all new light bulbs for this year.
|
|
|
|
Wednesday, January 1
|
View Page
|
 |
Picture taken on December 23rd, 2013
1734.5 Steil ’13 (F: 220.3 DeBacco ’13 “Snowball” x self)
Both of these seedlings are developing normally, so it does not look like there is a bad choice. I am going to let them grow for a little longer before making my final selection but right now I am happy with both.
|
|
|
|
Wednesday, January 1
|
View Page
|
 |
Picture taken on December 23rd, 2013
5.8 Osmala (Big Zac) ’13 (F: 4.37 Osmala x M: self)
4.46 Marley ’11 (F: 7.33 Hunt x self)
*Note: that should read 5.8 Osmala (not 6.8)
-Seeds were started on December 2nd, 2013
-Germination occurred on December 11th, 2013
-Initially put in the greenhouse on December 18th, 2013
Well, this off-season, I am happy to report there will also be some giant tomato plants growing in the greenhouse, for those that want to see something other than pumpkins;-). While I have grown tomatoes before the main goal has been eating so we will see how this project turns out. They will be planted in the same raised bed as the pumpkins so there will be plenty of area for the roots to spread.
I am not sure how the tomatoes will react to the greenhouse environment in the winter but I figure, it is worth a try.
|
|
|
|
Wednesday, January 1
|
View Page
|
 |
Picture taken Dec. ’13 / Jan. ‘14
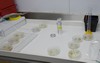
Environmental Growth Chamber
I was fortunate to receive three of the 2328 Meier UOW DMG seeds. While I am honored to have any sent to myself, I can say that their quality was quite poor. When I did the drop test the seeds just about floated on the way down with my estimation of 25% of the seed full, and 75% being empty space.
As a result I knew normal germination methods would have an extremely low probability of success. I felt that there was basically no endosperm (food storage) in the seed, but it did feel like there may be an embryo in there but not much more. So, I went back to the embryo rescue research that I had done at the very beginning of this year. I was not able to run any trials but there were three different media recipes that I felt would provide increased odds for successful germination.
I was able to get media prepared that matched the specific recipes that were determined to have increased odds of radical formation so that an initial trial could be preformed. I then took different grades of seeds (meaning different estimated percentages of being solid) to run a trial to see if one media recipe worked better than another.
|
|
|
|
Wednesday, January 1
|
View Page
|
 |
Picture taken Dec. ’13 / Jan. ‘14
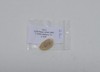
Embryo Rescue Trial
This is the first full scale trial that I preformed with my experimental seeds that were of varying degrees of being solid. Pictured here are the official trial plates that were used. While there are various notes to provide some data for me, in short, I think I found one media formulation that worked the “best”.
Two recipes were close, but after the trial inspections I felt one of the formulations may have caused some root mutations (which could be a result of one of the additives) so I chose the one I felt most confident in as producing a normal seedling.
I can say that the “D grade seeds” (which were the poorest quality estimated to be only 25% solid and “A grade” being 100% solid) sprouted at a rate I am very happy with (over 50%!!), when on the media. These same seeds I would give only a 1% chance of germinating at best during normal germination methods. However, all of the trials do not matter if it does not work on the real seeds but at least I have confidence that I now have a formulation that will drastically increase the odds of germination on compromised seeds.
|
|
|
|
Wednesday, January 1
|
View Page
|
 |
Picture taken Dec. ’13 / Jan. ‘14
What I Want To See…
This shows a “normal” radical being formed in the media. While this is a trial seed, if you look closely at the top you will noticed a brown area which is the area of the endosperm/cotyledon leaves and this portion was underdeveloped and is actually just a thin skin of cells. However, in this case the media did the job of supplying not only the right signals to induce germination but also contains the food necessary for growth.
While this looks easy, I can assure you this is an accomplishment in itself. With micro propagation there are very thin margins of error. Also, the media is non-selective meaning that contamination is another factor that can complicate things. Basically a small dust particle in the air can cause an entire experiment to become a loss. To try and guard against this, all of these trials are carried out in a sterile laboratory setting to reduce the odds of contamination.
|
|
|
|
Wednesday, January 1
|
View Page
|
 |
Picture taken Dec. ’13 / Jan. ‘14
The Real Deal
Well here is the vial that now contains the extremely rare 2328 Meier UOW DMG seeds as they enter the process of micro propagation.
|
|
|
|
Wednesday, January 1
|
View Page
|
 |
Picture taken Dec. ’13 / Jan. ‘14
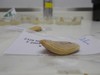
This is it…
In order to maintain sterile conditions, I am not able take many pictures, but I did take a picture of one of the seeds which does not look all that bad (on the outside). However, if you were to actually touch this seed you would realize that only the area form the tip to the first number two in the writing of 2328 feels solid, the rest of the seed is empty. This means that there is basically only an embryo in this seed with not much of anything else that a seed needs to germinate. This was also true for the other seeds as well. My hope is the media will supply the essential plant components that are missing.
|
|
|
|
Wednesday, January 1
|
View Page
|
 |
Picture taken Dec. ’13 / Jan. ‘14
No turning back now…
I went to put the camera down and saw that this looked like a good picture of the preparation. I like this picture as it has the true scientific experimental trial feel.
Going where no pumpkin seed had gone before…
|
|
|
|
Wednesday, January 1
|
View Page
|
 |
Picture taken Dec. ’13 / Jan. ‘14
The Deed is Done
During the procedure I could not get any pictures, but at the end of the process here is what I am left with. The aluminum foil containing box is where the plates are contained. (This is done because where do you put seeds? Answer: The ground. So is there much light down there? Answer: No.)
You can see the laminar flow hoods that are used to maintain sterility to the air while the seeds are being plated and there is also ethanol and a flame used to keep the instruments clean that are used. There are a few extra plates that I have as back-ups in case there is contamination noticed on the first plate.
I am fortunate to have access to these facilities and there is a lot of research that has gone into this project, now all that I can do is wait…
|
|
|
|
Wednesday, January 1
|
View Page
|
 |
Picture taken Dec. ’13 / Jan. ‘14
Initial Check
While checking on the embryos and not seeing any progress during the germination window that I saw with the initial trial seeds I let these seeds go a little longer in their black box. After still not seeing any progress I decided to make a shift and put the plant material under some grow lights to see if that would help at all.
|
|
|
|
Wednesday, January 1
|
View Page
|
 |
Picture taken Dec. ’13 / Jan. ‘14
No Contamination
This image is showing the lack of contamination which means that the embryo is not infected and the trial can continue on the original plate and does not need to be transferred.
|
|
|
|
Wednesday, January 1
|
View Page
|
 |
Picture taken Dec. ’13 / Jan. ‘14
It is slowly changing
Looking at this seed, there is hope that it will germinate as it is starting to lift itself off the media. I had to briefly open the plate and re-stick the embryo so the radical area would be in the media where it would have access to the prepared media.
|
|
|
|
Wednesday, January 1
|
View Page
|
 |
Picture taken Dec. ’13 / Jan. ‘14
After much anticipation and getting the embryo to green-up there was never any radical produced:-(
Now there is the possibility of taking a small section of this plant material and getting to the develop callus, then taking the callus tissue and getting it to differentiate into roots and shoots to still get a plant. However, this would put me out of the spring time window. I am also fortunate to have two actively growing pumpkin plants right now in the greenhouse and while they may not be the 2328 Meier, they both come from very strong genetic backgrounds.
|
|
|
|
Wednesday, January 1
|
View Page
|
 |
Picture taken Dec. ’13 / Jan. ‘14
Close up picture with the 6 O’clock position being the area where the radical should have formed. So, while the main goal of germinating this compromised and rare seed did not work out, I think that I still did gain something that could be advantageous to the growing community at large.
I may have found through my trials a media that could increase the odds of germination for older seeds. While it may not have worked on the compromised 2328’s I do see there being the possibility of it being able to increase the odds of older seeds germinating. Typically in older seeds all of the necessary components are present and fully developed but it is the energy storage that degrades. In this case the media should not only supply nutrients but it should also promote germination in general.
While I have not actually tried this on older seeds, the early indications from my initial trial do indicate that it can germinate compromised seeds that were shown in my initial. In all of the pumpkin projects I have preformed, it is always amazing how if you keep looking, there is something to be gained even from what may be initially considered as a failure.
|
|
|
|
Wednesday, January 1
|
View Page
|
 |
Happy New Year! (Picture Taken on January 1st, 2014)
335 Scherber ‘11 (F: 1421.5 Stelts [1663 Zoellner] x M: 1161 Rodonis [1725 Sweet])
The initially strong seedling is continuing to excel in growth and development. I clearly know which one I am going to keep but I am leaving the other one to help expand the soil biology. Now, I am just waiting for the vines to stretch out and make a safe landing.
|
|
|
|
Wednesday, January 1
|
View Page
|
 |
Happy New Year! (Picture Taken on January 1st, 2014)
1734.5 Steil ’13 (F: 220.3 DeBacco ’13 “Snowball” x self)
Now it looks like both of these seedlings are about tied so I will wait and see if one takes a lead over the other before making my final selection. As you can tell from the parking lot, not to many other people have decided to come in on New Years Day. (But they also do not have pumpkin plants to take care of;-)
|
|
|
|
Wednesday, January 1
|
View Page
|
 |
Happy New Year! (Picture Taken on January 1st, 2014)
5.8 Osmala (Big Zac) ’13 (F: 4.37 Osmala x M: self)
4.46 Marley ’11 (F: 7.33 Hunt x self)
Tomatoes seedlings are developing their true leaves. They are still in the mist chamber but I will be pulling them out of this section soon so I can harden them off. Yes, even keeping them in the greenhouse it is still advised to go through a hardening off process. Mainly the shock to these plants is the change (reduction) in humidity from the mist chamber to the actual greenhouse environment. So, I will try and keep them in an area of low intensity light so the stomata can have a chance to regulate the water loss. Luckily tomatoes are fairly drought tolerate so I do not think there will be much of a problem, but I want to keep them at peak performance.
|
|
|
|
Thursday, January 2
|
View Page
|
 |
Welcome to the Pumpkin Grow Room…
The lights stay on into the night so I can simulate the length of a summer day. It also makes it easy to care of the plants after sunset without the need for a head lamp.
|
|
|
|
Saturday, January 4
|
View Page
|
 |
I got up this morning and here is the thermometer reading…-0.6 degrees F. While this may not be a day you would expect to have a patch tour, but today is the first Team-Pumpkin Patch tour of 2014!
|
|
|
|
Saturday, January 4
|
View Page
|
 |
335 Scherber ‘11 (F: 1421.5 Stelts [1663 Zoellner] x M: 1161 Rodonis [1725 Sweet])
I am starting to use the drip tapes so I can ensure even watering over the entire area since I expect the roots of the pumpkin plant to start spreading out now. I have the bamboo stakes out for support and to help carefully guide the vines down to the ground.
|
|
|
|
Saturday, January 4
|
View Page
|
 |
1734.5 Steil ’13 (F: 220.3 DeBacco ’13 “Snowball” x self)
Cold temperatures and snow outside, but warm, sunny and liquid water inside! The snow does offer increased reflectance of sunlight so hopefully that is a plus for the pumpkin plants. Right now, both of these plants are basically twins so I am still not sure which one I am keeping.
|
|
|
|
Saturday, January 4
|
View Page
|
 |
5.8 Osmala (Big Zac) ’13 (F: 4.37 Osmala x M: self)
4.46 Marley ’11 (F: 7.33 Hunt x self)
I moved the tomato plants and here they are under more natural light and not the strange orange light produced by the HPS (High Pressure Sodium) grow lights. So far they are in good shape and are maintaining a stocky stem which I will have to watch as they are removed from the intensity of the supplemental light they have been under.
|
|
|
|
Monday, January 13
|
View Page
|
 |
Nothing to see here…
This is what the glow from the greenhouse where the pumpkins are looks like from the outside and despite the record lows outside the pumpkins have been kept nice and warm with their new hot water heating system.
|
|
|
|
Saturday, January 18
|
View Page
|
 |
335 Scherber ‘11 (F: 1421.5 Stelts [1663 Zoellner] x M: 1161 Rodonis [1725 Sweet])
The vine is off and running! Plant is looking great with no issues or problems to report. I am covering the nodes along the main vine to encourage increased rooting and my bamboo stakes are keeping the plant properly directed.
It is winter growing at its finest.
|
|
|
|
Saturday, January 18
|
View Page
|
 |
1734.5 Steil ’13 (F: 220.3 DeBacco ’13 “Snowball” x self)
I have been able to train the plant on the left a little better so it is looking my intended keeper, but right now the two plants are not really competing so I have no problem letting them continue to grow for a little while longer.
|
|
|
|
Friday, January 24
|
View Page
|
 |
Ooops..
Well, this is what phytotoxicity (also known as spray damage) looks like. There were white fly and aphids reported in the greenhouse section the tomatoes were in and apparently the tomatoes did not like what was sprayed on them. There could have been a slightly heavy application of an oil based product as this is the likely cause for the damage.
On a positive note the growing tips look to be in good shape so I am confident the plants will grow out of the problem, but it is just going to take them a little longer to get back on track.
|
|
|
|
Friday, January 24
|
View Page
|
 |
335 Scherber ‘11 (F: 1421.5 Stelts [1663 Zoellner] x M: 1161 Rodonis [1725 Sweet])
The plant is looking great and the leaves are a good color green on short leaf stalks. This indicates to me that the nitrogen levels are not excessive which I think was part of the problem I experienced last year.
There is a tall bamboo stake toward the tip of the vine that I put there to mark where the vine tip is as of today. I will place a new one once a week so the students and visitors can see the weekly growth.
|
|
|
|
Friday, January 24
|
View Page
|
 |
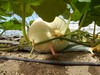
335 Scherber ‘11 (F: 1421.5 Stelts [1663 Zoellner] x M: 1161 Rodonis [1725 Sweet])
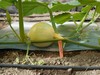
While there is not as much plant to support this potential pumpkin that I have had in the past, it is encouraging to see the first female flower of the winter season. This is a little earlier than I expected the first flower but hopefully I will have plenty pollination opportunities on this plant. There are still many things that have to come together but at least what I am seeing is encouraging.
|
|
|
|
Friday, January 24
|
View Page
|
 |
1734.5 Steil ’13 (F: 220.3 DeBacco ’13 “Snowball” x self)
Well there is one plant that has a slight advantage on the other, so I think that one will be the keeper. However, I am going to keep both plants to essentially double my odds of getting a male flower as the other plant has just shown its first female flower of the season. (You can see the 335 Scherber ’11 in the upper right hand corner of the image.)
|
|
|
|
Sunday, February 2
|
View Page
|
 |
Groundhog Day Pollination
335 Scherber ’11 (x 1734.5 Steil)- 2/2/14 pollination
Today, I had a beautiful 5-lobe flower open up and I also was fortunate to have an available male flower to make the cross I wanted. Now, I just have to wait and see what happens. However, this is a vast improvement from what I experienced last year with the poor female flower development. There were many female flowers that simply would not even open for me to even have a chance at pollinating, where this year the first flower to show has developed as would be expected and will hopefully result in a successful pollination.
Looking back to last year, I think an excessive amount of nitrogen was the main cause of my lack of female flower development. For this year, I have been careful not to repeat this and as a result I may be more on the deficient side of things but if it means increased odds of pollination success, I am all for it.
|
|
|
|
Friday, February 7
|
View Page
|
 |
335 Scherber ’11 (x 1734.5 Steil)- 2/2/14 pollination (day 5)
5 days post pollination and it is growing and still has a nice shine to it. There are still no guarantees but at least this is a very encouraging sign, and is a big change from the constant challenges I experienced last year.
|
|
|
|
Sunday, February 9
|
View Page
|
 |
335 Scherber ’11 (x 1734.5 Steil)- 2/2/14 pollination (day 7)
7 days post pollination and it is still growing and the pumpkin has settled on the mill fabric. It looks like it may also be an orange pumpkin as the small fruit is maintaining a nice consistent yellow coloration, but it is still early in development.
|
|
|
|
Sunday, February 9
|
View Page
|
 |
1734.5 Steil ’13 (F: 220.3 DeBacco ’13 “Snowball” x self)
I still have not been able to make the final plant selection. I know which one I am keeping but I want to ensure I have the maximum opportunity to make the cross I want. My fear is if I remove one of the plants I will not have a male flower on the day I need it.
|
|
|
|
Sunday, February 9
|
View Page
|
 |
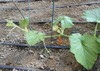
335 Scherber ‘11 (F: 1421.5 Stelts [1663 Zoellner] x M: 1161 Rodonis [1725 Sweet])
Overall the coloration of the plant is great and the leaf stalks are nice and low to the ground. There are a few secondary vines but I would like to see a few more of them, but they are slowly coming along, but I have to remember my main goal is a pumpkin and not just leaves. The square of mill fabric marks the site of the first pollination that I did on this plant on 2/2/14 and as of today it still looks great and it growing.
|
|
|
|
Tuesday, February 11
|
View Page
|
 |
335 Scherber ’11 (x 1734.5 Steil)- 2/11/14 pollination #2
I am very thankful to see yet another pollination opportunity on the 335 Scherber ’11 plant. This flower also looks great and I was also fortunate to be able to make the cross I wanted to again with the 1734.5 Steil plant since there was a male flower that also opened this morning.
|
|
|
|
Tuesday, February 11
|
View Page
|
 |
1734.5 Steil ’13 (x 335 Scherber)- 2/11/14 pollination
This was a double pollination day with the 1734.5 Steil ’13 plant also having a female flower open this morning and the 335 Scherber plant was able to supply the pollen. The lobes in this flower are very symmetrical which is encouraging not only for my pumpkin but that the offspring of this Snowball x self cross should produce pumpkins that have good shape which should reduce the chance of structural issues.
|
|
|
|
Tuesday, February 11
|
View Page
|
 |
1734.5 Steil ’13 (F: 220.3 DeBacco ’13 “Snowball” x self)
While this plant may not be the largest I think it is big enough (and growing) that it can support a pumpkin to produce mature seeds.
I can also say that I think the issue with my poor pollinations last year was the high nitrogen in the soil that I was using. I am as close to consistent conditions as you can get from one year to another with the greenhouse set-up. The light, temperature, and water have all been the same as last year with the only difference being the soil I have used. Last year there was a greater compost percentage and this year I have gone with a very bland field soil that has only had lime added to correct the pH. As a result, my plants are on the low end of the nutrient range or even in the deficient category in some cases. However, my main goal is to produce seeds I would rather have increased odds of fruit set which is what these conditions are providing me.
Last year I had gone through about 45 female flowers with only one reaching maturity. This year all my female flowers are opening and looking great, so take this as a lesson that high nitrogen can result in poor fruit setting.
|
|
|
|
Wednesday, February 12
|
View Page
|
 |
335 Scherber ’11 (x 1734.5 Steil)- 2/2/14 pollination (day 10)
I took this picture from the stem side as I think it shows the pumpkin a little better. The pumpkin continues to grow evenly each day and is maintaining a nice healthy shine. I realize it is still early, but seeing continual positive signs has me just hoping that good things will continue.
|
|
|
|
Wednesday, February 12
|
View Page
|
 |
335 Scherber ’11 (x 1734.5 Steil)- 2/11/14 pollination #2 (day 1)
Just thought I would include an early picture of the second pollination on the 335 Scherber. Hopefully, this one also takes and I can get two pumpkins on this plant. But as was evident last year, it only takes one pumpkin to have success.
|
|
|
|
Wednesday, February 12
|
View Page
|
 |
1734.5 Steil ’13 (x 335 Scherber)- 2/11/14 pollination (day 1)
For comparison here is day 1 on the 1734.5 Steil plant. Hard to tell this early in the developmental process but this looks like it is a mini version of the mother. I would expect this pumpkin to be round and white at maturity. Seeing that the lobes were symmetrical is encouraging that this pumpkin will also have a good internal structure which is a trait that I want to see carried on and is encouraging that I have incorporated it into my crosses this winter season.
|
|
|
|
Friday, February 14
|
View Page
|
 |
I am fortunate to also be teaching a course to Undergraduate students called the “Science of Gardening” where my students are learning about the process of growing plants. The greenhouse is providing a great indoor garden set-up / classroom for my students. We have tomatoes and pumpkins growing and I thought I would include some pictures of the seeds we have planted in the greenhouse on the entrance doorway.
|
|
|
|
Friday, February 14
|
View Page
|
 |
5.8 Osmala (Big Zac) ’13 (F: 4.37 Osmala x M: self) “Dustyn”
The tomato plants have been selected by the students so they can monitor the growth and changes during the semester. Overall the plants have improved slowly since their spray damage and now that they are in the Pumpkin Grow Room the temperature has been increased from the propagation chamber and they have been transplanted into the field soil.
This plant is “Dustyn” and at least at this stage it looks strong. Now that this plant is in soil and able to get a little more attention it will hopefully keep up its rate of improving and growth rate.
|
|
|
|
Friday, February 14
|
View Page
|
 |
5.8 Osmala (Big Zac) ’13 (F: 4.37 Osmala x M: self “Lori”
The tomato plants have been selected by the students so they can monitor the growth and changes during the semester. Overall the plants have improved slowly since their spray damage and now that they are in the Pumpkin Grow Room the temperature has been increased from the propagation chamber and they have been transplanted into the field soil.
This plant is “Lori” and while green it is one of the runts of the litter due to the spray damage that occurred earlier. However, thinking positively it is green and just starting to make some progress. You can never count a plant out and this one could surprises us all in the end.
|
|
|
|
Friday, February 14
|
View Page
|
 |
4.46 Marley ’11 (F: 7.33 Hunt x self) “Erin”
The tomato plants have been selected by the students so they can monitor the growth and changes during the semester. Overall the plants have improved slowly since their spray damage and now that they are in the Pumpkin Grow Room the temperature has been increased from the propagation chamber and they have been transplanted into the field soil.
This plant is “Erin” and off to a good start. All plants, including this one were buried deeper than normal so the stems that had the leaves burned off earlier can hopefully produce some more roots.
|
|
|
|
Friday, February 14
|
View Page
|
 |
4.46 Marley ’11 (F: 7.33 Hunt x self) “Chelsea”
The tomato plants have been selected by the students so they can monitor the growth and changes during the semester. Overall the plants have improved slowly since their spray damage and now that they are in the Pumpkin Grow Room the temperature has been increased from the propagation chamber and they have been transplanted into the field soil.
This plant is “Chelsea” and while it may look a little thin in the photo it does look fairly normal and as long as it continues to progress it should be able to produce a strong plant.
|
|
|
|
Friday, February 14
|
View Page
|
 |
4.46 Marley ’11 (F: 7.33 Hunt x self) “Prof. DeBacco”
This was one of two plants that were not selected so I have taken this one. Overall the plants have improved slowly since their spray damage and now that they are in the Pumpkin Grow Room the temperature has been increased from the propagation chamber and they have been transplanted into the field soil.
This is one of my plants “Prof. DeBacco” that is essentially a left over as the student all got to select their plants in a random order and I am left with the two plants that are in the roughest shape. The leaves are still green and the growing tip is undamaged but the plant structure is a little deformed. My hope is that they grow out of it but while my plants are getting back to normal I expect my student’s plants to be growing exponentially. At least I still have the pumpkin plants;-)
|
|
|
|
Friday, February 14
|
View Page
|
 |
4.46 Marley ’11 (F: 7.33 Hunt x self) “Prof. Matt”
This was one of two plants that were not selected so I have taken this one. Overall the plants have improved slowly since their spray damage and now that they are in the Pumpkin Grow Room the temperature has been increased from the propagation chamber and they have been transplanted into the field soil.
This is one of my plants “Prof. Matt” that is essentially a left over as the student all got to select their plants in a random order and I am left with the two plants that are in the roughest shape. The leaves are still green and the growing tip is undamaged but the plant structure is a little deformed. My hope is that they grow out of it but while my plants are getting back to normal I expect my student’s plants to be growing exponentially. At least I still have the pumpkin plants;-)
|
|
|
|
Friday, February 14
|
View Page
|
 |
1734.5 Steil ’13 (x 335 Scherber)- 2/11/14 pollination (day 3)
This shows the pollination I have on the 1734.5 Steil, still too early to tell if it has taken but it is beginning to swell in size which is an encouraging sign. In lab today we put aluminum foil under the tomato plants to reduce the potential pressure from insects as the highly reflective foil shines the light on the underside of the leaves that can result in confusing the insects from telling where the protective underside of the leaf is. I have actually run some basic trials on this theory and I can say that to a point it did reduce the insect pressure. It also adds more light to the plants to hopefully also help with growth rates.
Also, if you look toward the sides of the greenhouse… It is a challenge when snow blocks some of the limited amount of light this time of year. Luckily, I have some supplemental lights, but I will take all the natural light I can get;-)
|
|
|
|
Monday, February 17
|
View Page
|
 |
335 Scherber ’11 (x 1734.5 Steil)- 2/2/14 pollination (day 15)
The pumpkin continues to grow and has kept its nice healthy shine. These are both encouraging signs that this pumpkin has taken. If it keeps these characteristics to the end of the week I will feel confident that it has taken and the rest will be up to fate. The main vine has rooted well so even though the plant is not as big as I had last year at this time there is still plenty of roots and leaves to continue the hopeful seed developmental process.
|
|
|
|
Friday, February 21
|
View Page
|
 |
This shows the low and high and low temperature that the greenhouse section has been running the low is about 59 degrees F and 80 degrees F for a high. This is the range that I am aiming for and at times the high temperature may be a little closer to 85F as the sun can really warm up the section quick.
|
|
|
|
Friday, February 21
|
View Page
|
 |
335 Scherber ’11 – 2/11/14 pollination #2= failed
While this flower looked great I think with the small plant size that I have in addition to the already growing pumpkin I think the plant is aborting this pollination because it can not sufficiently support two pumpkins at this time. This allows the plant (and myself) to focus on just one pumpkin on this plant. Overall the leaves look very good and should be able to support a growing pumpkin.
|
|
|
|
Friday, February 21
|
View Page
|
 |
This shows the 335 Scherber ’11 plant with both “Dustyn” (on the right) and “Lori” (on the left) tomato plants. I have been doing a lot of weeding with the loop or stirrup hoe that you can see in the background. Nothing like weeding in February;-) Slowly things are coming together in this raised bed.
|
|
|
|
Friday, February 21
|
View Page
|
 |
335 Scherber ’11 (x 1734.5 Steil)- Day 19
First Measurement Day!
Day 19
OTT = 84.0”
Est. Weight = 14.9 pounds (using the official Team-Pumpkin Greenhouse Chart)
For those that follow my diary this was the same age that I first measured “Snowball” last year. As expected this pumpkin is a little behind in weight as the supporting plant is much smaller this year. I am not concerned with slow growth as the pumpkin plant and fruit are growing and since I am mainly interested in seed production I do not need to produce a giant pumpkin for my winter season to be a success.
|
|
|
|
Friday, February 28
|
View Page
|
 |
5.8 Osmala (Big Zac) ’13 (F: 4.37 Osmala x M: self) “Dustyn”
Overall this plant is looking quite strong as the color has developed a nice green color and the stem is bulking up. Its size change is evident as it has now out grown the aluminum foil that was originally placed under it so it is going to be time for an additional sheet soon.
|
|
|
|
Friday, February 28
|
View Page
|
 |
5.8 Osmala (Big Zac) ’13 (F: 4.37 Osmala x M: self “Lori”
This plant has a very nice upright structure to it and looking at it now you would not guess it was the runt of the litter.
|
|
|
|
Friday, February 28
|
View Page
|
 |
4.46 Marley ’11 (F: 7.33 Hunt x self) “Erin”
Right now, this plant is my pick for “best” as it seems to have the most aggressive growth out of all the other plants. There are two main stems that will be left for the moment as to increase the odds of getting a successful pollination and fruit.
|
|
|
|
Friday, February 28
|
View Page
|
 |
4.46 Marley ’11 (F: 7.33 Hunt x self) “Chelsea”
This plant has good height but the leaves seem to be a little more spaced out which in the picture gives a thinner look to it when you look at the others. These are not bad traits as there is probably the correct amount of leaves for efficient fruit production.
|
|
|
|
Friday, February 28
|
View Page
|
 |
4.46 Marley ’11 (F: 7.33 Hunt x self) “Prof. Matt”
As expected my plants are a little behind the others but I am seeing encouraging signs of progress. I think this plant in particular is just about a week behind the others so it may not catch-up to the others but it is progressing.
|
|
|
|
Friday, February 28
|
View Page
|
 |
4.46 Marley ’11 (F: 7.33 Hunt x self) “Prof. DeBacco”
Right now, this plant is a little ahead of “Prof. Matt” but it still has a little work to do to be able to compete with the other plants. Either way I think I will see some flowers on this plant (and the others) very soon.
|
|
|
|
Friday, February 28
|
View Page
|
 |
335 Scherber ’11 (x 1734.5 Steil)- Day 26
OTT = 111.5”
Est. Weight = 33.8 pounds (using the official Team-Pumpkin Greenhouse Chart)
I like what I am seeing as the growth is starting to pick-up. Also, on the stem side you can begin to notice some stretch marks which also indicate aggressive growth.
|
|
|
|
Wednesday, March 5
|
View Page
|
 |
This pollination on the 1734.5 Steil plant did not make it, but it did weigh in at 3 pounds 11oz. (no measurements taken)
|
|
|
|
Wednesday, March 5
|
View Page
|
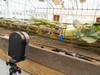 |
This year there is the addition of a time lapse camera to be able to watch the pumpkin grow. Its current interval is one picture every hour. Not sure how it will turn out but it is worth a try. From day to day the pumpkin is visually growing but it will be interested to see the potential changes over time. (The blue cup is placed in view for a size comparison.)
|
|
|
|
Wednesday, March 5
|
View Page
|
 |
335 Scherber ’11 (x 1734.5 Steil)- Day 31
OTT = 129.0”
Est. Weight = 51.5 pounds (using the official Team-Pumpkin Greenhouse Chart)
Overall this pumpkin is growing great and has met my first goal of 50 pounds. My second goal is 50 days (which is only 19 days way) and after that everything else is a bonus and all I can do is hope there are a lot of seeds, as the requests have already started coming in.
This may also be the first pumpkin ever to have a seed go up for auction before it was even pollinated!
|
|
|
|
Sunday, March 9
|
View Page
|
 |
If you look toward the base you will see me holding the traveling Team-Pumpkin sign at the base of the famous Circleville Ohio water tower. I want to thank everyone that both attended and helped make the Southern Ohio Seminar event possible. Hopefully, it was an enjoyable experience for everyone.
|
|
|
|
Sunday, March 9
|
View Page
|
 |
This is the famous mural in the center of Circleville, Ohio. The lighting and sky was prefect to blend the painting to the sky and provide a true 3D appearance. As a result I look like part of the painting;-)
Always great to see other growers and get to learn some tips as well as answer a few questions.
|
|
|
|
Wednesday, March 12
|
View Page
|
 |
335 Scherber ’11 (x 1734.5 Steil)- Day 38
OTT = 150.5”
Est. Weight = 80.5 pounds (using the official Team-Pumpkin Chart)
Average gain of 4.14 pounds per day over last 7
I am happy and impressed with the growth of the pumpkin especially considering the plant it is growing on is very small. I purposely had the nutrients on the low side which I think contributed to the increased odds of a successful fruit set. However, now that the fruit is growing it is putting stress on the plant as the vine growth has slowed way down even though I have added some diluted fertilizers.
What is interesting is that the plant I grew last year was basically out of control with leaves and vines everywhere, and this year is basically the exact opposite with a much smaller plant. Both plants are going to produce an acceptable sized pumpkin despite their differences in overall size. It is interesting to see how efficient a plant can be and brings into question, how big does a plant really have to be?
Either way, I know I am fortunate to be able to have this set-up and get to share my observations with other growers in hopes of improving genetics and growing techniques for everyone. Even growing in the winter I am still learning more about these giant pumpkin plants.
|
|
|
|
Friday, March 14
|
View Page
|
 |
5.8 Osmala (Big Zac) ’13 (F: 4.37 Osmala x M: self) “Dustyn”
This plant needed some extra aluminum foil to ensure there was still some benefit of reflecting light since the foliage has increased and was shading the original sheet. Overall this plant is doing well and is filling its cage well.
|
|
|
|
Friday, March 14
|
View Page
|
 |
5.8 Osmala (Big Zac) ’13 (F: 4.37 Osmala x M: self “Lori”
While early on this was the runt, it has shown signs of increasing promise as it continues to progress. It may be smaller comparatively to the other plants at this point in time but, if you look only at this plant as a standalone plant you would never know that is was a runt
|
|
|
|
Friday, March 14
|
View Page
|
 |
4.46 Marley ’11 (F: 7.33 Hunt x self) “Erin”
So, far if your mark for success is a vigorous plant, this is the clear winner in the group. While all plants have been receiving consistent treatments this plant has always been ahead of the pack and continues to be an aggressive grower.
|
|
|
|
Friday, March 14
|
View Page
|
 |
4.46 Marley ’11 (F: 7.33 Hunt x self) “Chelsea”
Overall this plant is in good shape and other than it being a little thinner I see no issues with the plant. It seems to want to branch out a little more than the rest, so it will need a little directing and pruning in the future.
|
|
|
|
Friday, March 14
|
View Page
|
 |
4.46 Marley ’11 (F: 7.33 Hunt x self) “Prof. Matt”
This plant is coming around and is looking better each time that I see it. This plant was not in good shape early on so I am be patient for it to improve without pushing it with excessive fertilizers. I think the main issue is the prolong effects of the original spray damage.
|
|
|
|
Friday, March 14
|
View Page
|
 |
4.46 Marley ’11 (F: 7.33 Hunt x self) “Prof. DeBacco”
This plant is about average for the group. Not a stand out and not a lager, so hopefully it continues on the same track, as there has to be one that fits the average category.
|
|
|
|
Monday, March 24
|
View Page
|
 |
335 Scherber ’11 (x 1734.5 Steil) “Marshmallow”-Day 50
OTT = 170.0”
Est. Weight = 115 pounds (using the official Team-Pumpkin Chart)
Average gain of 2.8 pounds per day over last 12
I am happy to announce that the pumpkin now as an official name of “Marshmallow”! I want to thank everyone that contributed a suggestion as I had about 207+ options to select from.
While the average daily growth has slowed this was expected, and the pumpkin is showing some signs of maturing by increasing the amount of “cantaloping” that is on the stem side. “Marshmallow” has also reached the minimum of 50 days old so every day from here on is only increasing the odds of viable seeds.
|
|
|
|
Wednesday, March 26
|
View Page
|
 |
5.8 Osmala (Big Zac) ’13 (F: 4.37 Osmala x M: self) “Dustyn”
This plant is experiencing the exponential growth phase. It has reached the top of the cage and is still growing. There are also some promising flower clusters that are present on the plant.
|
|
|
|
Wednesday, March 26
|
View Page
|
 |
5.8 Osmala (Big Zac) ’13 (F: 4.37 Osmala x M: self “Lori”
It seems the 5.8 Osmala plant tends to produce some lighter green foliage toward the actively growing tips. It has some subtle signs of being an iron deficiency but it seems to have been with the plant though all stages of development and even during the room + different growing medias with no observable change. As a result, my guess is that this is just a normal trait for the seed line.
|
|
|
|
Wednesday, March 26
|
View Page
|
 |
4.46 Marley ’11 (F: 7.33 Hunt x self) “Erin”
This plant still shows no signs of slowing down. It will be selectively pruned soon so that the excessive foliage can be removed while at the same time this plant will also be cloned to ensure this vigor can be propagated into multiple offspring.
|
|
|
|
Wednesday, March 26
|
View Page
|
 |
4.46 Marley ’11 (F: 7.33 Hunt x self) “Chelsea”
Clearly, there were a few side vines that did not make it into the supporting cage;-) While this does help with increasing air circulation it also makes supporting them a bit of a challenge. As you can see, more reflective sheets of aluminum foil have been added to increase the area for light reflection to match the increase in leaf canopy.
|
|
|
|
Wednesday, March 26
|
View Page
|
 |
4.46 Marley ’11 (F: 7.33 Hunt x self) “Prof. Matt”
This is a good picture angle as you can see “Erin” in the background along with Marshmallow in the same shot. In the far distance at the 1 O’clock position is “Dustyn” and to the right of that is “Lori”. You can also notice that the irrigation system is on as the distinctive wet spots can be seen at the location of the emitters on the drip tapes.
|
|
|
|
Wednesday, March 26
|
View Page
|
 |
4.46 Marley ’11 (F: 7.33 Hunt x self) “Prof. DeBacco”
When going through and putting more aluminum foil under the plants this was the plant I ran out on, so it is a little uneven at this point in time. So far, the insect issues have been at a minimum which is great and as a result there has been no need for any sprays on the plants. I also do not expect Tomato Horn worms to be an issue this time of year;-)
|
|
|
|
Friday, March 28
|
View Page
|
 |
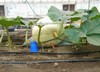
335 Scherber ’11 (x 1734.5 Steil) “Marshmallow”-Day 54
No measurements today just some pictures as it was a nice cloudy day so there are not harsh shadows in the image. The pPumpkin is still growing and the texture around the stem can be more easily seen in this image than some of the previous ones. I know growers typically correlate this cantalouping with going heavy to the estimation chart, but I am more hopefully that it translates into a good seed count. Either way, I have learned more about these giant pumpkins and hopefully this cross will prove itself out later this year.
|
|
|
|
Friday, March 28
|
View Page
|
 |
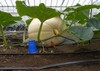
335 Scherber ’11 (x 1734.5 Steil) “Marshmallow”-Day 54
This is a blossom end picture that shows the isolated are of cantalouping that is occurring on this side. It does not seem to follow any pattern but it is noticeable. This year I decided not to cover the pumpkin in anyway while it was growing as I wanted to see if there would be any difference in color potential. While this may not be the best colored pumpkin I think the greenhouse glass may have some filtering quality that could contribute to the washed out look to the pumpkin.
You cannot get a tan while in the greenhouse as the glass blocks out the UV (ultra-violet) light and this could be a contributing factor as I no longer have any grow lights over the plant. I do know of other greenhouse grown fruit that have had great orange and green color so I may have just gotten a white producing one. It is bred with the 1734 Steil so I see more white coloration in the offspring’s future, but hopefully they will be big;-)
|
|
|
|
Friday, March 28
|
View Page
|
 |
Growing Site Under Glass
While the 335 Scherber has not produced much in the way of secondaries I think I have to take some of the blame for this as I did not add any fertilizer. I say this as on the 1734.5 Steil that did not have a pumpkin growing responded very well to the fertilizer treatment I gave and both sites received the same treatments. At the point of fertilizing, the 1734.5 has produced secondary vines and the leaves are slightly larger and taller indicating the response to the fertilizer treatment. I have not followed up with any other treatments and I can begin to see a slow regression back to the original (pre-fertilizer) plant behavior.
Also the portion of the 335 Scherber that is furthest away from the pumpkin seems to be exhibiting some fertilizer growth response. The plant is behaving more like I would expect with secondaries appearing at the nodes and a more youthful and vigorous growth rate. To me this stresses the point that once an area is stunted there is little you can do to get it back. So, keeping a close eye on your plants and being proactive is important.
Even though this may seem like a small obvious detail it does provide me some insight to how these plants respond to fertilizers through an actual example under fairly consistent greenhouse conditions. Attention to details and striking that optimum range is a key to achieving maximum plant efficiency so I understand better just where that line of sufficient is.
|
|
|
|
Friday, April 4
|
View Page
|
 |
4.46 Marley ’11 (F: 7.33 Hunt x self) “Erin”
This plant is showing the early lead with a great looking tomato developing that can be seen enjoying a little time in the sun. This plant was pruned and cloned so that the genetics of this specific plant can be preserved and grown in multiple locations. This will allow for potentially superior genetics to be incorporated on a larger scale than just the one plant later this year.
|
|
|
|
Friday, April 4
|
View Page
|
 |
Marshmallow’s last taping while still on the vine…
335 Scherber ’11 (x 1734.5 Steil) “Marshmallow”-Day 61
OTT = 178.0”
Est. Weight = 131 pounds (using the official Team-Pumpkin Chart)
Est. Weight range = 119-142 pounds (using the official Team-Pumpkin Enhanced Chart)
This will be the last measurement while Marshmallow is still on the vine as harvest time is approaching. I decided to include a slightly different angle of the pumpkin in this post. It looks like the pumpkin is trying to get some color but I do not expect it to change much. I still feel very fortunate to have a pumpkin to weigh this spring season.
|
|
|
|
Sunday, April 13
|
View Page
|
 |
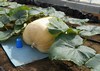
“Marshmallow” Harvest Day!
There were many people that arrived for the event which was great to see. With the helpful hands of a few we were able to get the pumpkin harvested and out of the raised bed and onto the cart for transport. Many cameras were present to document the process and ensure everything met or exceeded the Team-Pumpkin weigh-off standards.
|
|
|
|
Sunday, April 13
|
View Page
|
 |
Marshmallow Harvest Day! The procession…
This shows a good stem side picture of Marshmallow. I really like the shape of this pumpkin from this end and this is the first good look of the pumpkin that is not impeded by the shadows of the leaves. The blue cup is also riding with the pumpkin for continued size comparison. The spring flowers on the greenhouse benches add a nice touch as the pumpkin is carted to the scale.
|
|
|
|
Sunday, April 13
|
View Page
|
 |
Marshmallow Inspection and Taping
A special thanks goes out to the official judges that did the inspection and taping (two pictured here). If you look carefully you can see the official judge’s ribbon to ensure that all parts of the process are carried out officially and by people that have pumpkin growing experience. There were also representatives from three different states to ensure no home field advantage.
|
|
|
|
Sunday, April 13
|
View Page
|
 |
Marshmallow Underside Inspection
After the measurements were taken and the easy view areas were inspected the bottom portion of the pumpkin (which is every growers worry) had to be inspected. Other than a little soil the bottom was clean and as a result the pumpkin passed the inspection process!
|
|
|
|
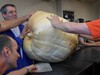
Sunday, April 13
|
View Page
|
 |
Marshmallow heading to the scale…
Some weigh-offs use tarps, lifting rings, forklifts, skid-steers, or other machinery to lift the pumpkins at their weigh-offs. At this event we were fortunate to have quite the lifting crew that was so strong they did not even need a lifting tarp!
Go Team-Pumpkin!
|
|
|
|
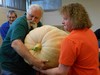
Sunday, April 13
|
View Page
|
 |
Marshmallow’s weight is…
With the pumpkin on the scale and everyone waiting with anticipation, the scale read-out was covered. Once some time was allowed for the scale to balance out I removed my hand, and the numbers showed…
|
|
|
|
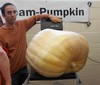
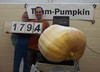
Sunday, April 13
|
View Page
|
 |
179.4 DeBacco ’14 (F:335 Scherber ’11 x 1734.5 Steil) “Marshmallow”- Day 70
Well it is official now my 2014 winter project pumpkin made it to the scale!
|
|
|
|
Monday, April 14
|
View Page
|
 |
Marshmallow Harvest Day! Getting it through the doorway…
Here you can see most of the people in attendance (or at least their heads). Even Flat Norm was there and I think he is standing on something, because I do not think he is that tall;-) I am always happy to see how a pumpkin can bring so many people together.
|
|
|
|
Tuesday, April 15
|
View Page
|
 |
179.4 DeBacco ’14 (F:335 Scherber ’11 x 1734.5 Steil) “Marshmallow”- Day 70
I want to thank all of the people that helped make this project and weighing possible. There is a true Team effort in place which is rewarding to see. This was another year of learning in the greenhouse and I feel fortunate that I was able to grow another pumpkin during the winter. I am hopeful that this cross will do well and I know that I will be growing a seed from this pumpkin in my patch this year.
|
|
|
|
Tuesday, April 15
|
View Page
|
 |
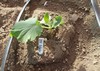
Picture taken on April 12th, 2014
Seems odd to say, but… I am trying to get some soil heating cables buried before the weigh-off tomorrow;-) We have been getting a lot of rain so this has put a delay on garden preparations but today does look like a good window of opportunity. The rye grass cover crop is beginning to get a deeper color green which is encouraging that the season is approaching.
|
|
|
|
Tuesday, April 15
|
View Page
|
 |
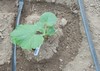
Picture taken on April 12th, 2014
In an effort to try and dry and warm the soil up ahead of time I set-up the cold frames early and while they were not plant ready, there was an increase in temperature. If you look at the rye grass, even though the plastic has been removed you can see the area that was under protection. Even though this protection was only up for about a weeks’ time it did make a difference. The rye is taller and deeper green in a rectangle;-)
|
|
|
|
Tuesday, April 15
|
View Page
|
 |
Picture taken on April 12th, 2014
I then preformed a quick till of the area that will be covered by the cold frame. This simply breaks up the cover crop and makes it easier to hand-dig the soil for the soon to be installed heating cables. All of the cold frame construction materials are off to the side, so once I get the heating cables in the ground I will set the frames back up again.
If you want to see how I construct my cold frames check out my YouTube video link:
http://www.youtube.com/watch?v=2y_9s9AQqYc
|
|
|
|
Tuesday, April 15
|
View Page
|
 |
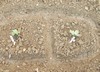
Picture taken on April 12th, 2014
Here are the pits I dig (about 5ft. x 6ft. and 8” deep) for my soil heating cables. This is a lot of work so it is nice when it is all completed. As you can see in this picture, I plant back to back, but it is an off-center back to back planting. (The actual plant sites are spaced about 6ft. from one another.)
|
|
|
|
Wednesday, April 16
|
View Page
|
 |
Under the snow you can see my new weed block to help suppress the early season weeds. The garden in this area has been tilled and amended but there are always some early weeds that want to get established so by covering the area post-tilling with this weed block it should help me save some time. The snow was unexpected, but of no real concern as I do not have any plants outside yet. This was basically a test of the pumpkin growing heating and protection systems.
|
|
|
|
Tuesday, April 22
|
View Page
|
 |
GFCI (Ground Fault Circuit Interrupter) Outlet
The goal of these outlets is to cut power when there is a short in the line detected. They are typically installed in outdoor and areas near the potential for water (like a sink). However, the outlet that I had my heating cables plugged into tripped, which resulted in no power going to my heating cables. After the initial installation process they were all working and sometime after that, the outlet tripped. I noticed when I went to plant my seedlings about a week or so after I had thought the cables were running the soil was cooler than I expected.
When I checked for power there was none, so I went to the outlet and sure enough it had tripped for an unknown reason. As a result the soil that I thought had been warming had not been. This is not what I was hoping for, but this had never happened to me before. The biggest concern at this point is corn seed maggots and reduced early growth. However, corn seed maggots have not been a problem for me in the past. I now have an indicator light so I can tell if the outlet ever trips again during the now critical period of cold nights with plants in the ground.
|
|
|
|
Thursday, April 24
|
View Page
|
 |
Corn Seed Maggots…
Not what you want to see when you go to check on your plants. The first sign is a severely wilted plant. Then when the main stem is inspected just below the soil line there will be a rotten area and continues down to the main roots. The maggots hatch at the first warmth in the soil and migrate to the plant and then eat their way into and up the plant.
There is essentially no cure and only preventative measures. The most effective method is to heat the soil before the plants go in the ground. I thought I was doing that this year (as I have done in the past) but my GFCI outlet tripped and shut off power to my heating cables. I now have an indicator light to make sure I know if the GFCI outlet trips again and I have drenched (watered) the remaining plants with a combination of contact and systemic insecticides as well as Garlic tainted water to try and repel the maggots from the plants.
|
|
|
|
Thursday, May 15
|
View Page
|
 |
Most years I have the greenhouse all cleared by now, but I am working on the tomatoes and I am also growing another pumpkin. What is interesting is that the plants seem to have new life to them even though I have made no modifications. My current thought is that there is something in natural light that these plants respond to and during the winter there is a limited amount of this component that results in the reduced growth.
Tomatoes are doing great with growth being very aggressive and there are multiple tomatoes on each plant. Hopefully, there will be some good sized tomatoes to harvest and collect the seeds from.
So, it looks like I am going to be growing indoors and outdoors at the same time, at least during the spring;-)
|
|
|
|
Friday, May 16
|
View Page
|
 |
Here is my final seed line-up for field growing 2014. I will be going with three (or half) of my line-up with my own seeds which is difficult when everyone else’s seeds always seem to look better (which I think is because you do not know of all the little problems that occur during the season when the pumpkins are not your own). Also, two seeds came from pumpkins under 250 pounds as I think they have a strong lineage behind them and were grown under special conditions.
I have tried to ensure a nice mix of genetics in my line-up and I look forward to see what each produces.
2009 Wallace ’12 (F: 1725 Harp x 1409 Miller)
1766.5 DeBacco ’13 (F: 1676.5 Daletas x 1216.5 DeBacco ’11)
1676.5 Daletas ’12 (F: 1381 Checkon x 1495 Stelts)
811 Gerhardt ’11 (F: 923 Gerhardt x M: 1332 Wolf)
220.3 DeBacco ’13 “Snowball” (F: 2009 Wallace x 1725 Harp [2009 Wallace] clone)
179.4 DeBacco ’14 “Marshmallow” (F: 335 Scherber x M: 1734.5 Steil)
|
|
|
|
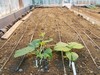
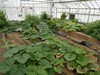
Friday, May 16
|
View Page
|
 |
Here is a general field picture, with the only real change for this year being that I am using more weed block to reduce the time I spend weeding in the early part of the season. I am now using material in the center section between my cold-frames. In the gap areas between the two runs of material you can see how tall the weeds would be getting if there was not weed-block in place. I will be cutting these areas down soon, but we are expecting heavy rain so I left the weed lines untouched to increase the rate of water infiltration and reduce potential for soil runoff.
|
|
|
|
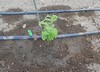
Friday, May 16
|
View Page
|
 |
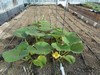
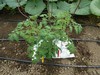
2009 Wallace ’12 (F: 1725 Harp x 1409 Miller)
This plant has been a slow starter, but it seems to be growing normally otherwise. I am trying to get it on the ground safely and based on how it initially grew I am slightly twisting the vine to ensure it does not kink. It may take a day with some good sun to get the leaves to reorient themselves but it looks like it will soon be safely on the ground.
|
|
|
|
Friday, May 16
|
View Page
|
 |
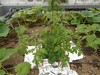
1766.5 DeBacco ’13 (F: 1676.5 Daletas x 1216.5 DeBacco)
This plant looks like it has the aggressiveness of the 1216 so this is encouraging to see. Also, for those wondering what the background of the 1216.5 DeBacco here is some information as to why I had this as the pollinator…
1216.5 DeBacco ’11 = (F: 1325 Hopkins x 1725 Harp) and the 1725 Harp grew my 1465.5 DeBacco ’11 dmg (due to mouse damage, but was weighed at Topsfield Fair) which was my patch biggest and second heaviest Connecticut Grown pumpkin at the time. Knowing the 1325 Hopkins did not have any 1385 Jutras in its background made it a great choice for crossing. If my 1216 plant did not get infected it was on track to produce a great pumpkin.
Some pictures of the 1216.5 DeBacco ’11 (F: 1325 Hopkins x M: 1725 Harp)
http://www.bigpumpkins.com/Diary/DiaryViewOne.asp?eid=172815
http://www.bigpumpkins.com/Diary/DiaryViewOne.asp?eid=172816
http://www.bigpumpkins.com/Diary/DiaryViewOne.asp?eid=172817
|
|
|
|
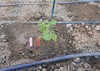
Friday, May 16
|
View Page
|
 |
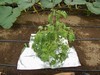
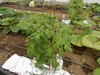
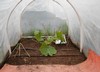
1676.5 Daletas ’12 (F: 1381 Checkon x 1495 Stelts)
For me this was a “must plant” after what this plant produced for me last year. I know the potential of this plant, but I am going to do my best to not give it any special treatment. At this point in time I would classify this plant as average. Right now, there is nothing special about the plant, but remember we are not weighing the amount of leaves we grow, just the pumpkin;-)
|
|
|
|
Friday, May 16
|
View Page
|
 |
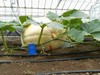
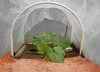
811 Gerhardt ’11 (F: 923 Gerhardt x M: 1332 Wolf)
I expected to have the “best” orange color from this plant. What I did not expect was the super aggressive vine growth early in the season. This plant is by far my current patch best! I try and keep the mill fabric in the same location for all of the pictures so a true size comparison can be made. As it looks right now, this will be the first plant out of its cold frame.
|
|
|
|
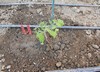
Friday, May 16
|
View Page
|
 |
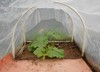
220.3 DeBacco ’13 “Snowball” (F: 2009 Wallace x 1725 Harp [2009 Wallace] clone)
Much like the 2009 Wallace plant I have growing this plant has been slow to get going. However, after some patience from my end, it does look like it is starting to vine out. I have heard from a grower that grew it last year they were ready to pull their “Snowball” out three times, and even with a late pollination still managed a pumpkin over 1700lbs. So, I am willing to take the risk with a slow starting plant, as it is still early in the season and a lot can happen.
|
|
|
|
Friday, May 16
|
View Page
|
 |
179.4 DeBacco ’14 “Marshmallow” (F: 335 Scherber x M: 1734.5 Steil)
This is my smallest plant, but this is to be expected as the pumpkin this seed came from was harvested on April 13th, 2014. This is the pumpkin I grew this past winter and the start of my diary contains the progress of the pumpkin. I really like the cross of this plant as it brings in a clone x clone cross and the 1734.5 is Snowball x self. That is two very strong and unrelated genetic lines coming together, so I hope that the results go to plan;-)
|
|
|
|
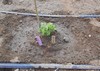
Wednesday, May 28
|
View Page
|
 |
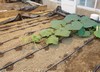
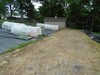
Effectiveness of Weed Block
This shows the effectiveness of the weed block material that I use. I rolled some of the material back and you can clearly see the small portion that I did not have covered. By simply blocking the light I am able to kill the cover crop that I have growing which means no tilling or herbicides needed. I will apply my amendments to this surface and then till to incorporate then, but this step sure makes the entire process easier and limits the amount of times that I need to till down to just once a year.
|
|
|
|
Wednesday, May 28
|
View Page
|
 |
Ready to Till
Here is a portion of the pumpkin patch that I have just finished adding my amendments to. The white haze is the lime that I needed to ensure my pH maintains the optimum level as it was starting to slip. For my soil type I am aiming for a pH value of 6.8
|
|
|
|
Wednesday, May 28
|
View Page
|
 |
My Once a Year Tilling
With only one pass of the walk behind tiller, here is how the patch now looks. I think that many growers are over tilling their patches and with the system I currently have in place, I am able to simply till only once a year which is great. For lime soil contact is important so tilling it into the soil profile should help its effectiveness over the growing season.
|
|
|
|
Monday, June 2
|
View Page
|
 |
4.46 Marley ’11 (F: 7.33 Hunt x self) “Prof. DeBacco”
I still have the tomato plants growing in the greenhouse, so it is nice to be able to do some harvests now and have some of the first giant tomatoes to hit the scale for this year. This plant did not have its tomatoes thinned and as you (and my students) can see there are many tomatoes produced, but the largest has only been 540g (or 1.19lbs). However, it has produced over 5000g (or 11 pounds) of great eating tomatoes;-) The goal of this plant was to show the effect of letting any and all tomatoes set on the plant and the effect on the overall yield.
|
|
|
|
Monday, June 2
|
View Page
|
 |
4.46 Marley ’11 (F: 7.33 Hunt x self) “Chelsea”
This plant was a little slow to get going but it has been a great producer with two of these tomatoes weighing in at 977g (or 2.15lbs) and 1028g (or 2.266lbs) respectively! When compared to the other plants grown in the class this has produced both the second and third heaviest weighed to date. This plant was pruned and thinned to try and ensure maximum yield and while initially it was difficult to cull some of the “babies” I think the results justify the difficult decisions that were made earlier in the year.
It was great to be able to show the comparison of this plant to the “Prof. DeBacco” plant that was not pruned or thinned and grown from the same seed and only about 7ft away. This stressed the point that the grower can have a strong influence on what the plant produces.
|
|
|
|
Monday, June 2
|
View Page
|
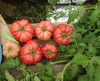 |
5.8 Osmala (Big Zac) ’13 (F: 4.37 Osmala x M: self) “Dustyn”
Overall the 5.8 Osmala seems to produce more symmetrical tomatoes with less of a lobular look to them when compared to the 4.46 Marley’s. This could lead to a less chance of splitting or cracking but overall I have not seen much of a splitting problem on any of the plants I have growing. This picture shows a nice sample of the harvest with one of these weighing in at 927g (or 2.04lbs) placing it a very close fourth place in the class overall, and the 4.46 Marley plants holding to top-3 class weights so far.
|
|
|
|
Monday, June 2
|
View Page
|
 |
3.11 DeBacco ’14 (F: 4.46 Marley ’11 (F: 7.33 Hunt x self) “Prof. Matt” x M: Self) New Connecticut State Record!!!
Looks like the teacher still has the touch, since this (my) plant yielded the heaviest tomato out of the class. Not only is this the largest tomato in the class, but it is also a new Connecticut State Record! I was surprised and am very thankful to now hold two current state records, one in tomatoes and the other in pumpkins.
While all of the tomato plants were initially severely spray damaged (see diary entry on 1/24/14 @ http://www.bigpumpkins.com/Diary/DiaryViewOne.asp?eid=213337 ) I had confidence that the growing tips were still good and even though the turnaround was not immediate all of the plants did recover and are now growing excessively.
Also, everyone has been very impressed with size of all of the “cull” tomatoes. The tomatoes have all been flavorful, and dense which is perfect for large sandwiches. It is not every day you see a tomato around two pounds so it has been a great way to get people interested in Plant Science.
|
|
|
|
Saturday, June 7
|
View Page
|
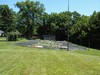 |
Patch Update…
Here is an overall patch picture showing all of the plastic from the cold-frames has been removed. For the most part the plants are tracking together which should help ensure there are male flowers ready on all plants so that I can make the crosses that I have planned. If the weather stays like today with some good temperatures and sunshine I think the plants will respond in a positive way.
|
|
|
|
Thursday, June 12
|
View Page
|
 |
5 Days later…
There is a noticeable difference in plant development in just the last 5-days which is encouraging. I have been busy taking down all of the cold frames to clean up the growing areas. I have also set up the SVB (Squash Vine Borer) traps which are actually not baited with the pheromone at this time, but will be soon. I have heard some people have caught some SVB’s with no lure just the traps set up so I am testing that for a little bit. I am using the traps for mating disruption so the pheromone is a requirement for this purpose. I have also set-up the irrigation timer box, but with all of the rain this is not an immediate priority.
Today is also the day I have historically measured my plants to estimate each ones leaf area as it is the birthday of a grower I know so this helps me remember the date;-) Most people just measure the main vine length which is easy, but as you will see this does not tell the full story of the size of the plant. By estimating the leaf area I am able to better determine the true size of each plant which offers a more meaningful year-to-year plant comparisons.
|
|
|
|
Thursday, June 12
|
View Page
|
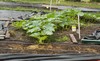 |
2009 Wallace ’12 (F: 1725 Harp x 1409 Miller)
This plant was slow to get going, but it has come around for the most part and other than the fact that it is on the small side, everything seems to be normal. Side vines are starting to be buried so I am sure it will just be a matter of time before this plant fills in the area I have planned for it.
While it seems the standard for comparison this time of year is main vine length, I have had plants in the past that grow a great main vine but do not ‘fill-in’, so I developed the idea of Leaf Area Estimation which is basically the area of a triangle. (This works best for the standard Christmas Tree style of pruning.) All you have to do is measure the width of the plant and the length of the main vine. Then it is simply (1/2)*(width of the plant)*(main vine length) = Leaf Area Estimation.
Estimated Leaf Area = 87.5 square feet
Main Vine Length = 14 feet
|
|
|
|
Thursday, June 12
|
View Page
|
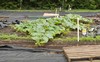 |
1766.5 DeBacco ’13 (F: 1676.5 Daletas x 1216.5 DeBacco ’11)
Overall, I am happy with this plants performance as it is a very nice looking plant. It has been keeping a full appearance with the side vines growing at a rate that is keeping up with the main vine.
While it seems the standard for comparison this time of year is main vine length, I have had plants in the past that grow a great main vine but do not ‘fill-in’, so I developed the idea of Leaf Area Estimation which is basically the area of a triangle. (This works best for the standard Christmas Tree style of pruning.) All you have to do is measure the width of the plant and the length of the main vine. Then it is simply (1/2)*(width of the plant)*(main vine length) = Leaf Area Estimation.
Estimated Leaf Area = 124 square feet
Main Vine Length = 15.5 feet
|
|
|
|
Thursday, June 12
|
View Page
|
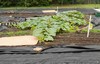 |
1676.5 Daletas ’12 (F: 1381 Checkon x 1495 Stelts)
This plant has the largest estimated leaf area out of all six plants that I have growing this year. However, compared to the same day last year, it is smaller than I had just one year ago. Personally, I think the weather has to do with this smaller size and while it is smaller it is not too far behind. While we as giant pumpkin growers never like to be behind, I think that this plant (and even all of my others) is not out of contention as of today.
While it seems the standard for comparison this time of year is main vine length, I have had plants in the past that grow a great main vine but do not ‘fill-in’, so I developed the idea of Leaf Area Estimation which is basically the area of a triangle. (This works best for the standard Christmas Tree style of pruning.) All you have to do is measure the width of the plant and the length of the main vine. Then it is simply (1/2)*(width of the plant)*(main vine length) = Leaf Area Estimation.
Estimated Leaf Area = 140 square feet
Main Vine Length = 16.5 feet
|
|
|
|
Thursday, June 12
|
View Page
|
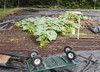 |
811 Gerhardt ’11 (F: 923 Gerhardt x M: 1332 Wolf)
While the picture may not show it, this is my best looking plant in the patch. It is the second largest by leaf area estimation but it seems to have produced leaves that are all edge to edge that is allowing for maximum coverage while limiting any overlap. I am happy with the overall look of the vegetative growth and I hope to be equally impressed with the visual characteristics of the pumpkin in the future.
While it seems the standard for comparison this time of year is main vine length, I have had plants in the past that grow a great main vine but do not ‘fill-in’, so I developed the idea of Leaf Area Estimation which is basically the area of a triangle. (This works best for the standard Christmas Tree style of pruning.) All you have to do is measure the width of the plant and the length of the main vine. Then it is simply (1/2)*(width of the plant)*(main vine length) = Leaf Area Estimation.
Estimated Leaf Area = 127 square feet
Main Vine Length = 17.5 feet
|
|
|
|
Thursday, June 12
|
View Page
|
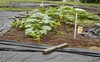 |
220.3 DeBacco ’13 “Snowball” (F: 2009 Wallace x 1725 Harp [2009 Wallace] clone)
There are many similarities to the 2009 Wallace plant that I have growing which would be expected as they are similar genetically. While this plant has also seemed to have a slow start (like the 2009 Wallace) it seems to have recovered sooner and is larger than the 2009 at this time. The main vine seems to be on an exponential growth curve and the secondary vines are trying to keep up;-) In short, I am very glad to have this plant in my patch this year.
While it seems the standard for comparison this time of year is main vine length, I have had plants in the past that grow a great main vine but do not ‘fill-in’, so I developed the idea of Leaf Area Estimation which is basically the area of a triangle. (This works best for the standard Christmas Tree style of pruning.) All you have to do is measure the width of the plant and the length of the main vine. Then it is simply (1/2)*(width of the plant)*(main vine length) = Leaf Area Estimation.
Estimated Leaf Area = 94 square feet
Main Vine Length = 15 feet
|
|
|
|
Thursday, June 12
|
View Page
|
 |
179.4 DeBacco ’14 “Marshmallow” (F: 335 Scherber x M: 1734.5 Steil)
If you look at the numbers this is not the most impressive plant in the patch, but keep in-mind that this pumpkin was still on the vine in mid-April, so this seed was started the later than all of the others. Considering that it is the youngest plant in the patch, it is not all that far behind which is impressive and I hope the aggressive nature of this plant carries over into (hopeful) pumpkin that will be set in the near future.
While it seems the standard for comparison this time of year is main vine length, I have had plants in the past that grow a great main vine but do not ‘fill-in’, so I developed the idea of Leaf Area Estimation which is basically the area of a triangle. (This works best for the standard Christmas Tree style of pruning.) All you have to do is measure the width of the plant and the length of the main vine. Then it is simply (1/2)*(width of the plant)*(main vine length) = Leaf Area Estimation.
Estimated Leaf Area = 54 square feet
Main Vine Length = 12 feet
|
|
|
|
Friday, June 20
|
View Page
|
 |
This is how the leaves should look.
Pay careful attention to the color and the shape as there will be some variance from this in the following postings. This image shows what the normal (or typical) leaves look like. Sadly I noticed some leaves that did not match these in my pumpkin patch.
|
|
|
|
Friday, June 20
|
View Page
|
 |
This is not right!?!?!
If you look quick at this picture the leaf does have a normal shape to it, what is odd is the coloration. This is often called a mottled appearance and this is characteristic of a virus infection. There is no cure for viruses in plants and the best method of control is complete removal. I had experienced virus infection two years ago that basically ended my season early so this time I was able to recognize the problem early. I also know of a lab that can do a screening so I sent some sample leaves and then removed the entire plant.
I had ZYMV (Zucchini Yellow Mosaic Virus) two years ago and this time I have a different virus that could not be specifically identified on the 13 virus screen I had preformed. However, after talking over with the lab tech, I know I have an aphid transmitted Potyvirus, but I most likely have Watermelon Mosic-2. No cure, but at least it is not TMV (Tobacco Mosaic Virus which can be infectious for 20+ years.
|
|
|
|
Friday, June 20
|
View Page
|
 |
It is more than just one leaf…
This is a Potyvirus, and most likely Water Melon Mosaic-2. As you can see the newer growth leaves have the mottled appearance to them, but the leaf morphology (shape) is normal. There is no cure and shortly after this picture was taken samples were collected for diagnosis purposes and then the plant was removed.
|
|
|
|
Friday, June 20
|
View Page
|
 |
Tell tale sign of virus!
This is a Potyvirus, and most likely Water Melon Mosaic-2. While the mottled appearance of the leaves is an obvious indication of virus when you see green splotches on immature fruit this is confirmation your plant has a virus infection. Depending on the stage of plant development and the timing of infection it is possible to grow a pumpkin over 1,000 pounds (pumpkin should be 20+ days old upon infection), I decided to remove the plant in hopes of saving the others I have growing around it. Odds are I may be too late already, but I felt this was worth a chance.
|
|
|
|
Friday, June 20
|
View Page
|
 |
Leaves taken as a sample to send to the diagnostic lab
Here is a picture showing the leaves that were collected and sent to the lab for screening. The newer growth is what you want to take as this is going to have the highest rate of cell division and as a result the greatest site of virus particle formation. The key to sending any material to a lab is a proper sample. If you are ever unsure what to send contact the lab for guidance. Remember the lab is only as good as the sample they receive from you.
Speeding ahead I can now say that the lab diagnosis is Potyvirus, and most likely Water Melon Mosaic-2.
|
|
|
|
Friday, June 20
|
View Page
|
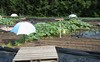 |
Last picture of the 1766.5 DeBacco ’13 (F: 1676.5 Daletas x 1216.5 DeBacco ’11)…
I was really looking forward to growing this plant, but it looks like it was not meant to be for me. To all of those that do have a 1766.5 DeBacco ’13 in the ground I wish you the best of luck. The root structure on the plant that I noticed while I was pulling it out:-( was impressive and I would expect it to have just as much potential as the pumpkin size the seeds came from.
After I hand pulled the plant out I made sure to rinse my hands and then wash them with milk as the milk can bind to the virus particles limiting the chance of cross infection. Odds are the aphids have already spread the virus but I did not want to be the one responsible for infecting my other plants. There are studies that show this simple hand wash can reduce the spread of TMV (Tobacco Mosaic Virus) by workers who are handling infected transplants.
I find it quite interesting that milk also has this virus binding property (on top of reducing Powdery Mildew) and it seems I have found yet another use for milk in the pumpkin patch. While, milk feeding does not work, there are other proven uses for it.
|
|
|
|
Monday, June 30
|
View Page
|
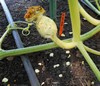 |
**Viewer Discretion is Advised**
As I was inspecting my plants for virus I noticed a much more obvious problem with yet another patch pest… Squirrels!
There are not many in my area and they did not hit many pumpkins but this one was my planned keeper on 179.4 DeBacco 14 “Marshmallow”. Needless to say, I will have to set another pumpkin on this plant and it will be protected with a 5-gallon paint strainer bag to allow for easy inspection, shade and the ability for the flower to breath while it is developing.
|
|
|
|
Sunday, July 6
|
View Page
|
 |
Patch Update…
Well, the pollination I was planning on doing on the 179.4 DeBacco ’14 “Marshmallow” was not needed since the plant has become infected with virus and was completely removed. Also, next to this plant was the 2009 Wallace ’12 which was also showing advanced signs of virus infection so I also removed it.
While I still have three plants, each of those (1676.5 Daletas, 811 Gerhardt, 220.3 DeBacco) is also infected with what is believed to be Watermelon Mosaic-2 virus. However, at this point in time I have decided not to remove these plants as they each have pumpkins that may be able to make it to day 20 before the virus reaches the part of the plant the pumpkins are located. The idea is if I can get the pumpkin beyond the age most of the cell division occurs (about day 20) I may be able to get them to the end of the season. Two years ago when my patch was infected with Zucchini Yellow Mosaic I had one pumpkin that was older than 20-days and it did not get the traditional virus bumps and I was almost able to get it to a weigh-off (I picked it early and it rotted on the trailer).
Since viruses need active dividing cells to replicate I proposed the theory that cells in our pumpkins do not divide beyond day 20. Even when your season is a loss, there can still be very important things to learn if you pay attention.
|
|
|
|
Sunday, July 6
|
View Page
|
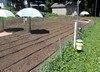 |
Plant sites of the 2009 Wallace ’12 and the 179.4 DeBacco ’14 “Marshmallow”
Both plants have been removed and the area has been raked in preparation for “Contractors Grade” grass seed and some left over Buckwheat seed I have from a few years ago. The Squash Vine Borer (SVB) traps will be left up to hopefully reduce the local population and try and reduce at least one pest to my remaining plants.
|
|
|
|
Thursday, July 10
|
View Page
|
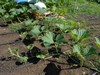 |
220. DeBacco ’13 “Snowball”
What could have been…
While on a quick glance this plant may look normal, you need to look carefully at the leaves on the main vine compared to the secondary vines. Main vine leaves look “normal” but the leaves on the secondary vines are mottled and misshapen. It is hard to tell in this ‘point in time’ photo, but the growth is also stunted with the side vines basically, not growing.
On the main vine you will also notice that one leaf has yellow and brown at the margin (edge), this is a leaf burn that is a direct result of the virus as the plant is not able to properly function and is spreading through the plant. This portion of the plant was removed since the side vines had not grown very much over the last week and were not looking very good.
|
|
|
|
Thursday, July 10
|
View Page
|
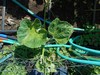 |
Advanced Virus Infection
This shows what some of the virus infected leaves on the 220.3 DeBacco ’13 “Snowball” look like. As you can clearly see there is not just one way that virus infected leaves can look, since both of these leaves are on the same vine, but look vastly different.
|
|
|
|
Thursday, July 10
|
View Page
|
 |
Another Indication of Virus Infection
The 1676.5 Daletas ‘12 is also infected with the virus, which is evident by this almost green squash looking female flower. This is a clear sign that the virus had been incorporated basically when the flower was initially developing in the meristem (actively dividing tip) of the vine.
(Needless to say, this portion of plant was removed.)
|
|
|
|
Thursday, July 10
|
View Page
|
 |
Lumpy Bumpy Pumpkin = Virus Infection
This is why I had to remove my 2009 Wallace ‘12 plant as the pumpkin was under 20-days old when it got hit with virus and as a result the pumpkin gets these lumps and bumps all over it. A pumpkin like this one will not have much hope of staying together and is just not worth the time and increased risk of the area’s virus inoculum.
|
|
|
|
Thursday, July 10
|
View Page
|
 |
Pokeweed (Phytolacca americana)
While we all dislike weeds because they get in the way of our plants in actuality they are just nuisance plants. In this case Poke Weed is a minimum nuisance plant since there are not many of them, but the real problem is that it can act as a reservoir for certain plant virus and be non-symptomatic. This simply means the plant can be infected with a virus but not show any indication that it is infected. An aphid can come to a Pokeweed plant pick-up the virus and then spread it to the pumpkin plants and it would seem as if the virus came out of nowhere, when it could be potentially sitting just a few feet away from the patch “hiding” in the Pokeweed plant.
There are other plants also that can act as reservoir hosts but this is a very common weed that I have seen around other peoples growing areas. Regardless of the host what is very interesting (at least to me) is that the virus has specific proteins that allow it to easily bind to the stylet (mouth part) of an aphid. This helps make the spread easier for the virus and it also self selects the proper host to be an efficient vector.
My neighbors have been happy as I have been controlling this weed in all of their properties in hopes of reducing the potential hosts for the virus. There are other plants that can carry viruses but this is an obvious one that can be common, so I want to warn others of the potential evil that can be residing in one of these plants.
|
|
|
|
Thursday, July 10
|
View Page
|
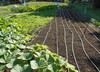 |
Grass Seed Planting
Newly planted grass seed only 4 days post seeding and it is already starting to germinate! On the left is an earlier planting when I first removed my 1766.5 DeBacco plant about 20 days ago and the exposed soil (if you look carefully) has the little grass seedlings that have a “peach fuzz” look. It has not been easy trying to get grass to germinate and grow mid-summer but keeping it well watered has certainly helped. I have even run my overhead impact sprinklers longer to keep the very surface moist.
The drip tapes water time has been reduced since I do not need the total volume of water that a growing pumpkin plant would need. However, the drip lines are helping as it seems germination is starting in the area around the emitters as they are getting just a little bit more water than the surrounding area on the soil surface. In the main root zone the moisture is even but on the very surface there are some slight moisture differences.
|
|
|
|
Thursday, July 10
|
View Page
|
 |
1676.5 Daletas ‘12 (x 220.3 DeBacco “Snowball”)
Pollinated: June 20th, 2014
Lobes: 4
Lobe symmetry rating (1-10, with 10 being the most symmetrical): 5
Days old: 20
OTT: 174”
Est. weight: 123 pounds
This is looking like it will be a barrel shaped pumpkin based at this point in time. The color is white, like I had last year so I would expect it to follow the same pattern and be a pink-ish color by the end of the season if it makes it that far. The plant is infected with virus but the plant is doing its best to keep the pumpkin growing. This pumpkin is actually one day ahead of where my 1676.5 Daletas plant was last year (when it was also at day 20) and if it was not for the virus I feel this could have been a very competitive pumpkin.
|
|
|
|
Thursday, July 10
|
View Page
|
 |
811 Gerhardt ’11 (x 2009 Wallace)
Pollinated: June 21st, 2014
Lobes: 5
Lobe symmetry rating (1-10, with 10 being the most symmetrical): 10!
Days old: 19
OTT: 156”
Est. weight: 89 pounds
Already this pumpkin is showing the main reason why I planted it. The shape is great and there is some great orange color potential even at the early stages of development. This is the youngest of the three pumpkins that I have left so hopefully, the pumpkin itself will not become infected with the virus that is already running through other parts of the plant.
While some orange growers may not like the color of the pollinator I can say that there is certainly a different genetic back ground to the pollinator, and it should add some aggressive plant and pumpkin growth to the offspring while hopefully maintaining the color of the 811 Gerhardt.
|
|
|
|
Thursday, July 10
|
View Page
|
 |
220.3 DeBacco ’13 “Snowball” (x 1676.5 Daletas)
Pollinated: June 19th, 2014
Lobes: 5
Lobe symmetry rating (1-10, with 10 being the most symmetrical): 9.5
Days old: 21
OTT: 206.5”
Est. weight: 201.5 pounds
The growth rate of this pumpkin has been exceptional. What makes this particularly impressive is that the plant is stunted with leaf burn (both a direct result of the virus) and also has not filled the total area. The shape and color are what I expected but the growth rate is what we all dream of.
I am simply putting this pumpkin into the category:
“What could have been…”
|
|
|
|
Monday, July 14
|
View Page
|
 |
342.0 DeBacco ’14 (F: 335 Scherber ’11 x 1734.5 Steil) “Inside Job”
Pollinated April 11th, 2014
5 Lobes
Lobe symmetry rating (1-10, with 10 being the most symmetrical): 7.5
95 Days Old
After harvesting Marshmallow from the 335 Scherber ’11 I decided to set another pumpkin just to see if one would set, because when the 179.5 DeBacco ’14 “Marshmallow” was growing, nothing else would set. However, once I harvested” Marshmallow”, I was able to get this pumpkin “Inside Job” set and also got another flush of vine growth. This just further shows the stress that an actively growing pumpkin can have on a plant.
The position of the pumpkin was not ideal with the pumpkin being right at the edge of the growing space, but with the help of my students when it was younger we were able to stack a bunch of wood and cement blocks under it to provide a platform for it to grow on. It was a good thing I did this as this pumpkin really put on some weight. This pumpkin is older than most of my greenhouse grown pumpkins and I think that is why it has more color than the 179.5 DeBacco ’14 “Marshmallow” that was grown on the same exact plant.
This pumpkin did accomplish a goal I set out to do… it would not fit out either of the greenhouse doors so I had to weigh it inside the greenhouse section and take it out in pieces!
|
|
|
|
Monday, July 14
|
View Page
|
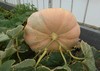 |
342.0 DeBacco ’14 (F: 335 Scherber ’11 x 1734.5 Steil) “Inside Job”
OTT = 249”
Team-Pumpkin 2013 Chart estimation = 346 pounds
Expected Range = 315 to 376
Looking at this pumpkin from the stem end you can see similarities to the 1161 Rodonis/1725 Sweet line that is the pollinator to the 335 Scherber ’11 seed. The plant was stressed in more ways than one with the high heat that is common in a greenhouse during the month of July and I also only gave the plant water with no fertilizers being added so the older leaves are showing a little heat and nutrient stress.
|
|
|
|
Monday, July 14
|
View Page
|
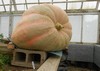 |
342.0 DeBacco ’14 (F: 335 Scherber ’11 x 1734.5 Steil) “Inside Job”
Living on the Edge
This shows the under pumpkin support base that was built when the pumpkin was much smaller. I did a good job of estimating the size it would get to but as you can see there was a portion of the pumpkin that was unsupported. It did not cause any problems that I could see but I would not recommend this growing style, even though it did make it easy to inspect some of the bottom of the pumpkin;-)
|
|
|
|
Monday, July 14
|
View Page
|
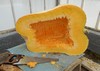 |
342.0 DeBacco ’14 (F: 335 Scherber ’11 x 1734.5 Steil) “Inside Job”
Cross-Section
While it may seem odd to have a pumpkin harvested at 95 days old in mid-July this is for real. Since I had to remove the pumpkin in sections it made for a great cut away picture which shows exactly what I want to see, even an thick supporting walls all the way around. I was able to get seeds from this pumpkin also which are now drying.
This is essentially a 179.4 DeBacco ’14 “Marshmallow” remake, with the female plant being the exact same plant and the same is true for the pollinating plant. The reason for the size difference I think is due to the increase in natural light as in the winter months I think this is my most limiting factor. The lack of light may also be causing some other issues that I have seen during the winter months that were less evident during this spring time growing situation.
|
|
|
|
Friday, July 25
|
View Page
|
 |
1676.5 Daletas ‘12 (x 220.3 DeBacco “Snowball”)
Days old: 35
OTT: 279.5”
Est. weight: 483.5 pounds
Est. weight range: 439-522
Average over last 8 days: 23.4 pounds per day
I really like the shape this pumpkin is taking on as it is getting some great length to it. It is growing on a little bit of a hill that I did not correct for early as I was not sure the pumpkin was even going to make it. Either way, I have been doing my best to move it so it is at a right angle to the vine but the fact that it is long means there is not a lot of area that will be coming in contract with the main supporting vine which is a good thing. Color is still very white, so it does not look like this one picked up any of the pollinator color influence;-)
I am also very impressed with the growth considering the full blown virus infection and I do not expect this growth to continue for much longer. Sad to see but I am still hopeful that I will have something to weigh at a weigh-off this year.
|
|
|
|
Friday, July 25
|
View Page
|
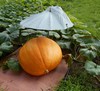 |
811 Gerhardt ’11 (x 2009 Wallace)
Days old: 34
OTT: 249”
Est. weight: 346 pounds
Est. weight range: 315-376
Average over last 8 days: 16.5 pounds per day
This pumpkin has absolutely great color that seems to just keep improving week to week. It may not be the biggest pumpkin in the patch but it sure has some of appearance characteristics that we all associate with a giant pumpkin. If nothing else this pumpkin sure does look nice and I have been keeping the sheet off it so I can enjoy the look of a giant pumpkin rising out of the pumpkin patch.
|
|
|
|
Friday, July 25
|
View Page
|
 |
220.3 DeBacco ’13 “Snowball” (x 1676.5 Daletas)
Days old: 36
OTT: 302”
Est. weight: 605 pounds
Est. weight range: 552-657
Average over last 8 days: 24.4 pounds per day
I am shocked at the continued performance of this pumpkin and plant. While other growers may say that 24 pounds a day average is not good enough, if you could see the overall condition of the plant you would better understand my excitement. The virus has really hit this plant hard with now very little left after the pumpkin and the vines before the pumpkin getting an every worsening leaf burn to them. To me this is a statement to the real grow power of this seed.
|
|
|
|
Sunday, July 27
|
View Page
|
 |
Patch Tour Rain or Shine
(Note: That is my 220.3 DeBacco ’13 “Snowball” in the foreground)
It is not only the pumpkins that enjoy the protection of umbrellas but the guests that I had visit during the Team-Pumpkin patch tour also appreciated them as well. Luckily, I was able to find a recent sale and as a result I stocked up for next year so I had a few extras to pass out to everyone. Initially everyone showed up and there was not rain but then the rain came and it came down hard. So I ran into the shed and came out with over 12 umbrellas for everyone.
Thanks goes out to everyone who attended as well as the other growers that hosted as part of the tour!
We have had Team-Pumpkin patch tours in sun, rain, and even -0.6 degree F weather so nothing can stop a group of dedicated and supportive growers.
|
|
|
|
Sunday, July 27
|
View Page
|
 |
Team-Pumpkin Patch Tour (Rain or Shine)
Under the protection of umbrellas the growers in attendance made their way around the patch to see what I have growing. The presence of the mosaic virus was very evident as well as my seeding of grass seed over most of the patch. It has had a chance to get well established and is my current in-season cover crop. The height differences are due to the different seeding dates but overall I was able to get a good stand on both plantings.
I think it was good to show the newer growers that even experienced growers can have challenges. I think when it come to the weigh-off only the best make it and it can be intimidating to someone who may not think they can even grow a pumpkin that is a couple hundred pounds. This is why we have made an extra effort to encourage the new growers to give this a hobby a try. Based on the e-mails I received post-tour it sounds like we may have saved one growers season which is great to hear. Go Team-Pumpkin!
|
|
|
|
Monday, August 4
|
View Page
|
 |
Patch Overview
I still have three plants left but growth on all of them has basically stopped. I feel fortunate for the period of time that they were growing as the plants are not in very good shape due to the sever virus infection. I am still hopeful that I can have an entry for at least one weigh-off this year so I am counting the days until harvest…
|
|
|
|
Monday, August 4
|
View Page
|
 |
Weeding to do, or is weeding all ready done?
While it may not look like it on first glace I have been weeding the pumpkin patch regularly. While many growers want a perfect weed free patch my weeding has been directed toward dicot weeds and I have been leaving the grass species. The grass seed that I added has finally established and it has been out competing most of the other weeds I had starting. I should have good soil stabilization since I basically have a lawn on both the inside and outside of my pumpkin patch fence.
|
|
|
|
Sunday, August 10
|
View Page
|
 |
Vermont Growers Patch Tour
I want to thank the entire Vermont Growers group for organizing this patch tour. It was great to be able to see everyone! Even though it was a weekend I still put some time in to diagnose potential problems that I saw and offer what suggestions I could for control/prevention in the future. This stop had some great looking pumpkins and the weed control is the best I have consistency seen over the years.
The lunch location had a great looking pumpkin and provided the perfect venue for everyone to have a chance to talk and exchange questions.
Thanks to all!
|
|
|
|
Tuesday, August 12
|
View Page
|
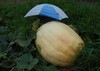 |
1676.5 Daletas ‘12 (x 220.3 DeBacco “Snowball”)
Days old: 53
OTT: 321”
Est. weight: 722 pounds
Est. weight range: 659-784
Overall this is the exact shape that I like to see in a pumpkin. Sadly the virus has caused the growth and development to stop but up to this point I have liked what I saw from this seed. It was also on a very favorable pace that makes me think that the phenomenal growth rate I saw last year was not just a lucky seed, but normality for this seed.
Only complaint is that I wish there was a little more orange color with this pumpkin but everything else I look for seems to be present so I glad I gave it another try this year.
|
|
|
|
Tuesday, August 12
|
View Page
|
 |
811 Gerhardt ’11 (x 2009 Wallace)
Days old: 52
OTT: 292.5”
Est. weight: 551.5 pounds
Est. weight range: 503.5-599
While this may not be the biggest pumpkin in the patch it sure is the best looking. I have not been covering this pumpkin and the color has only been getting better each day. This pumpkin was orange long ago, but I am now seeing if I can get some of the red/orange color to come though. For whatever reason (my guess is sugar content) the cucumber beetles seem to really like this pumpkin and have been quite a pest damaging the skin in some places. But I have been doing my best to control them and the small areas of damage are minimal as the vast majority of this pumpkin looks like a true giant pumpkin.
|
|
|
|
Tuesday, August 12
|
View Page
|
 |
220.3 DeBacco ’13 “Snowball” (x 1676.5 Daletas)
Days old: 54
OTT: 334.5”
Est. weight: 813.5 pounds
Est. weight range: 742.5-884
I am getting to the point that I think I may need to start weeding around this pumpkin;-) While this plant was hit with virus a little later than some of the other plants it had the best growth rate and post infection but now seems to be the hardest hit with the virus. Even though this pumpkin will not set a new personal best for me I think this could be the “best” seed I have grown to date. I say this because of the growth rate and overall plant performance, sadly the virus has blurred the true potential in this seed for me this year, but others have proved what this seed can do. In my opinion this cross captures two of the top seed lines in one, and my 1676.5 Daletas is the reverse cross.
|
|
|
|
Thursday, August 28
|
View Page
|
 |
792 DeBacco ’14 (F: 1676.5 Daletas ‘12 x 220.3 DeBacco “Snowball”) OTT: 320.5”
This is my Woodstock Fair entry that I am very happy with especially, considering the conditions that I was faced with this year. Watching your pumpkin plants essentially die from a virus infection is not a pleasant sight, so for me getting anything to the scale is an accomplishment. This pumpkin went heavy for me which was a bonus to the goal of getting something to the scale.
This is a cross that I am very excited about as I think it is a great combination of two genetic lines that have proved themselves multiple times. I am going to wait and see if any other growers made this same cross and see which combination looks the most impressive on paper before making a potential selection for next year. If I like mine, I will get the seeds screened for virus to ensure that I will not be starting with infected seeds as the plant was infected, but the appearance of the pumpkin did not become mottled or distorted in anyway, which is encouraging as the pumpkin was 20+ days old when the plant became infected.
|
|
|
|
Monday, September 1
|
View Page
|
 |
792 DeBacco ’14 (F: 1676.5 Daletas ‘12 x 220.3 DeBacco “Snowball”)
From the start this pumpkin had “carve me” written all over it. It has a long shape and smooth skin and this year at the Woodstock Fair we were lucky to add a pumpkin carver and I really like what they did with my pumpkin. The face was very life-like and many of the fair goers commented on the pumpkin. Of course many thought I did the carving but I admitted that I have better growing skills than carving.
At night we added a light which really made it stand out and added to the entire pumpkin tent display.
|
|
|
|
Friday, September 5
|
View Page
|
 |
220.3 DeBacco ‘13 “Snowball” (x 1676.5 Daletas)
Here I am harvesting my Durham Fair entry, as you can see the virus infection killed almost the entire plant. Only 5 leaves remain and my grass cover crop has established itself nicely. This image also shows the modified Team-Pumpkin tripod as this style has couplers that join two eight foot 4”x4” wooden posts together. This allows this 16ft. tall tripod to be transported in a small car like a Honda Civic with ease. This does make handling and storing this once a year use item easier.
Due to the lack of plant material this pumpkin has not grown for at least last three weeks, but I left it attached. Now that my Woodstock Fair entry is off the trailer and carved I now have space to load this one up. It is a little depressing when you go to cut the pumpkin off the vine and realize that there is no reason to cut it because the vine is not attached to anything.
I should also point out that this is how the plant looked, before I pulled any vines out so as you can tell there has not been much supporting this pumpkin for a long while. On the plus side the grass did provide a nice carpet like ground cover so thing got soil splash on it at all. I am still thankful for having a pumpkin to harvest after the sever virus infection.
|
|
|
|
Wednesday, September 24
|
View Page
|
 |
923.5 DeBacco ’14 (F: 220.3 DeBacco ‘13 “Snowball” x 1676.5 Daletas ‘12)
I was happy to get this pumpkin to the scale and knowing how many days that I missed out on any growth due to virus infection I am very happy with the final weight. Personally, I still believe this could have been the best seed/plant I have ever grown even thought this is not my personal best. The growth curve was very impressive and if only I had a full sized plant for the season I think this had the potential to produce an impressive pumpkin. Either way, I am not complaining and thankful to be able to get a pumpkin of this size considering all of the problems I had in my patch with Mosaic Virus.
|
|
|
|
Friday, September 26
|
View Page
|
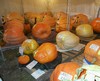 |
Durham Fair Pumpkin Tent Sample of Entries
Team-Pumpkin members have been helping out at the Giant Pumpkin tent at the Durham Fair and here is just a sampling of the entries we had this year. Many thanks goes out to the growers that brought pumpkins (as well as other giant produce) to the Fair. Also, I am sorry for those that brought entries that I was not able to fit in this picture, but this at least provides a representative sample.
|
|
|
|
Sunday, October 5
|
View Page
|
 |
811 Gerhardt ’11 (x 2009 Wallace)
I was clearing some of the plant out to get ready for harvesting my last big pumpkin in the patch and I am very impressed with the color this plant produced. I planted this seed expecting good color and shape and I think I was fortunate to get great color and shape. Sadly disease reduced the overall size of the pumpkin but I am still proud of it and I look forward to driving with it on the trailer to the weigh-off.
I have not taped it since the last time I did a patch wide measuring but I do not think it has grown much so I would say it still estimates is in the range of 503.5-599 pounds.
|
|
|
|
Sunday, October 12
|
View Page
|
 |
705 DeBacco ’14 (F: 811 Gerhardt x M: 2009 Wallace) OTT = 313.5”
After the Southern New England Giant Pumpkin Growers (SNGPG) directors surveyed the field of pumpkins at Frerich’s Farm Weigh-off, this was their selected Howard Dill Award winner. I was very happy and honored to receive this award as I know this is a sought after by many growers. The pumpkin had grown more since I last taped it and it was actually a little to the heavy side so that is always a nice plus to see a nice looking orange pumpkin that also goes heavy.
I added the 2009 Wallace as the pollinator to try and cross something from a little bit of a different genetic background. Hopefully this pumpkin will be enjoyed by many people between now and Halloween at various displays.
|
|
|
|
Saturday, October 25
|
View Page
|
 |
Today I decided to go down to the New York Botanical Gardens to see the giant pumpkins as well as try and meet some of the growers. It was a beautiful New England autumn day which was of great relief to the growers as we have been in a cool, rainy and windy weather pattern recently. The venue was a little different this year, but in my opinion I think it was improved over past years that I have seen. Most of the pumpkins were on display in their full unaltered form and seeing them all together really made for an impressive sight.
|
|
|
|
Saturday, October 25
|
View Page
|
 |
2,058 Hawkley ‘14
Getting to see the North American Champion pumpkin up-close and personal is an honor. This 2,058 pound pumpkin had some impressive length to it and just as the picture shows, it was very white in color. Since it was displayed next to a very orange pumpkin at the main entrance to the gardens I think this made its white color even more apparent. It was hard to get a good picture, but this pumpkin did have an impressive length to it that made it look very impressive. This is also the same spot that the 1810 Stevens was when it was on display so this exact spot holds many memories related to big pumpkins for me.
|
|
|
|
Saturday, October 25
|
View Page
|
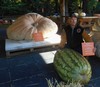 |
Does he grow on Neptune?
I would say Bill had a very good year;-) His pumpkin and watermelon were on display and both were in the top of their respective class which is a great accomplishment. I was able to hear Bill respond to people’s questions and his attention to detail and willingness to share information was certainly a treat. Congratulations on a great year!
|
|
|
|
Saturday, October 25
|
View Page
|
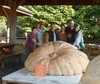 |
While I was unable to stay all day, I did get the chance to meet Pete and Cindi form the West Coast. Even though their pumpkin did not make it to New York it was nice to get a chance to talk with them for a little bit. They both have quite the spunk and energy and their enthusiasm to answer growers questions was great to see. Bill’s pumpkin was most centered and it became the center piece for our picture. It is always an enjoyable time to get the chance to talk with growers from all over the country. Often I may be in e-mail contact but this is not the same as a face to face meeting.
I enjoyed the time I spent around the pumpkins and the growers and I feel fortunate to get a chance to talk with growers from all over the country today.
Congratulations to everyone on their accomplishments this year!!
|
|
|
|
Sunday, December 14
|
View Page
|
 |
705 DeBacco ’14 (F: 811 Gerhardt x M: 2009 Wallace) Howard Dill Winner!
Considering this pumpkin was harvested 68 days ago I think it is in great shape! It was shown to many people at different venues and spectators were respectful in most cases. I also feel the need to state that the color in the picture was not altered in anyway; this is how it actually looked (if you can believe it).
I am holding the front page of the “Hartford Current” on December 14th, 2014 to document the seed harvest day. I am happy to report the pumpkin made great Pumpkin Soup and Pumpkin Bread for the holidays!
|
|
|
|
Sunday, December 14
|
View Page
|
 |
705 DeBacco ’14 (F: 811 Gerhardt x M: 2009 Wallace) Howard Dill Winner!
This is the cutaway of my 705 DeBacco ’14. It is great to see consistent wall thickness and integrity throughout the pumpkin. Overall as you can see there are no major flaws and I hope this trait combined with the grow power of the 2009 Wallace produces some big and orange pumpkins!
|
|
|
|
Tuesday, December 30
|
View Page
|
 |
2014 Season in Review:
Overall it was another very challenging year for me with Mosaic Virus (in two different strains) showing up again very early in the season. However, I may have gained some knowledge about when the virus is transmitted and I am working on a plan for next year. I am impressed with some of the weights I was able to bring to the scale this year due to the lack of supporting plants for most of the season.
With my winter growing it is like having two seasons in one calendar year so here is a summary of my 2014 season. I will list them in order of weighing…
179.4 DeBacco ’14 (F:335 Scherber ’11 x 1734.5 Steil) “Marshmallow”
-This pumpkin went on to produce a 1,644.5 pound pumpkin for Mr. Gehweile!.
Tomato
3.11 DeBacco ’14 (F: 4.46 Marley ’11 (F: 7.33 Hunt x self) “Prof. Matt” x M: Self) Connecticut State Record!!!
- I feel fortunate to hold this title.
342.0 DeBacco ’14 (F: 335 Scherber ’11 x 1734.5 Steil) “Inside Job”
-I think this pumpkin is forgotten about because the odd time of year (July 14th) it was weighed. This is essentially a 179.4 DeBacco ’14 “Marshmallow” remake since it was grown on the same plant with the same pollinator. I was looking at some of the differences of the same greenhouse space growing in the winter compared to the summer.
792 DeBacco ’14 (F: 1676.5 Daletas ‘12 x 220.3 DeBacco “Snowball”)
-I entered this one at the Woodstock Fair.
923.5 DeBacco ’14 (F: 220.3 DeBacco ‘13 “Snowball” x 1676.5 Daletas ‘12)
-This was my largest for 2014 and it was weighed in at the Durham Fair.
705 DeBacco ’14 (F: 811 Gerhardt x M: 2009 Wallace) Howard Dill Winner!
- I appreciate everyone’s interest and hope the cross does well for all of those growers that give it a try.
|
|
|
