| |
|
Entry Date
|
Nick Name
|
Location
|
|
Wednesday, June 21, 2023
|

|
Matt D.
|
Connecticut
|
 |
Entry 25 of 100 |
 |
|
|
|
Day 7 (F: 1832.5 Graham �20 x M: 2365 Wolf �21 (from Ron Wallace))
The pumpkin is growing and still has that nice shine to it. Yesterday (the day before official touch down the area was prepared for the pumpkin now, and for the duration of its growing cycle following this sequence�
1. The area is raked to try and take away any low or high spots and while it may not be perfectly level it intended to match the consistent slope of the land.
2. Two pieces of 5ft.x5ft. mill fabric as added to the soil surface.
3. An approximate 4ft. x 4ft. piece of plywood is added that has been painted to reduce water absorption and help smooth the surface.
4. Two more layers of mill fabric are added on top of the plywood.
5. The mill fabric-plywood-mill fabric sandwich is slid under the pumpkin and as far under as is possible. (Estimated 18� or so.)
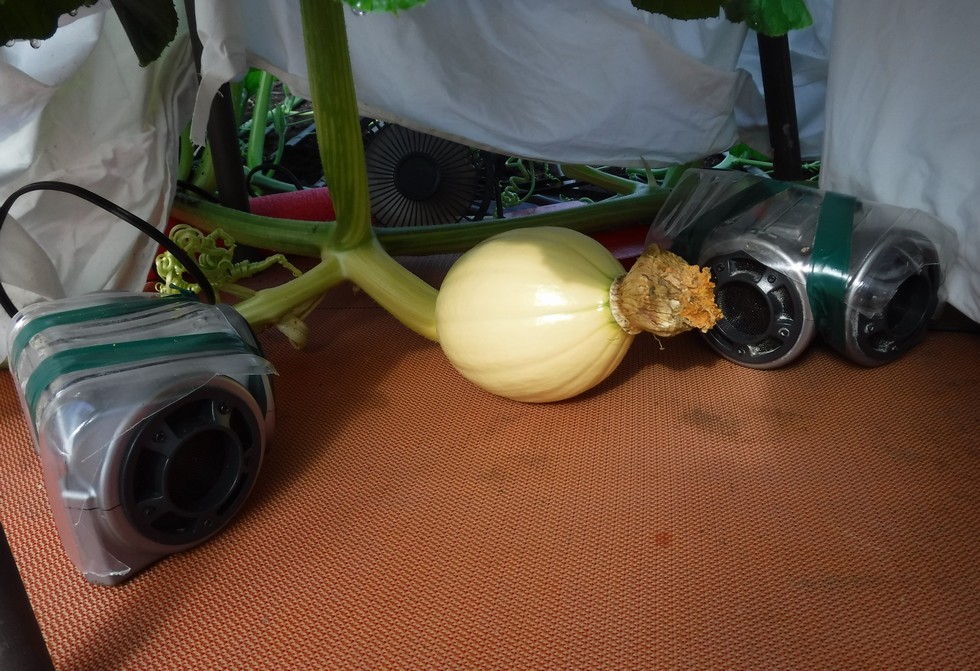
6. A power cord is run to the area and a 4� desk fan is added on the stem side along with two ultra sonicators incase a mouse happens to be passing by, they will keep on going and not stay around. *It is important to remember that ultrasonic waves behave more like a laser beam of light and not like sound. Meaning the ultrasonic �speaker� needs to be pointed in the area of the expected pest, the �speaker� will not fill the area with noise like many think. This is why there are three angled speakers to ensure complete coverage around the pumpkin.
7. Pool noodles are placed under the vine as needed to get the right angle as setting the pumpkin up now is critical. In the image the stem is too far down so a little extra blocking up of the main is needed to level out the pumpkin so when the flat spot is developed it is sitting level and will hopefully stay that way.
8. Final step is to put a chair over the pumpkin and place a white sheet on it to provide shading but also allow for some air circulation.
|
|
|