| |
|
Click on a thumbnail picture below to see the full size version.
|
154 Entries.
|
|
Monday, April 2
|
View Page
|
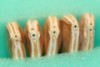 |
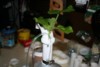
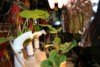
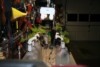
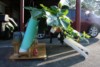
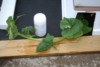
Hydroponic Giant Pumpkin Day 1! Friends, here we go for my third year of trying to grow a giant pumpkin usingn hydroponics. Why? Why not! For fun, for the challenge, and to interact with the coolest folks-you all on Big Pumpkins! I've learned so much here. Best of luck to everyone.
Last night I started the gemination of seven seeds. OK, so not evey step is hydroponic. I've played around over the winter months trying different methods, the the best rot development is in good old soil. The seedlings will be tranferred to a hydroponic reservior later.
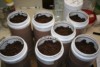
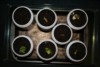
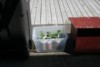
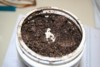
I filed all seeds, all the way around, including the tips (to reveal small holes; each seed usually had three of them). The seeds were soaked tip down in a saturated sponge, then planted in Jiffy Seed Started mix, plus 1 Tbs of indole-3-butyric acid per 12 quarts. This mix was moistened and added to a 29 oz plastic container. Seeds planted about 1/2 inch into the soil, lids screwed onto the container, and kept at about 90 deg F (in our oven, warmth maintained by the oven interior light). Seeds should germinate in 1-2 days. Images are the filed seeds, the soaking seeds, the soil mix in containers, and the containers in the "incubator" (oven). Stay Tuned!
|
|
|
Monday, April 2
|
View Page
|
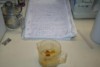 |
Soaking seeds (image with text of 04/02/12
|
|
|
Monday, April 2
|
View Page
|
 |
soil containers (goes with previous text)
|
|
|
Monday, April 2
|
View Page
|
 |
soil containers (goes with previous text)
|
|
|
Monday, April 2
|
View Page
|
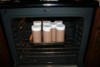 |
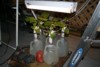
Sophisticated (haha) Giant Pumpkin Seed Germinator Incubator (see previous text for info)
|
|
|
Tuesday, April 3
|
View Page
|
 |
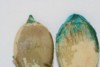
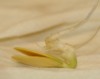
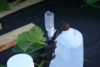
An experiment in soaking seeds. The tip of a filed seed was soaked in blue food coloring + water. After an hour, it was photographed, pried open, re-photographed.his pic is the outside of the seed.
|
|
|
Tuesday, April 3
|
View Page
|
 |
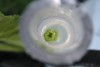
The dyed seed showing blue radicle and non-stained endoderm (becomes the cots)
|
|
|
Thursday, April 5
|
View Page
|
 |
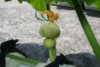
Yay! 7 of 7 germinated. Image is Day three post filing/soaking/planting.
|
|
|
Thursday, April 5
|
View Page
|
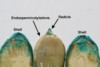 |
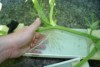
I posted this on the message board under seed starting, but without a picture to refer to, it didn't make much sense so I am adding the picture here.
Regarding soaking seeds. I did an experiment using blue food coloring in water to mark the part of the seed that “takes up” the liquid. The seed was filed all around. After soaking just the tip in the blue water, the fluid had soaked all around the entire seed, saturating the filed area. The shell was then pried off, and it was clear that the radicle/emryo/endosperm had soaked up the water, but the endosperm/cotyledon was not wet (in fact, it is waxy and hydrophobic, suggesting that it will never get moistened even if submerged). In nature, seeds have a natural opening at the tip (where the embryo radicle is), suggesting that this is the only part of the seed that needs moisture. What does this all mean? Well, not sure! It seems that too much water will promote mold growth, and to stimulate germination, one only needs to moisten the tip to kick-start the embryo. Soaking the entire seed may not be necessary, and may add to mold problems. It does seem like a good idea to file the rest of the seed to help the seedling/cotyledon break out (more experiments to do!!).
Just some musings fom the garage!
EP
|
|
|
Friday, April 6
|
View Page
|
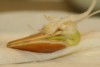 |
Paper towel method of germination. Note the randomness of the root growth. I suggest that seeds pointed down (and this can be done with paper towel method too, just point 'em down!) will have more robust and deliberate root growth due to gravitropism. The next pic is with the shell removed (not much educatinal value, but it looks cool)
|
|
|
Friday, April 6
|
View Page
|
 |
paper towel gemination, shell removed.
|
|
|
Friday, April 6
|
View Page
|
|
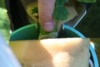
Forgot to point out a cool feature that you can see on the above image of the roots emerging from the shell. Some plants like pumpkins form a little "foot" on the root/stem as it is just emerging from the shell, and this foot actually pushes against the shell and helps the plant wiggle it's way out of the splitting shell. See the little foot in the pic? It's pushing against what was the edge of the upper shell tip. It is very evident to see in the second image above when the shell was removed. Pretty cool.
|
|
|
Friday, April 6
|
View Page
|
|
Ooops, the most recent post above refers to new pics that will be posted BELOW, once approved.
|
|
|
Friday, April 6
|
View Page
|
 |
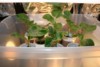
Seedlings have germinated (7 of 7) and were relocated from the germination incubator (oven with interior light for heat) into the garage until the risk of frost is over (freeze warning last night and tonight). They are under two 20W grow light bulbs and a few 40W incandescent bulbs to maintain temperature around 80-85deg. the next pic is a close-up of the seedlings
|
|
|
Friday, April 6
|
View Page
|
 |
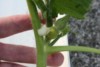
Seedlings, Day 4 post-planting
|
|
|
Saturday, April 7
|
View Page
|
 |
Seedling growth Day 6 Still in garage under grow light; kept warm with incandescent bulbs.
|
|
|
Sunday, April 8
|
View Page
|
 |
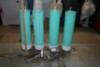
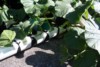
Day 7 post-seeding: The seedlings first day out....just a couple of hours in the sun, the rest of the day in shade. The breeze is light, but I used objects to block the gusts to protect the plants from being damaged. I read somewhere that slight breeze helps develop strong "woody" stems in the seedlings. At night, I bring them back into the garage with grow light, warmth, and a fan to provide that gentle breeze. I spray water on the leaves every now and then, but will not water the soil.
|
|
|
Sunday, April 8
|
View Page
|
 |
Great day in Kentucky!
|
|
|
Monday, April 9
|
View Page
|
|
Placed seedlings outside again today. High mid 60s, a little breezy, but even though a bit cool the sun is far better than my Wally World grow lights. Will bring back inside tonight since nights are still cold. Today gave them a foliar application of elixir of seaweed (Holland's), ensuring the underside of the leaves got a good dose (I read somewhere that dicots have more stomata on the underside of the leaves that the upper side).
EP
|
|
|
Wednesday, April 11
|
View Page
|
 |
Day 10 post seeding. All goes well. True leaves very healthy (first true leaf well developed, the second true leaf popping up). I plan to move these guys from the germination container/soil to an all aqueous hydroponic system in a day or two. I've re-re-re-designed my hydroponic systems over and over. This will not be the final set-up for the entire summer; in a few weeks I'll again move the plants to different system, assuming the plants are healthy.
EP
|
|
|
Thursday, April 12
|
View Page
|
 |
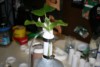
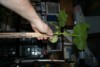
Day 12 post-seeding and time to start transplanting the seedlings from the container/soil in which they were germinated into their hydroponic system. "System" sounds too sophisticated! It’s really a gallon jug, some plumbing supplies (1 ½ inch tube and elbow) and an aquarium pump/bubbling stone. One seedling per jug; this is not their final home-in several weeks the best 3 or 4 will be transferred into a larger system. There are 11 pictures in this series, mostly self-explanatory. The plumbing elbow was cut so the growing stalk will be trained to carefully bend toward the horizontal. The aquarium pump runs 24/7, with the stone at the very bottom of the jug (both for aeration and for mixing). To get the plant from the germination jug, warm water was hosed into the container until the lose soil was washed out, the container then laid sideways and the plant is carefully carefully (not pulled by the stalk, but by grabbing the roots) pulled out. After a bit more rinsing of the roots, the plant is inserted into the gallon hydroponic reservoir (using the slits cut into the 1 ½ inch tube and elbow). Got one done today, the rest will be done over the weekend. Foliar feed with seaweed every day. Stay tuned!
|
|
|
Thursday, April 12
|
View Page
|
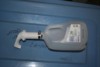 |
Jug with modified tubes to train stalk to grow from vertical to horizontal
|
|
|
Thursday, April 12
|
View Page
|
 |
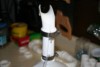
Final set up, with air pump/tubing/stone.
|
|
|
Thursday, April 12
|
View Page
|
 |
Close-up of the slits cut in the tube, for easy insertion of the plant.
|
|
|
Thursday, April 12
|
View Page
|
 |
Hosing out the loose soil.
|
|
|
Thursday, April 12
|
View Page
|
 |
The root ball has been carefully wiggled out of the container.
|
|
|
Thursday, April 12
|
View Page
|
 |
Rinsing a bit more loose soil- this is enough.
|
|
|
Thursday, April 12
|
View Page
|
 |
Seedling about 18 inches long (did not try to untangle the roots- the roots are actually several inches longer, but I don't want to damage them by messing with them too much.
|
|
|
Thursday, April 12
|
View Page
|
 |
Squeezed the roots (like rolling a cigar), and threaded them into the hydroponic jug.
|
|
|
Thursday, April 12
|
View Page
|
 |
Secured ecerything with tubing clamps---Done!
|
|
|
Thursday, April 12
|
View Page
|
 |
Returned to the grow light, using incandescent bulbs for warmth. Not shown- I use aluminum foil to direct the wimpy grow light toward the plants. The other plants doing great and will be moved to their own jugs in a day or two. Stay Tuned!!
|
|
|
Friday, April 13
|
View Page
|
 |
Update- discarded two of the healthy seedlings (seeds were of unknown genetics, bought in 50 seed packs, just to use for back ups and practice....and decided tonight they were not needed). This leaves 5 plants, all very healthy with known genetics. A total of three are now in their hydroponic jug. Two still in soil for a day or two.
|
|
|
Friday, April 13
|
View Page
|
 |
side view -same description as above
|
|
|
Friday, April 13
|
View Page
|
 |
Roots of one of the seedlings. This was a plant I was going to throw away, so I thought I take a look at the roots. I carefully teased the roots apart-tap root clearly visible, but it's not the longest root by far. Not much more to say-but I think it looks cool!
EP
|
|
|
Saturday, April 14
|
View Page
|
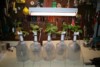 |
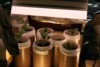
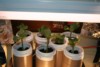
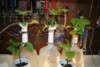
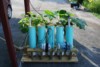
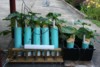
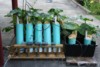
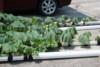
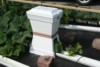
All of the seedlings that I want to keep have now been transferred to their gallon jug hydroponic chambers. One seedling per jug. The root mass can been seen through the plastic walls of the jug. Each jug also has its own air pump and bubbling stone. The stalks are being directed to grow from vertical to horizontal by how the grow light is positioned. The stalk will be supported by the curved tube at the top of the jug. There are five images in this series.
|
|
|
Sunday, April 15
|
View Page
|
 |
Side view, showing the curve of the PVC tubing that will support the main stalk.
|
|
|
Sunday, April 15
|
View Page
|
 |
Positioning of the set-up, with the aim of steering the plants toward the light (along the support tubing)
|
|
|
Sunday, April 15
|
View Page
|
 |
Rigged cardboard sides to help maintain temperature. This is very temporary. Everything will be moved outside soon.
|
|
|
Sunday, April 15
|
View Page
|
 |
Last image- enclosed to help keep plants warm- the garage is a bit cool. Tomorrow it will be 80-85 outside and these guys will be taken out enjoy the warm day!
|
|
|
Sunday, April 15
|
View Page
|
 |
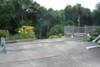
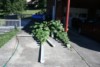
The Patch! aka "Mobile 1".....hydroponic systems (five) taken outside for some sun and breeze. High 85 (record!). Note the jugs are on a mobile platform. Can you "dirt people" easily move your plants inside when a hail storm is approaching? Hmmm? Didn't think so! lol Ok, just kidding around. As I said early on, this is year three of trying this, and I'm having a ball! Not really expecting a monster using hydroponics, then again.......
|
|
|
Sunday, April 15
|
View Page
|
 |
The Patch! Moved inside for the evening. Last season, I was able to easily move the plants until they were about 10 feet long, then it becomes too cumbersome.
|
|
|
Sunday, April 15
|
View Page
|
 |
STARTED A NEW SEED tonight- Many thanks to Richard B. He generously sent me a number of outstanding seeds.
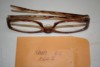
This seed was filed as usual (filed all the way around, including the tip...see the typical three holes? The tip of the radicle is just behind the middle hole).
|
|
|
Sunday, April 15
|
View Page
|
 |
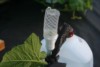
soaked the seed, immersing just the tip
|
|
|
Sunday, April 15
|
View Page
|
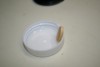 |
Soaked for an hour, then into seed starting soil with a pinch of I-3-BA and maintained at 85-90 deg. Stay tuned!
|
|
|
Monday, April 16
|
View Page
|
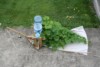 |
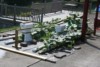
Image from LAST season. This is how I hope things look in a few weeks. The entire thing is on wheels, and the vines are growing out on a 6 x 8 ft tarp. If I need to, I can drag the entire thing under shelter in the event of a nasty storm. Later, when the plants establish their hydroponically-fed nodal roots, the plants can't be easily moved again.
|
|
|
Tuesday, April 17
|
View Page
|
|
Added H2O2 (diluted 35% stock down to 0.1% final concentration) to each pumpkin plant container. For both added oxygenation as well as a bit of disinfection. Not too worried about oxygenation now, but when the weather gets warmer the O2 saturation levels in the hydroponic solution goes down, so the H2O2 helps increase available oxygen (or so "they" say!)
|
|
|
Wednesday, April 18
|
View Page
|
 |
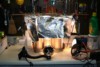
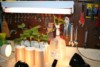
Plants still inside- too cool outside. I'm a little worried about not enough sunlight to get these guys into high gear, but the cool weather can't be controlled! Giving them a light foliar spray each day, rotating four different solutions (e.g. seaweed, fish powder (which smells like my cat's mouth!)).
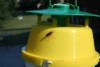
Added my mascot "Murray" to watch over things.
|
|
|
Wednesday, April 18
|
View Page
|
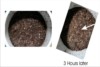 |
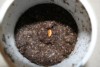
Germination? This seed was started a couple of days ago....when I got home from work today I noted (imagined?) a bit of a disturbance on the surface of the soil. The picture is a three hour difference.....is that a slight crack in the soil after three hours (arrow)? Optimistic, arent we!? Stay tuned! I think it may be a matter of a few hours before I can truly tell.
|
|
|
Thursday, April 19
|
View Page
|
 |
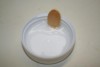
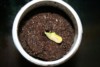
Seed that was filed, soaked and planted on the 15th. Today is day 4-this pic is in the morning of Day 4. Definite dome of soil being pushed up! Yay! Next pic is after I got home from work, about 12 hours later. Yep, the seed shell is being pushed up..success!
|
|
|
Thursday, April 19
|
View Page
|
 |
I'll probably need to pick the shell off the cots in the morning (they pry apart with very little effort). Then under lights or sun immediately. This was my oldest seed to try to germinate (6 years).
|
|
|
Thursday, April 19
|
View Page
|
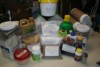 |
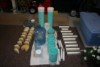
Finally got my last item in the mail today. This is a picture of the reagents I will be using this season. I think it is complete, but then again, in this hobby, a "must have" fertilizer, additive or gadget may come along! I also just purchased a fan-based cooler/mister from Amazon for about $30-just attach to a 24-30 inch fan and I'll keep my hydroponically growing plants (esp the fruit) cool. Stay tuned!
|
|
|
Friday, April 20
|
View Page
|
 |
Seed from April 15th doing great- cots turning green and all is well! Maybe it took a bit long (today is day 5), but what, me worry!?!
|
|
|
Friday, April 20
|
View Page
|
 |
Hydroponic maintenance- In the past, I have washed all of the soil off the roots before I transferred the plants from the germination soil to the hydroponic solution. This season I did not, and I think this caused a bacteria problem in 2 of the jugs. The soil and root ball was compacted, and even though I added H2O2 on occasion, I think that the regions of soil and roots that are all wadded together in a ball were not accessible to the disinfecting H2O2. I cleaned up each plant's roots and removed most of the soil and debris. While I was at it, I measured the roots, nearly 2 feet long!
|
|
|
Friday, April 20
|
View Page
|
 |
Second half of the picture of the root system of a young plant. Root about two feet long.
|
|
|
Friday, April 20
|
View Page
|
 |
I also give the roots a dash of the rooting hormone I-3-BA. I will do this 3-4 total times during the early part of the season.
|
|
|
Tuesday, April 24
|
View Page
|
 |
Germinated one more seed for the 2012 season- Filed all the way around as is usual for my other seeds in this diary. But, I soaked them a bit differently (next pic)
|
|
|
Tuesday, April 24
|
View Page
|
 |
I read in a peer-reviewed biology journal a few things that drove this idea (it was a study of pea seeds, not pumpkin, so take with grain of salt): First- some cells of the embryo die immediately upon the seed being submerged in water (probably due to hypoxia/low oxygen), and second- rehydration of the dessicated seed needs to proceed very slowly in order to reactivate the enzymes and other molecules that are dehydrated during seed drying and storage. The scientists recommended three things- using polyethylene glycol in water to slow the rehydration (hard for most folks to find this stuff); or incubation of the seed in 100% humidity for a day, then planting; or soaking the seed tip in a paper towel that is simply wicking water,from a pool of water. Ths last thing seemed easy and is what I did, then into damp Jiffy Mix soil in 86 deg incubator. I think the key is slow introduction of a little water, warmth, and oxygen (air). A lot of folks just file and plant in damp soil....seems like this is quite reasonable!
|
|
|
Tuesday, April 24
|
View Page
|
 |
And Day 4- nice germination!
|
|
|
Tuesday, April 24
|
View Page
|
 |
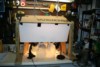
Another pic of the hydroponic set-up. I've noted slow growth becauses its so darned cool in the garage, and much too cold outside. So, this series of pictures is the construction of a cheap but effective tent to help hold the plants at 80 deg.
|
|
|
Tuesday, April 24
|
View Page
|
 |
A frame made out of dowel rods
|
|
|
Tuesday, April 24
|
View Page
|
 |
dowel rods held together with plastic tubing and nylon "Tee" connectors
|
|
|
Tuesday, April 24
|
View Page
|
 |
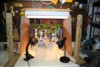
The whole thing hung from the ceiling, draped with lawnscaping fabric, openings closed with clothes pins, and there you go! A fan runs 24/7, and a small space heater is plugged into a temperature-controller set at 80 deg.
|
|
|
Tuesday, April 24
|
View Page
|
 |
When I first plugged everything in............
|
|
|
Tuesday, April 24
|
View Page
|
 |
and success! The heater now cycles on and off, holding the tent interior to 77-80 deg. Seems acceptable to me! (well, I do have low standards!).
|
|
|
Tuesday, April 24
|
View Page
|
 |
Last pic of the day...parts of the next hydroponic system. The seedlings were germinated in soil, moved to a gallon jug..and the best will be moved to a larger system as appropriate. Stay tuned!
As a side note, it is really exciting to read all the other diary entries. Best of Luck, everyone!
|
|
|
Saturday, April 28
|
View Page
|
 |
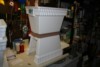
Next stage of my hydroponic effort- seeds were germinated in soil, then the seedlings transferred to a gallon jug for a couple of weeks, then their next stop was a larger container. Shown is the container, the foam rubber insert used to hold the plant, and the aerator tube (PVC tube with aquarium air pump and bubbling stone)
|
|
|
Saturday, April 28
|
View Page
|
 |
Aerator tube, end view of bottom showing the bubbling stone
|
|
|
Saturday, April 28
|
View Page
|
 |
Aerator tube is inserted into the 6 inch diameter hydroponic container
|
|
|
Saturday, April 28
|
View Page
|
 |
Aerator in operation- this both ensures as much O2 is dissolved in the solution as is possible, and it keeps the solution well mixed. It may not be clear from this picture, but there is a robust movement of water up and out of the tube, creating a upward circular movement of nutrients.
|
|
|
Saturday, April 28
|
View Page
|
 |
1400 Hester in the system- also has a submergable heater to hold the water at about 80 deg; whole thing either under grow light or outside as soon at it is possible (darned cool days!!)
|
|
|
Saturday, April 28
|
View Page
|
 |
1118.5 Holland in system. Each plant gets their own system (1.25 gal reservoir, submergable water heater, aerator/aquarium pump). Will be placed outside as soon as weather permits, otherwise under grow lights in a heated environment. Stay tuned!!
|
|
|
Tuesday, May 1
|
View Page
|
 |
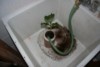
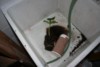
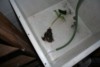
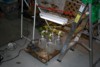
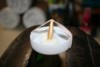
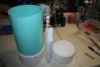
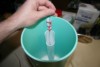
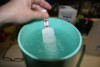
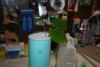
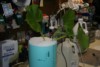
Seed intensive care! I received my 1561 Stevens seeds in the mail and one of the two looked like it was in need of serious botanical health care! The seed was split along the entire edge of one side and half around the round end. The cots were visible and had even begun to turn a light shade of green. Hmmm…so, ok, maybe it would have germinated no matter what I did, but I felt that soaking/immersing in water or plopping into soil straight away would be bad for the health of the seed. Maybe mold or mildew would fester, maybe the embryo was fragile and may drown, who knows. So, following my thoughts that slow hydration, air and warmth are all important factors, I rigged the set-up in the picture. I saturated a wad of paper towel and stuffed it onto a very small plastic container. I added the seed, tip first, into the paper towel. This kept the cots and bulk of the seed dry, but the tip could slowly adsorb moisture. I inserted this into a larger container that had some water in the bottom, just to keep the humidity high. Entire thing held at 86ish deg. F. And see following pic- germination in 48 hours! Yay! But, as I said, it may have geminated no matter what I did, so who knows if this method was useful. However, I had fun!
|
|
|
Tuesday, May 1
|
View Page
|
 |
The 1561 Stevens germinated at day 2. Is now in soil at 86 deg for a few more days.
|
|
|
Monday, May 7
|
View Page
|
 |
Another beautiful day in Kentucky.
|
|
|
Saturday, June 16
|
View Page
|
 |
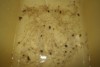
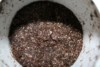
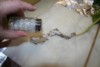
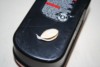
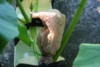
Ever have a seed not germinate? Of course, most of us have. And ever hear about folks pulling the seed out of the soil and giving it a squeeze to see if it was just sitting in the soil, wet and rotting? Here is a photo of the white gooey gunk that I squeezed out of a seed that never germinated. It was like squeezing a tube of toothpaste! I usually have excellent luck with germination, so this was an oddity. For those who were wondering what happens when a seed that has rotted in the soil is given a firm squeeze- here you go!
|
|
|
Saturday, June 16
|
View Page
|
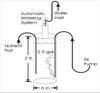 |
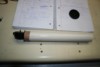
Diagram of the final hydroponic system. The seedlings are allowed to grow to 3-4 true leaf stage and then introduced into this system. It is a 2.5 gallon reservoir with a line for bubbling (to mix and aerate), a line to add concentrated fertilizers and additives, and a third line as part of an automated watering system that maintains the solution at a constant level.
|
|
|
Saturday, June 16
|
View Page
|
 |
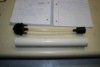
Construction of the system. 2 ft by 6 in drainage tube with cap, and aeration line powered via aquarium pumps housed in a plastic container to protect from rain. The aeration line runs to the bottom of a 2 in PVC pipe that runs the length of the 2 ft pipe.
|
|
|
Saturday, June 16
|
View Page
|
 |
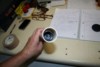
Automatic watering system. This is a brillant gadget! From Earthbox. It works very well to maintain liquid in the hydroponic at a set level. The device is inserted into a 12 in long PVC pipe (next pic)
|
|
|
Sunday, June 17
|
View Page
|
 |
The automatic watering system inserted into the PVC tube.
|
|
|
Sunday, June 17
|
View Page
|
 |
Looking into the bottem end of the automatic watering system. The PVC tube is inserted into the reservoir and air pressure that is modulated by the level of the liquid in the PVC column controls a diaphram valve.
|
|
|
Sunday, June 17
|
View Page
|
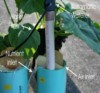 |
Photo of the hydroponic system (that was shown in the diagram a few picures ago). The air line, nutrient inlet and automatic watering system is indicated. The nutrient inlet is also used to sample the solution to measure pH.
|
|
|
Sunday, June 17
|
View Page
|
 |
Five plants in the system.
|
|
|
Sunday, June 17
|
View Page
|
 |
Nice leaves!
|
|
|
Sunday, June 17
|
View Page
|
 |
Side view of the system
|
|
|
Sunday, June 17
|
View Page
|
 |
Rear view of the system
|
|
|
Sunday, June 17
|
View Page
|
 |
Only two of the five plants are hooked up to automatic waering systems (for now). There is a water line leading to a 3 gallon jug about 12 feet above the system. These two plants, that are pretty young but are growing faster every day, drink about 2 gallons per day. I anticipate this will dramatically increase soon.
|
|
|
Monday, June 18
|
View Page
|
|
I have not posted my line-up until I was sure I had robust plants. This season, I had to start over once due to my inability to leave well enough alone. I'm the reason for the adage "if it ain't broke don;t fix it"! Last year I had optimized many of my steps, but this year I thought I'd "improve" some things! And between over-fertilizing and sunburn, I lost some plants. Germination is not a problem, it's been the seedling transplant step where I made my errors. But, I'm back on track I think.
Here is my line-up of healthy growers:
864.5 Companion
885 Peters
1051 Holland
1118.5 Holland
1464 Dwelly
1561 Stevens
1600 McConkie
Cheers!
EP
|
|
|
Wednesday, June 20
|
View Page
|
 |
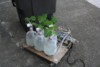
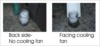
First day with cooling fan (evaporative cooling). About 92 degrees, according to the NWS. This is my first year using the cooling fan. I may have bought too strong of a fan-even on the low setting I need to move the fan about 20 feet away-closer than this starts to whip the leaves too much. Now I worry that this is too far to cool the plants, so made sure it was going to work (see next two entries).
|
|
|
Wednesday, June 20
|
View Page
|
 |
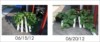
If the evaporative cooling fan is working at the distance the fan sits, a glass of ice water sitting in front of the plants should form more condensation than a glass of ice water that is out of the path of the fan. It is so! The glass in front of the fan has more condensation running down the side, hence moisture from the cooling system is making it to the plants.
|
|
|
Wednesday, June 20
|
View Page
|
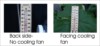 |
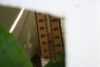
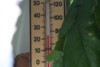
And the actual temperature is cooler on the plants with the cooling fan-one thermometer is behind the plants, out of the path of the fan, and the second image is the thermometer on top of a leaf, in the path of the cooling fan. I'm content with the function of the cooling system. Also, the leaves aren't so wilty after a few hours in front of the fan, so all seems well!
|
|
|
Wednesday, June 20
|
View Page
|
 |
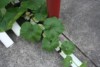
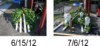
Some plants growing very well!- the images are five days apart.
|
|
|
Wednesday, June 20
|
View Page
|
 |
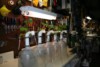
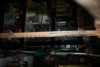
The running vines are maintained in a vinyl gutter (with end caps). The nodes are tied to foam rubber to promote nodal root development. Fertilizer is added to the gutter.
|
|
|
Wednesday, June 20
|
View Page
|
 |
Close up of nodes and foam rubber in vinyl gutter. A female is on the left, but this will not be pollenated (too close to stem). All running vines, main and secondary, will be maintained in these vinyl gutters with liquid fertilizer.
|
|
|
Thursday, June 21
|
View Page
|
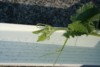 |
I think this girl will be the one I hope is the keeper on this plant. It is on 864.5 Champion and I will use males from 1464 Dwelly when the time comes. The fruit will be at about 9-10 ft.
|
|
|
Thursday, June 21
|
View Page
|
 |
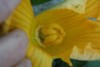
A different female I'll pollinate in the morning. Nice shape and stripes too! I will self-pollinate this one due to no other males on other plants are ready at this time. On 864.5 Champion.
|
|
|
Thursday, June 21
|
View Page
|
 |
Have the female in a stocking until the morning. Keep those busy bees away from the girl.
|
|
|
Thursday, June 21
|
View Page
|
 |
This is a male wearing a sock for safe pollination. I have a total of two (wish more were ready) males to use in the morning.
|
|
|
Thursday, June 21
|
View Page
|
 |
The big picture. Running primary vines are growing at a rate of about 8-10 inches per day. Lots of males, a few females now starting.
|
|
|
Friday, June 22
|
View Page
|
 |
Pollinated the first female on 864.5 Companion, self-pollinated with two males. I covered all three flowers last night with nylon stockings. This morning, the flowers literally popped right open when I removed the stocking. This female is about 6 feet out so its location is not ideal. There is another female at 10 feet that I will also pollinate in several days. The one in the image from today's pollination is certainly odd-looking. This image and the next one shows malformed stigma, and maybe even a second partially formed stigma in the same flower. These pumpkins are really genetically mish-mashed! We'll see if this fruit sets!
|
|
|
Friday, June 22
|
View Page
|
 |
Second image of the weird malformed female that I pollinated this morning. Is the pale structure at about 9:00 position a second underdeveloped stigma? Hmmmm. Regardless, I forged ahead with the pollination. Maybe weird flowers grow weird (and huge) pumpkins!
|
|
|
Friday, June 22
|
View Page
|
 |
Female pollinated this morning, closed up with a twist tie to prevent additional pollination events from those pesky bees. I will untie the flower tomorrow morning (after the female is no longer viable for additional fertilization) and let the petals fall off on their own.
|
|
|
Monday, June 25
|
View Page
|
 |
This is the 864.5 Companion self-pollinated three days ago. This fruit is only 6 feet out and may be culled (there is a new female at 10 feet-shown on next pic). Seems to have a nice long stem, and has increased in size over the past three days after pollination.
|
|
|
Monday, June 25
|
View Page
|
 |
Second female on 864.5 Companion- at 10 ft. Very small at this point; I am using small pieces of foam rubber to slowly re-orient the stem. This node has a female, a leaf, a tendril, and a secondary vine. I may try to keep all of them intact to see if this aids in the growth. I'll have to keep an eye on preventing stem stress.
|
|
|
Monday, June 25
|
View Page
|
 |
Rear view of the hydroponic system. The air pumps are protected from the elements with a piece of vinyl guttering. The short vertical PVC pipes are automatic watering devices.
|
|
|
Monday, June 25
|
View Page
|
 |
Rear view of system showing air pumps. I think that it looks cool and "sciency"!! Which is why I enjoy this hobby!
|
|
|
Monday, June 25
|
View Page
|
 |
I posted this to propose a question: And I hope for constructive feedback if I am off-base. I read that often we need to cut off leaves that are in the way of the fruit or perhaps damaged. I then see images where the leaf had been cut off at the base, and this leaves a huge "wound" since the leaf stalk had such a large diameter. But, if the leaf is cut off right at the very top, there is only a small diameter wound, and it dries and closes very quickly (see pic), thus minimzing chances for disease. Just a thought!
|
|
|
Monday, June 25
|
View Page
|
|
Found the first squash bug in my patch yesterday (06/24/12) and gave the plants a dose of Sevin spray. Also, found 5 vine borer adults dead in the SVB traps. I won this bug battle, but won't know if I won the bug war until much later!
|
|
|
Tuesday, June 26
|
View Page
|
 |
Secondaries are also grown along a gutter. I set up the gutters when the secondaries begin to run. As with the mains, the nodes are tied into a block of foam rubber in the gutter, which contains nutrient solution.
|
|
|
Tuesday, June 26
|
View Page
|
 |
The Hydroponic Pumpkin Patch! Gutters coming toward the camera contain the mains, the other gutters contain the secondaries.
|
|
|
Tuesday, June 26
|
View Page
|
 |
Close up of a node from the main vine. All the nodes are growing nodal roots, fed from the nurient solution in the gutters. Many of the nodes are tied into a foam block, into which the nodal roots like to grow.
|
|
|
Tuesday, June 26
|
View Page
|
 |
Not a huge main stump, compared to other growers', but not too bad, I guess, considering this is a hydroponic system.
|
|
|
Tuesday, June 26
|
View Page
|
 |
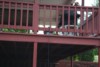
The Patch, view from the deck.
|
|
|
Thursday, June 28
|
View Page
|
 |
Not sure what it is---maybe a young SVB moth? It's crawling and flying around my patch, and this SVB trap has caught many dead bugs that are this same species.
|
|
|
Thursday, June 28
|
View Page
|
 |
Pollinated another female on 864.5 Companion, and Yikes, it is over 100 degrees today. I hope the misting fan is enough to keep the young fruit cool and healthy!
|
|
|
Friday, June 29
|
View Page
|
 |
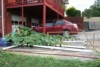
Good News and Bad News: The bad news is that a very severe storm packing nearly 70 MPH winds came through this early evening. This is my back yard and the house is on generator power. The good news is that it was 102 degrees today and my misting/cooling fan was not working. Why is this good news? Because the plants were pretty flaccid due to the heat and did not break, just bent, in the high winds!!!
|
|
|
Friday, June 29
|
View Page
|
 |
The Patch, after the storm. Lot of broken leaf stems, but no broken main stems.
|
|
|
Friday, June 29
|
View Page
|
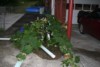 |
The Patch, after the storm. Lot of broken leaf stems, but no broken main stems.
|
|
|
Friday, June 29
|
View Page
|
 |
Recently pollinated fruit survived the storm
|
|
|
Friday, June 29
|
View Page
|
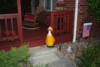 |
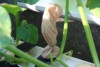
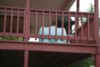
The Goose weathered the storm as well.
|
|
|
Friday, June 29
|
View Page
|
 |
The only damage, out of 7 plants- a split secondary vine. I usually do not worry about splits like this that are parallel to the vine. I'll keep it dry and the plant should do fine.
|
|
|
Saturday, June 30
|
View Page
|
 |
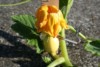
Another pollination, another 100 degree day. Trying my best to keep the plants cool with fan and mister. This female has 4 lobes; each seems rather large, and not fused like many other lobes I've seen.
|
|
|
Saturday, June 30
|
View Page
|
 |
Differences in female stigma lobes/segments. Look at the image at the left- each lobe seems to be made of two segments that are fused. The flower on the right is female from 1464 Dwelly and the segments do not appear to be fused- still four lobes, but made of 8 unfused segments. I wonder what difference it makes?
|
|
|
Thursday, July 5
|
View Page
|
 |
Just showing the heat-induced wilts- and also how quickly reversible these wilts are.....I sprayed these with water and took another picture about 15-20 minutes later....
|
|
|
Thursday, July 5
|
View Page
|
 |
...and the leaves perk up a little bit. After seeing this, and the 100 degree days here in Kentucky, I set up a more aggressive misting system. Next images.
|
|
|
Thursday, July 5
|
View Page
|
 |
Some tubing and mister heads from Lowes, and an automatic timer (5 minutes every two hours), and I can mist the plants during these hot days. A fan runs 24/7 as well to minimize mold (and enhance cooling). Seems to work well.
|
|
|
Thursday, July 5
|
View Page
|
 |
Some tubing and mister heads from Lowes, and an automatic timer (5 minutes every two hours), and I can mist the plants during these hot days. A fan runs 24/7 as well to minimize mold (and enhance cooling). Seems to work well.
|
|
|
Thursday, July 5
|
View Page
|
 |
Also replaced the 5 gallon hydroponic reservoir with a 35 gallon tank.
|
|
|
Thursday, July 5
|
View Page
|
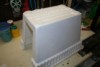 |
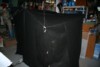
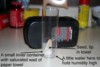
Had to figure out a way to keep the pollinated fruit cool. It's been 100 deg day after day and I've lost every young fruit. I have many more females on the vine and I am determined to make this work!
I took a styrofoam cooler and cut the sides as shown.
|
|
|
Thursday, July 5
|
View Page
|
 |
Taped a second cooler on top of the first one. Also poked holes in both bottoms. When ice is put in the top cooler, it will melt and drip around the plant thus keeping the region under the cooler "tunnel" cool.
|
|
|
Thursday, July 5
|
View Page
|
 |
Placed the cooling unit atop the newly pollinated female; added 12 pounds of ice.
|
|
|
Thursday, July 5
|
View Page
|
 |
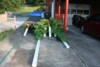
The patch, with two cooling units in play. It was nearly 100 again today, and when I got home from work, about 8 hours later, there was plenty of ice still in the upper cooler! I think this is going to work well. I also put a piece of styrofoam, about 5 x 5 in., on top of the small fruit, to make sure that ice water does not drip directly on the pumpkin. It was quite cool inside the unit; I'll formally test this over the weekend with a thermometer.
I have five total cooling units contructed and have more pollinating to do in the morning. Wish me luck!!
|
|
|
Saturday, July 7
|
View Page
|
 |
I described this cooling unit in previous posts. I've had many aborted pollinations due to the 100+ degree days. Ice in the upper cooler, holes between the upper cooler and the lower cooler, and as the ice melts it drips onto the plant (newly pollinated female). Does it do the job? Read on!
|
|
|
Saturday, July 7
|
View Page
|
 |
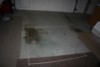
Analysis of the cooling capability of the cooling unit: I set up the cooling units in the morning; data collected in the afternoon. It's about 103 deg. in the sun, on the concrete, but not in the patch.
|
|
|
Saturday, July 7
|
View Page
|
 |
In my hydroponic patch, also on the concrete patio but covered with landscaping cloth and with a misting fan running. Much cooler! In fact, it's about 88 deg.
|
|
|
Saturday, July 7
|
View Page
|
 |
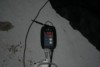
And under the cooling unit, next to the pollinated female: 74 degrees! Seems to be working!
|
|
|
Saturday, July 7
|
View Page
|
 |
A second cooling unit...also 74 deg! In summary: 103 degrees in the sun; upper 80's in the patch, and mid 70's under the coolers! I have been putting 7 pounds of ice in each cooler in the morning, and 12 hours later there is still ice in the cooler. If I had enough freezer space, I'd try two-2 liter bottles of frozen water, placed in the upper cooler upside down with no caps, so as the ice melts in the bottles it drips onto the plants.
|
|
|
Saturday, July 7
|
View Page
|
 |
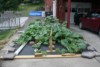
The Patch- about 3 weeks between images.
|
|
|
Wednesday, July 11
|
View Page
|
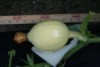 |
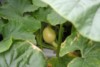
One of my several pumpkins that appears to have survived the eleven days of 100+ heat indexes. Several did not survive, but these were pollinated before I started using the coolers. I think the cooling units that I used really helped!
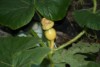
This is DAP 7, self-pollinated with two males on the 1464 Dwelly 2008. The Dwelly was a cross between 1062.5 Stelts 2006 (female) and 1502 Wallace 2006 (male). I am not too concerned with its size at this early point. The shape is clearly not as round as many images of other pumpkins that I've seen. But I think it looks great!
|
|
|
Thursday, July 12
|
View Page
|
 |
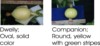
DAP 8 for the Dwelly and 5 for the Companion. The diversity of the shapes and colors is cool.
|
|
|
Thursday, July 12
|
View Page
|
 |
A pumpkin that was bee-pollinated. I wonder if the assymmetric shape is due to the inefficiency of the insect pollination (I've read it may be about 5% for bees) vs. hand-pollination? Won't poor pollination result in uneven growth? I think maybe, yes. Just an interesting thought.
|
|
|
Thursday, July 12
|
View Page
|
 |
The Patch
|
|
|
Thursday, July 12
|
View Page
|
|
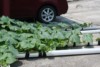
A photo from last season showing three things. First, a shading set-up that seems to work well, and can withstand 15 mph gusts of wind. Since I can't pound stakes into my patio to make a sturdy shade, this was my solution to make shade over my plants that can be moved around, and also be able to sway with the breeze. Second, SVB got my plants last year, and you can easily see the decimated region of the main vine where all the leaves are gone. The last point is that the distant region of the plant is still alive despite the SVB damage, fed via the nodal root systems. Thanks for reading!
|
|
|
Thursday, July 12
|
View Page
|
 |
oops, this is the photo for the previous post.
|
|
|
Friday, July 13
|
View Page
|
 |
Some of yesterday's posts got computer-glitched. This image goes with the previous post's text.
|
|
|
Friday, July 13
|
View Page
|
 |
Two young pumpkins on two different plants. It's cool how different they look! Shape and striping, in particular.
|
|
|
Friday, July 13
|
View Page
|
 |
Here's an open pollination- I bet the asymmetric shape is due to inefficient pollination by the bees. I read in a paper that bee's pollination efficiency is around 5%. I also bet that hand-pollination with several males is much much more efficient. So, I guess I predict that the more efficient the pollination, the larger and more symmetric the fruit? I really enjoy the science behind what we are tying to acheive.
|
|
|
Friday, July 13
|
View Page
|
 |
For decades, Big Pumpkin scientists have been trying to photodocument the mating behavior of the elusive Giant Pumpkin, especially the post-pollination activity of the female. Well, the mystery has finally been solved.
|
|
|
Friday, July 13
|
View Page
|
 |
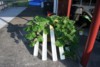
The Patch!
|
|
|
Saturday, July 14
|
View Page
|
 |
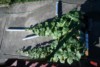
Training vines to curve- I worry about snapping the main or secondaries when I position them, so I came up with a protocol-I re-position them a small amount every day. How do I know how much the vine can take before it breaks? No idea! But what I do is grab one of tendrils by its smallest shoot (you know, the tendril bifurcates again and again into smaller shoots) and pull it, thus moving the vine, until the small tendril breaks. I designate this as the furtherst the stem can be moved. I then pull another shoot of this tendril to move the stem, and then anchor the stem by putting a weight on the tendril. My logic is this: The tendrils are used by the plant to anchor the stem. I bet that when the tendril finds an anchor point, it sends a signal to the growing stem to grow in that direction, toward the solid support. If the tendril is anchored by a weight such that it pulls the stem in a desired direction, maybe the stem will prefer to bend in that direction more naturally, thus reducing the channce of snapping. This may all be BS! But it's fun to hypothesize. I've been able to train pretty thick mains 90 degrees like this.
|
|
|
Friday, July 27
|
View Page
|
 |
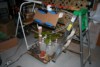
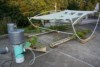
Haven't posted for a while- nothing exciting to report. Hydroponically grown pumpkins are growing very slowly (but growing nevertheless!). I think that the pumpkins are slow growers because I am not able to provide the four plants I am growing with sufficient and consistent nutrients. These four can go through about 100 gallons of nutrient solution each week. I can keep up with watering the main roots, but the nodal root systems are really keeping me busy and these are often nearly dry when I get home from work each day. I am going to rig an automatic watering system like those I have for the main roots. I've also recently increased the phosphorous and potassium and my nutrient composition is now approximately 180 ppm N; 400 ppm P; 500 ppm K; some Ca, and trace elements. In retrospect, I should have made this increase a few days before pollination. I am also feeding different solutions via foliar feeding every other day. Another reason for the slow pumpkin growth may be insufficent area of plant behind the set fruit.
So, what's shown in the picture? I recently terminated my four mains. I looked at the cut end and wondered if I could take advantage of the exposed vascular system of the main vine. So, I attached a large tube to the end, sealed it with a combination of agar (a jello-like substance) and paraffin film), and filled the tube with solution. The hope is that this will provide the plant (the fruit, to be specific) with additional growth-promoting goodies to compensate for terminating the vine. Imagine providing the plant extra "photosynthate" by this avenue. Sort of like intravenous fluids in humans. Will it work? Who knows! but it's fun. And so crazy that it just might work! A couple of additional pictures of this follow.
|
|
|
Friday, July 27
|
View Page
|
 |
Another view of the main stem "IV" fluid idea.
|
|
|
Friday, July 27
|
View Page
|
 |
Top view of the IV fluid set up, showing the cut end of the main stem.
|
|
|
Friday, July 27
|
View Page
|
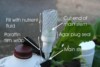 |
and finally, a labeled image with the pertinent parts identified.
|
|
|
Friday, July 27
|
View Page
|
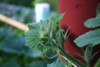 |
When I increased the phosphorous, the ends of the mains and secondaries went crazy with buds!
|
|
|
|
