|
Tuesday, January 1
|
View Page
|
 |
My brother Jeff and I are determined to have a big year this year in the pumpkin growing arena. Last year after another season of mishaps and adventures we grew a 383 lbs. pumpkin we affectionately named �Casper�. As you may have guessed from the name �Casper� refers to its very white coloration. Last year we planted 4 pumpkins in our 500 sqft. patch. Our plan was to eventually cull down to 2 pumpkins. We would start the pumpkins head to head and then select the best plant. Unfortunately the two plants we were left to choose from were on the same side of the patch. The other two suffered from a double vine that turned into a ribbon of vines (that ended the plant) and a heating cable on the frits that literally made pumpkin pie out of the roots (no actual pumpkin fruit involved). We were left with two plants growing head to head. We turned the bigger healthier plant and gave it the bulk of the growing space (a little over 400+ square feet). The other plant we kept as a back up (in maybe 90 square feet) to grow a nice pumpkin for the porch.
|
|
|
Wednesday, January 2
|
View Page
|
 |
As luck would have it we got an undetected foaming stump in the primary plant and it exploded about 20 feet down the length of the vine. Fruit would come on, grow to the size of a basketball then die off. This happened about 6 times. Jeff did a very careful examination of the plant and discovered foaming stump, again (2 years in a row!). He drilled some holes in the base, applied Captan, and tried sucking out the foam with a turkey baster. In the end the vine exploded about 20 feet from the stump. The plant was done. This left us with the 4th place plant grown off the 1190 Northrup. This was the smallest of the plants and had been cut back to a small 90 square foot area of the patch. We ripped out every other plant and gave the 1190 Northrup the run of the patch. It had been almost completely pruned back at this point. In fact, the main vine had been grown like a horse shoe.
|
|
|
Thursday, January 3
|
View Page
|
 |
We had just 1 female come on after the pumpkin had almost grown all the way around and back out of the patch. We terminated the main just patch this fruit. This grew and grew and grew. In fact if it were any bigger it would have outgrown its corner spot! With the small space and later set time (July 14th) growing a 383 pounder was pretty exciting. This would have been a much bigger plant but we noticed that the main stump had rotted off with about a month left until shoreline. That brings us up to this season.
|
|
|
Sunday, March 31
|
View Page
|
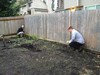 |
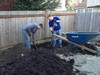
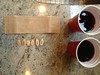
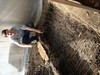
Jeff and I had been talking through the winter. Through the dark and stormy nights that winter often brings about our pumpkin growing for the upcoming year. We have a lot going on in our lives this year. It was during a visit home for Easter that Jeff and I decided we were going to go big this year. We looked at each other and said �yes� lets do it! Thus we began. As some of you others growers are probably thinking at this point we are a little behind the 8 ball. Not too behind though. We have a few years under our belts and are determined to break 500 this year. 500 is the minimum we want to see at the weigh off. Over Easter Jeff and I discussed whether we would grow 1 or two plants. We decided to go big or go home. We only have about 500 square feet in our patch.
Here we are measuring the patch.
|
|
|
Sunday, March 31
|
View Page
|
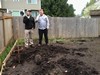 |
At the 2012 Shoreline Jeff and I were talking to Cali Halbert about the foaming stump problems from the past 2 years. He asked us about our patch size. We told him about 500 square feet and that we were growing 2 plants. At this point he asked �Well are you growing large fruit or Giant Pumpkins?!� We had this discussion on Easter as we were walking around the patch discussing the foaming stump situation. Jeff and I both decided we don�t want giant vegetables�.WE WANT GIANT PUMPKINS!!!! Thanks for the advice Cali. At this point we knew we had to start getting the patch ready to go. We did a drainage test and saw we had pretty much no drainage. In addition Jeff and I talked about how we were going to change our soil composition to increase drainage.
|
|
|
Sunday, March 31
|
View Page
|
 |
***Correction*** Robin not Cali Halbert. The whole Halbert family was at the Shoreline Weigh off and was very fun to meet. Robin, Jeff and I measured the majority of the pumpkins at the weigh off for the estimated weights. That was a fun day and an exciting event. Congrats again Joel (Holland), you grew the biggest pumpkin at the 2012 Shoreline Central Market Weigh off.
|
|
|
Tuesday, April 2
|
View Page
|
 |
We took some soil samples and sent them off to A&L Labs for Analysis. I headed back to Minneapolis and Jeff and I began doing heavy research on foaming stump. In addition we ordered up for fertilizer and soil amendments. We began talking to a number of people and scouring through the bigpumpkin.com forums looking for information or preventing foaming stump. There is quite a bit of information, theories, and advice out there. We decided to take a blanket approach. Increase drainage, keep vines growing, add some fungicides (rootshield) in our planting areas and along the vines, reduce the watering, reduce root competition around the stump, apply fungicide to the stump, and keep the stump drier.
|
|
|
Monday, April 8
|
View Page
|
 |
After talking to a number of other growers and looking over the other information we had collected we began formulating a plan for our soil. Regardless of the soil test we knew we needed to add some sand for drainage. We got our test results back from A&L Labs and discovered a few other problems.
P- 491ppm
K-346ppm
Ca-3485ppm
Mg-549ppm
%k 4.4
%Ca 73.2
%Mg 22.4
K:Mg 0.19
Ca:Mg 3.27
CEC 18.8
ORGANIC MATTER 33.0%
Our Phosphorus and organic matter are through the roof. Our patch has been built on yards and yards of Cedar Grove Booster Blend. Water on the other hand doesn't seem to go very far in our patch. It rains or gets watered then turns into a black muddy mess instead of draining off. Doing the dig a hole and fill it with water test. We pour in the water and it hardly goes anywhere. The cedar grove compost seems very susceptible to soil compaction.
|
|
|
Tuesday, April 9
|
View Page
|
 |
The Cedar Grove Dirt seems to be a large part of the foaming stump and root rot problems in our patch. Our patch was built on top of our old play area. It had a couple inches of pea gravel that settled into the clay base below. We built a raised bed on top of the clay.we have been adding dirt ever since. It's about 12-18 inches deep. We have built it mostly on cedar grove booster blend. This now seems to be contributing to some of the problems in the patch. In combination with high phosphorus fertilizers (blooming aids) we have used in the past, our levels are very high. Jeff and I discussed the need to drastically change our soil composition. We knew we needed to add sand to increase drainage. We than began looking for honest top soil. Basically soil from a farm. Not blended topsoil that is available at most of the larger soil producers made from compost and other organics. This turned out to be a tougher task that I thought. I called just about every soil place in the hone book and finally found a very nice guy named mark that has a materials operation near the Sea-Tac airport.
|
|
|
Wednesday, April 10
|
View Page
|
 |
We bought 3 yards and were loaded with about 4 yards of excellent looking honest dirt from the earth. The dirt was stripped from the Kent Valley and had a loamy/sandy quality to change our solid composition. Mark had stripped the top couple feet from a site and run it through a screen.
|
|
|
Thursday, April 11
|
View Page
|
 |
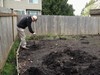
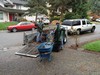
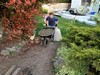
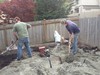
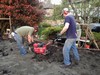
We brought the dirt back to the house and began the process of transporting the dirt from the front yard to the pumpkin patch in the backyard. In true Northwest gardening style in was rainy and mucky with heavy wet dirt to transport.
|
|
|
Thursday, April 11
|
View Page
|
 |
The rain did not deter Jeff, my dad or I from getting our task done. We battled the elements and moved the 4 yards of dirt around the house, up a small hill and into the mucky patch. You could see an immediate difference in how the Cedar Grove dirt and the Kent Valley dirt handled the water. Though the Cedar Grove Booster Blend was mostly compacted, the areas that were loose did not absorb water as well as the new Kent Valley dirt. We placed wheel barrow sized piles all over the patch but left room to bring in the sand that was coming in the next trailer load.
|
|
|
Thursday, April 11
|
View Page
|
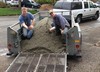 |
We covered the grass with an odd collection of boards from around the house and yard to prevent the grass from getting destroyed during the process of moving the dirt. After the Kent Valley dirt was fully moved into the pumpkin patch we went to Pacific Topsoil off Route 900 in Issaquah for a load of sand. We picked up about 2 yards of land and were loaded with a bit more than that. We hauled this back to the house and began to unload it. At this point the weather started easing up and bit and the rain became very light or intermittent.
|
|
|
Thursday, April 11
|
View Page
|
 |
We were able to enlist our good friend Eric to help us move the second round of dirt on the board walk to the pumpkin patch in the back. On his first load we put a big load of sand for him. You gotta break in the new guy right? With Eric, Jeff, my dad and I unloading the sand it became a very fast and efficient process.
|
|
|
Thursday, April 11
|
View Page
|
 |
Gordie was loading wheel barrows with sand in the front. As you brought your wheelbarrow in you would help him load it up. Then head to the back. This was a big help and turned out to be one of those days where everyone is nice. The soil providers were nice. Everything just ran pretty smoothly (except for the weather of course).
|
|
|
Thursday, April 11
|
View Page
|
 |
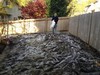
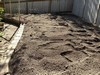
By 4 PM after an 8 AM start we were all done moving both loads of dirt to the back. We had so much extra time in fact that we took the trailer over and got a couple yards of bark to use around the yard and pumpkin patch. You can see in this picture how we dumped the Kent Valley Soil and Sand on top of the existing Cedar Grove Soil. We will soon be spreading out the new soil evenly and then tilling it into the old soil.
|
|
|
Thursday, April 11
|
View Page
|
 |
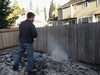
Classic Northwest gardening. This was a picture from earlier in the day as we were moving the Kent Valley Dirt from the front yard into the pumpkin patch in the backyard. It was chilly and raining until the afternoon. We got the job done. Look at these happy campers. Big Pumpkin here we COME!
|
|
|
Saturday, April 13
|
View Page
|
 |
Jeff and I decided to do some soil testing on our new dirt to look at what amendments we will need to add for the growing season. Jeff collected some of the dirt that was already in the patch (mostly Cedar Grove Booster Blend) as well as some of the new Kent Valley dirt and Sand that we added to the patch. We are going to send a representative sample to Western Labs as well as A&L Labs in Memphis. We sent a third sample to the Rodale Institute for pathogen testing. We really want to get all the information we can to prevent foaming stump from occurring in our pumpkin patch for a third year in a row.
|
|
|
Monday, April 15
|
View Page
|
 |
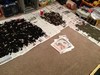
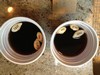
Jeff allowed the samples to dry out for a couple days. Some of the labs want a dry sample for testing and others do not. As you can see there are three different samples of dirt. We decided to send off the original dirt and Kent Valley dirt for individually to A&L Labs in Memphis. We send out blended samples (2 parts Original dirt, 1 part sand, 1 part Kent Valley dirt) to Western Labs and the Rodale Institute for testing. We created this representative sample based on the proportions of dirt we added to our pumpkin patch. The original dirt (Cedar Grove Booster Blend) is about 8-12 deep throughout the patch. We added equal portions of Kent Valley dirt and sand. Based on our calculations we would be adding about 4.5 inches of new combined dirt.
|
|
|
Monday, April 15
|
View Page
|
 |
The soil samples are packaged and ready to go to their respective labs for testing. Hopefully in a couple days we will get out results back. Then we can start determining what fertilizers and amendments to add to our soil.
|
|
|
Friday, April 19
|
View Page
|
 |
We got our soil test back from Western Laboratories. Interesting results. We have never used Western Labs before. I had been talking with Geneva Emmons about foaming stump and she was the one who recommended Western Labs as well as doing a pathogen test on our soil. Thanks Geneva! Western was speedy in sending their results back to us. Overall the new blend of soil looks pretty good. There are a few things to correct however it is much better than the turbo blaster (Cedar Grove Booster Blend) that had been out growing medium the past couple years.
|
|
|
Friday, April 19
|
View Page
|
 |
Here were the additions recommended by Western labs. These recommendations were for generic pumpkins. We used this as a starting point and then dug through big pumpkins, talked with people, read through our trusty �How to Grow Giant Pumpkins, The Organic Way� book. To determine the levels we wanted in our soil. That being said the levels recommended by most of the labs and want we came up with in our research are pretty similar. With some differences of course!
|
|
|
Friday, April 19
|
View Page
|
 |
As you can see on our results the old dirt (Mostly Cedar Grove Booster Blend) has quit e a few problems. Plus it is very clumpy dirt frequently suffering from easy soil compaction. Jeff and I looked at our Cedar Grove dirt after it had dried out. It doesn�t even really look like dirt. Mostly little sticks and other organic matter It has a lot of breaking down to do before it can really be considered soil. Jeff and I figured out that we needed to dilute our dirt down and then add the nutrients back into it at the correct levels. The Cedar Grove is TURBO CHARGED in phosphorus and organic matter.
|
|
|
Friday, April 19
|
View Page
|
 |
Here is the soil test from the Kent Valley Dirt. The nutrient levels are substantially lower than in the Cedar Grove Booster blend. Jeff and I did not send out the sand for testing because, well basically its sand! This blending of the Kent Valley dirt will help us reduce the overall nutrient levels while at the same time adding in some honest dirt. The Kent Valley dirt is earthy and just what you would expect to find on a farm. This will increase the loamy material in the dirt and add some actual dirt to the Cedar Grove. Hopefully in combination with the sand the clumpiness and soil compaction factors will be reduced.
|
|
|
Saturday, April 20
|
View Page
|
 |
My dad, Jeff and I noticed quite a few differences between the results we sent out. The western labs reported a very low organic matter in their results. A&L still reported an organic matter hovering around 30%. We then started looking at other nutrient levels and noticed some discrepancies. While these samples are not comparing exactly the same thing in theory if we have a sample that�s half 30% organic matter and add it to a 0% organic matter material that should give you around 15% right. This began to get us thinking about the accuracy of the soil tests. We started looking around on Big Pumpkins and noticed that this seemed to be an area of some discussion. I made a very rough spreadsheet on the back on some old flight paperwork in between flights while on a trip(Pumpkins can infect your daily life, haha). The results were mixed. This lead Jeff and I to wonder about the results. We decided to do some more testing before adding amendments and fertilizers to our soil. Just to make sure.
|
|
|
Sunday, April 21
|
View Page
|
 |
I found a great chart on the Waters Labatories site describing our each element affects a plant. This is some good information for all of you new growers out there. Waters Labs came across my search for soil testing Labs. I am going to throw them in the mix for this next round of testing.
|
|
|
Monday, April 22
|
View Page
|
 |
I flew back into Seattle for a few days to get some pumpkin stuff done, see some friends and hang out with the family. The first thing I did was collect some soil samples. I read through about 10 different labs and their soil collection methods. I want this round of soil tests to have clean samples for accurate results. I used a clean stainless steel trowel and took about 12 samples from different areas of the patch for each type of dirt.
|
|
|
Monday, April 22
|
View Page
|
 |
With the incredible spring weather (this hardly ever happens in Seattle for more than a day or two) I used the sun to help my dry out the samples of dirt. I grabbed quite a bit because I wanted enough for the samples to the labs and to keep some around for any future testing. The sun dried out the samples in just 1 day. Actually I should say in just several hours. Jeff and I knew we were going to till on Wednesday so we had to get these samples out quick for testing.
|
|
|
Monday, April 22
|
View Page
|
 |
A wise man once told me �when in doubt, over engineer� I decided to use that same approach with our soil tests. I sent our representative sample (All from the same mix) for overnight delivery so that a couple days later Jeff and I could amend our soil with fertilizers and get the soil ready for the season. With the potential differences in the soil tests we went for a shotgun approach and sent samples off all over. We sent samples to the following labs: Waters Agricultural Laboratories in Georgia, Litchfield Analytical Laboratories in Michigan, A&L Analytical Laboratories in Tennessee, and A&L Great Lakes Laboratories in Indiana. Basically we sent the same dirt all across the country to get it tested to see how the different labs compared. These labs posted a 24-48 hour turn around on results. We will keep you updated.
|
|
|
Monday, April 22
|
View Page
|
 |
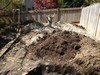
After sending off our 4 care packages out for overnight shipping Jeff and I came up with a game plan for our patch this year. We are determined to have a big year and want to give ourselves the best chance we can get. Our plan is to have one giant plant that takes over the entire pumpkin patch. Since we only have 500 square feet this will give us the best shot at a HUGE PUMPKIN! Jeff and I want to give ourselves the best odds we can as well. Our growing history in the patch has shown us that on average only about 1 in 2 or 3 plant will make it through the season a fruit. Last year we were 1 in 5 (pretty bad, and has resulted in our major soil change this year). We stated digging out our planting holes. We only have 12-18 inches (probably more now with the new dirt), so to increase root growing area and drainage we have dug out deep planting holes. Here we are starting on one of the holes.
|
|
|
Monday, April 22
|
View Page
|
 |
Our plan was to start 3 plants and cull down to one primary plant. We want the best odds we can get so 3 plants will see the dirt. 2 will be on the wide end of the patch and one on the narrow end of the patch. The two on the wide end of the patch will only grow for about 3 weeks or so before one plant will need to be culled. The last two will have about 5-7 weeks before the last culling decision will need to be made. The optimal location is on the far side against the fence where the patch is just over 20 feet wide. The patch is shaped sort of like a tree with one end about 23 feet wide and the far side about 10 feet wide. Here I am continuing to dig out the double wide planting hole. This is where the side by side (about 4 feet apart) starts will go.
|
|
|
Monday, April 22
|
View Page
|
 |
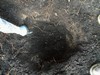
Jeff and I got through the Old Patch dirt, Cedar Grove Booster Blend, and Dug down to the beginning of the inter clay/pumpkin patch soil level. This was about a foot deep of pretty compacted black, mucky Cedar Grove Compost. There is a giant boulder, about he size of your average BBQ) about 14-16 inches down. We dug out next to the rock and discovered a previous planting hole where we grew the 1400 Holland seed that produced the 297.5 Blume (we generally round to 300).
|
|
|
Monday, April 22
|
View Page
|
 |
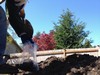
Here Jeff is digging out the planting site of the 1400 Holland Seed. We discovered it went down about 3 feet. The bottom foot or so smelled horribly musty and rotten. That Cedar Grove Booster Blend is not decomposing well. That stuff is 3 years old down there and hasn�t hardly changed its composition. In talking with Joel Holland he suggested that foaming stump could be caused by root congestion. So we are digging out planting sites much wider and you can see in this picture. The old size (the black dirt shaft Jeff is digging) and the new size around it. We aren�t going to dig out that whole area but make the deep part wider and then have it slope up so it can have a much wider and deeper area to spread out. Increasing drainage as well.
|
|
|
Monday, April 22
|
View Page
|
 |
We have dug out the original area from the planting site 3 years ago and expanded it out to make room for the second seed. As you can see its pretty deep. We could bury someone in this hole we have dug! Hahaha. We took out all the clay and got rid of it. Clay is our enemy in this patch. We then went to the narrower opposite side and began digging out that hole in the patch.
|
|
|
Monday, April 22
|
View Page
|
 |
When we started digging the planting hole on the other side of the patch we noticed there were a ton of roots growing through the patch. We have never dug out a planning site and reused it the following year, until now. We saw a ton of roots growing through the soil. Thinking back on Joel Holland�s comment about the root congestion being a potential cause we decided to stop digging for the evening and come back tomorrow and massively expand these planting holes. This way we would be giving the roots all sorts of areas to grow in and not have to stop the roots when the hit the hard clay that the patch is built on. We packed up for the night and made a reservation for a U-Haul trailer. Jeff and I were going to need to move some serious amounts of heavy gray clay tomorrow.
|
|
|
Monday, April 22
|
View Page
|
 |
Here we go again adding the new yard of sand to the pumpkin patch. We talked to our neighbor out front about renting a bigger tiller than our little one to really get in deep and mix up the dirt with the proper proportions that we sent off to the labs for testing. He said he would check into it
|
|
|
Tuesday, April 23
|
View Page
|
 |
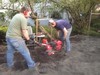
We got the trailer and then Jeff and I set out to move clay, LOTS of clay. My dad has been battling the gray clay since he moved into the house wayyyyyyy back in the day. It has been the enemy for a long time. We decided to dig out the entire area that had been the second tier yesterday down to where the previous planting holes had been dug (a major expansion). We loaded up wheelbarrow after wheel barrow with clay and moved it to the trailer in the front yard. This clay had to have been the heaviest thing we have hulled in the wheelbarrows (even more than wet dirt and sand). We Dug out little tiered planting hole �up side down wedding cake� out much wider and down deep in the second tier area yesterday. The weather was nice so it was a good day to be moving the clay.
|
|
|
Tuesday, April 23
|
View Page
|
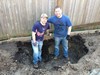 |
LOOK how big this hole is now! It�s massive! We moved a ton of clay to the front in the trailer. We are feeling good about how much area the roots will have. Also that our new soil composition will be going into these holes. There should be far less horribly smelling dirt when we dig it up in the future. Look that those Big Ole Smiles. We just dug out a hot tub of dirt for the pumpkins. Enjoy Roots!
|
|
|
Tuesday, April 23
|
View Page
|
 |
Jeff and I took the dirt to Pacific Top Soils in Issaquah off route 900. We had seen yard waste going there when we had picked up dirt in the past. We called and asked if they accepted clay. Sure enough they did. So we parked our trailer next to the yard waste area and began unloading the dirt in the same way that we got it in. One wheel barrow at a time. Jeff had a good comment. �We move everything twice� He wasn�t kidding. We really do! We got rid of our clay, Then our dad had the suggestion of getting some more dirt to add to the patch because we had just dug two massive holes. We picked up another yard of sand to add into the patch. We brought it back to the house and wheel barrowed in to the patch in the back.
|
|
|
Tuesday, April 23
|
View Page
|
 |
Here is part of how we get our dirt from the front yard into the back yard. We lay down boards on the grass so it does not get killed or ripped up. There are 2 hills we go up. They are not very long but when it is raining they become a muddy slip and slide. One year we laid down old fence boards horizontally like a walk way of a dock. This gave us traction but made the wheel barrows hop. Haha.
|
|
|
Tuesday, April 23
|
View Page
|
 |
Here is the final shot of the dirt before we started moving any of it back in the planting holes or trying to disperse it evenly throughout the patch. As you can see there are areas that have more of one type of dirt than others. The hole was so deep I was half buried. Pumpkin roots I hope you are happy.
|
|
|
Wednesday, April 24
|
View Page
|
 |
Our neighbor Armondo got us a great deal on a tiller rental. Here my dad and Armondo are looking at the tiller after Armondo was nice enough to drop it off. We looked at several tillers that were available. Walk behind, smaller mid-engine tillers. We got the Honda FC 600 series tiller. It was the biggest of the mid-engine tillers with 14 inch tines on it. It also had everything attached above. Our thinking was all this room meant it could dig down and till deep.
|
|
|
Wednesday, April 24
|
View Page
|
 |
We got our results from A&L Labs (Memphis, TN) within 24 hours of them receiving it. The results were lose to that of Western Labs with some slight differences. We then sat down for a couple hours and crunched out what we needed to add to our soil and how much to add. We used the information from the two tests, which we close but had some big differences. From this we came up with the fertilizers and amendments we would like to add to our patch.
|
|
|
Wednesday, April 24
|
View Page
|
 |
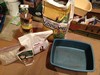
Here are all of our soil amendments. We are going to start with each planting hole. Making sure they are just right. Then using the tiller on top to mix up the new dirt. On the right side is something that we found at Sky Nursery in Edmonton. 4 cubic feet of perlite. We decided to use this to really increase the drainage in our planting sites as well as help to keep the soil from compacting.
|
|
|
Wednesday, April 24
|
View Page
|
 |
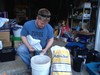
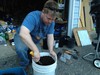
Here is Jeff throwing some Perlite into the planting hole. We would end up using most of the bag between these two holes and just adding the smaller remaining portion to the patch. To ensure the dirt was just right we would add 2 shovels of Cedar Grove, 1 of Sand and 1 of the Kent Valley Dirt. This way our amendments would be correct for the dirt that was tested. This will also be the dirt that the pants have the greatest contact with since it will be the site of the future monster stump growing there.
|
|
|
Wednesday, April 24
|
View Page
|
 |
Perlite Delight? Here is Jeff just after releasing the Perlite in the previous posting. This was very light and fluffy. It is commonly used in potting soil. Our thinking was let�s keep our planting hole more like a greenhouse start and give it a product that will reduce soil compaction and increase air in the soil without absorbing water, like vermiculite.
|
|
|
Wednesday, April 24
|
View Page
|
 |
To speed up the mixing process we broke out the little tiller and used it in the holes to mix up the dirt. It did a great job at that. We put on breaking masks because the fertilizer dust and Perlite dust was something that we didn�t want to inhale, plus it was making us cough. We would continue to add our shovels full of dirt and then add in the fertilizers and amendments then use the little tiller and mix it all up. We tried doing it wil shovels and rakes first. There is no substitute for power tools.
|
|
|
Wednesday, April 24
|
View Page
|
 |
Here Jeff and I are adding shovels full of dirt. Jeff is adding the sand and I am adding some of the old patch dirt (Cedar Grove booster blend). We could do 10 cycles each then add the amendments and till it up. Here we are again just proving Jeff�s point about moving our dirt twice. We moved it from the front yard to the back. Now we are moving it all over the patch to get the composition right. Hahaha.
|
|
|
Wednesday, April 24
|
View Page
|
 |
Here Jeff is giving the planting site a till. You can see the layer of Perlite that is added. It looks like a lot at first. Then look at the area behind the tiller where Jeff has already tilled. It is worked into the soil pretty well into a homogenous mixture that is just the way we want it (according to our soil tests and the information we have picked up from all you helpful growers out there sharing your wisdom with us). We continued to do this until the dirt was up even with the rest of the patch and then prepared to break out the bigger tiller to go to work on the patch as a whole.
|
|
|
Wednesday, April 24
|
View Page
|
 |
When we first got the tiller into the patch we found that we couldn�t get it to move forward. Watching YouTube videos of the tiller in operation it appeared the tines pulled the unit forward on its own. A bar in the back slowed the progress of the tiller so it would run away. We tried this. The tiller didn�t move anywhere. Our dirt was too soft. After a while and tinkering around with it Jeff and I finally figured out a system that worked. The guy on the back would hold the throttle and the guy in the front would pull the tiller along a couple inches at a time and let the tiller munch. Once it had dug down deep enough the guy n the front would pull the tiller up and let it move forward a few inches. This tiller weighs over 100 pounds mind you.
|
|
|
Wednesday, April 24
|
View Page
|
 |
Here I am pulling the tiller along. It was pretty tiring moving that tiller along. It was a goofy weird system. But, ya know what? It worked! We decided to do the deep will without adding any fertilizers or amendments to the patch. We just wanted to get the big tiller in and mixing up the dirt as deep as it could. We would stop and move Kent valley Dirt and Sand from areas where it was highly concentrated to others areas that were less concentrated. This also gave us a chance to have a break, although we were still working. The dirt was starting to look very good. Very close to what we had sent the labs. This made us felt good that our ratios were about right.
|
|
|
Wednesday, April 24
|
View Page
|
 |
Good ole Gordo was out there following Jeff and I with our little tiller. He came up with the idea all on his own. We had some areas that would be high in Kent Valley Dirt, or sand, or old dirt. He would go through with the little tiller and really get it evened out and mixed up. After he was done with an area the soil looked really uniform in its mixture. Very homogenous. My favorite part was my dad saying �I did all that yard work and I never even had to change out of my PJ�s� that was hilarious.
|
|
|
Thursday, April 25
|
View Page
|
 |
Today I had to fly back to Minneapolis to go to work. This is why we had to do the big till yesterday. It really was a two man job. Although with Gordie�s third man assistance we got the dirt in the patch looking really nice. Thanks dad. Here are the fertilizers and amendments that we are adding to our pumpkin patch based on our soil tests. We believe this will give us the nutrient levels we want. I got up at 6:30 in the morning to go outside and start adding the soil amendments. Jeff and I talked about it the night before. We would both lay down the soil amendments then he would come back later and use the little tiller to get it in the soil and worked in. The little tiller will get down and mix the top 8 inches of soil in the patch. I got up first and moved everything to the back while Jeff got out of bed. We are dedicated to these pumpkins.
|
|
|
Thursday, April 25
|
View Page
|
 |
Here is Jeff up bright and early adding the remainder of the Perlite to the pumpkin patch. It�s a pretty nice morning, again. We hand spread everything over the patch. This allows us to control where everything goes. With 500 feet of soil it really doesn�t take a lot of time like a grower with a much larger plot of land. Jeff and I split up the fertilizers, fungicides, and amendments. That way were we each laying one down and discussing with each other how much to lay down.
|
|
|
Thursday, April 25
|
View Page
|
 |
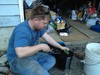
Here I am adding Azomite to our soil. This is a new addition for us. It contains something like 67 different elements and trace minerals. We found this in our research for this year. This way we can spice up the micronutrients that may be low in our patch. It is light brown/yellow fine powder.
|
|
|
Thursday, April 25
|
View Page
|
 |
Jeff and I received the remainder of the soil test on the morning of the 25th. The results more or less confirmed we we had thought we would need to add to the soil. There were a number of differences though. Remember these were all from the same soil sample. Here is page 1 of the report from A&L Great Lakes (Indiana). It is similar to the A&L Labs (Memphis). Though the reporting style is different.
|
|
|
Thursday, April 25
|
View Page
|
 |
Here is the second page of the report. It contains the recommendations from A&L Great Lakes.
|
|
|
Thursday, April 25
|
View Page
|
 |
Here is the report from Waters Lab (Georgia). They had similar results. The recommendations were slightly different however their results were slightly different
|
|
|
Thursday, April 25
|
View Page
|
 |
Here is the lab report and recommendations from Litchfield Labs (Michigan). Again similar yet slightly different. Here is the big question�.which lab is the best? Most accurate? I will make a spread sheet and show a combined, side to side, comparison of all the results from all of the labs.
|
|
|
Thursday, April 25
|
View Page
|
 |
Later in the day we received our pathogen test that we had sent out a while back. We had sent in a sample of the blended dirt. After reading the full report Jeff and I may have wanted to send in our original dirt. Their recommendation was to add more compost to our soil. Which as we all know is the last thing we want to do. Our soil has wayyyyyyy too much organic matter. The blended soil test indicated a much much lower organic matter level. We find this quite odd since every test prior to this round has indicated around 30%.
|
|
|
Thursday, April 25
|
View Page
|
 |
That afternoon Jeff went and tilled in the fertilizers and soil amendments with the little tiller. The little tiller does a really good job of mixing everything up. The dirt now looks really really nice. Much different than the �Black Death� that we had before this extensive dirt rectification process. I think we have done some excellent work. Look at the color of it. Now more earthy brown in coloration. When you take a couple hand full�s and squeeze it together it makes a ball that breaks apart pretty easily instead of a pitch black baseball. This dirt looks awesome. Plus with all the sand it will allow for the greater movement of water through the patch instead of retaining the water. The Cedar Grove is famous for clumping and holding dirt. Hopefully it�s got just what the pumpkins need to grow us a 500+ pound pumpkin in the patch.
|
|
|
Friday, April 26
|
View Page
|
 |
Jeff has been looking around for some seeds with good prospects from some of the growers. He had been talking to a few guys on big pumpkins about their seeds. He came across the the 1102 Huydic. At day 47 (growing the 1102 Huydic seed) the pumpkin was 391 OTT at day 47, that�s huge! Unfortunately the pumpkin did not make it to term. Jeff had been talking with �Big Orange� on Big Pumpkins and he agreed to send us a few of his seeds. Thanks Big Orange!
|
|
|
Friday, April 26
|
View Page
|
 |
Jeff received the 1102 Huydic seeds today right on planting day. Great genetics on this seeds. In addition it is one of the few proven seeds that we have in our line up for this year. Not to mention having Werner and Wallace genetics in the seed.
|
|
|
Friday, April 26
|
View Page
|
 |
Planting day! Jeff and I discussed which seeds to grow at great length. It�s the age old question. There are number of really good seeds that we have and want to grow but only so much room to grow them in. We first determined we wanted to start 6 seeds. We always assume we will lose 1 in the germination process. Our 6 seeds are the are the: 1382 Bryson (1419 Bryson x 1725 Harp); 2X 1102 Huydic (1634 Werner x 1068 Wallace); 1281.5 Holland (1794 Pugh x 1818.5 Bryson); 1264 Kline (1161 Rodonis x 1385 Jutras); 1190 Northrup (1161 Rodonis x 1725 Harp).
|
|
|
Friday, April 26
|
View Page
|
 |
Here is Jeff sanding the edges of the seeds, getting them ready for the soak. We take down the edge just a bit because the seed husks are so thick that sometimes the little plants have trouble popping open.
|
|
|
Friday, April 26
|
View Page
|
 |
The seeds are sanded on the edge and ready to go into the water/seaweed soak for the germination process. Each of the seeds is labeled so we know which seed is which. It would be very easy to get these seeds confused since they all look very similar to each other.
|
|
|
Friday, April 26
|
View Page
|
 |
Now the seeds are soaking in the seaweed solution. We use a weakened solution of seaweed in the soaking process. We will let the seeds soak for several hours before planting them in the dirt. Filing the seeds a bit allows the water to get inside the seeds a bit easier than the original thick husk that is present. Drink up seeds, you have a lot of growing to do!
|
|
|
Friday, April 26
|
View Page
|
 |
While the seeds are soaking we get the soil ready for planting. This year we will be using two different (actually 3) types of Mycorrhizae in our patch. 2 granular and 1 water soluble. We mixed equal portions of Holland�s �BioGrow Endo Plus) Mycorrhizae and Extreme Pumpkins�s �Pumpkn Pro Mycorrhizal Inoculant� into the dirt. This will give us an excellent opportunity to get some Mycorrhizae right next to the roots as they are starting the growing process. The dirt then goes into 5� peat pots. If the roots hit the edge of the posts they can grow through the peat pots and remain uninhibited. They will be transplanted later on into much larger pots. Last year we used actually seed starting soil. We found this to dry out too quickly for our liking. We got a different type of organic potting soil (Edna�s best potting soil). This was quite similar to what we had used in the past. It retains just a bit more water, which works better for us.
|
|
|
Friday, April 26
|
View Page
|
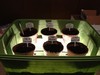 |
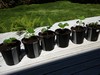
Here are all the seeds nestled in their new growing peat pots in our germination box. This is the same one we have used the past few years. We look for 85 degrees in the box. We use a couple light bulbs for heat. The season is definitely under way now. The seeds had an 8 hour soak on them before they we planted in the soil. They had about half an inch of dirt covering the seed. This method has worked well for us in the past. Hopefully all 6 will come up. We always figure one will not germinate for one reason or another. 3 will go in the dirt so we will have a few backups. These babies should sprout in the next couple of days.
|
|
|
Friday, April 26
|
View Page
|
 |
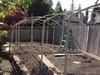
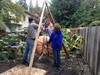
While the seeds were soaking Jeff and dad began the construction of the greenhouses for this year. They talked about several ideas on how to build them. Eventually they came up with the great idea old using the side supports from last year and then running a 10 foot length of PVC between them in a arch. It is a similar design as last year only smaller and not covering the whole patch. Each of the planting sites will have its own green house. These will be removed as the summer rolls on and the plant expands. We are not going to keep the greenhouses up all year like last year. Last year we would walk in and the patch would be very musty. This may have been a contributing factor in our foaming stump problems. This structure will be covered by Visqueen and the greenhouse will be complete. We just have to assemble the greenhouse on the far side against the fence.
|
|
|
Monday, April 29
|
View Page
|
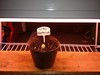 |
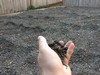
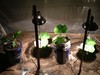
The 1190 Northrup is the first seed to sprout. This is the seed that grew in about 90 square feet and gave us �Casper� (383 Blume) last year. Impressive in that small area (that�s what we keep telling ourselves). This is a good sign for the ole germination box. Hopefully its friends will follow long here shortly. After the starts begin to sprout we move them under a grow light. We keep the light just above the leaves. This keeps the plants nice and stocky. The light setup was built using an old aquarium stand and a cedar board that was a spare from the boards used to build the raised bed of the pumpkin patch.
|
|
|
Tuesday, April 30
|
View Page
|
 |
Our second plant is up. The 1281.5 Holland is sprouted and looks healthy. We will remove the husk here after the picture. If the husk is accidently left on too long we have found that the cot leaves will begin to rot away. We will help the plant and usually remove the husk from the seed.
|
|
|
Tuesday, April 30
|
View Page
|
 |
Later in the day. Both of the 1102 Huydic�s have sprouted and are now under the grow lights. Just 2 seeds remain in the Germination box. The 1382 Bryson has a �dirt nipple� already. The 1264 Kline has no activity as of yet.
|
|
|
Wednesday, May 1
|
View Page
|
 |
The 1382 Bryson has sprouted and is now under the growing lights. No sign of activity on the 1264 Kline. 5 good starts so far. Hopefully the 1264 Kline will be along shortly. You can see our grow light and germination box in the background.
|
|
|
Saturday, May 4
|
View Page
|
 |
Gordie, Jeff and I went out Halibut fishing in Sequim the past few days. Unfortunately our mom had her classes to teach so she was unable to join us for the fishing trip. Molly was in charge of the pumpkin starts while we were away. She called us this morning to tell us that the 1264 Kline had activity. Jeff and I were surprised. This was great news. Not only did we get the Kline to come up but we were a perfect 6 for 6!
|
|
|
Saturday, May 4
|
View Page
|
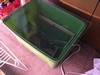 |
The germination Box is unplugged and will go back into retirement. It once again did its job and gave us another set of great starts. This holds the temperature right around 85 degrees which gives the seeds the heat they need to leap out of the dirt. Once they are up they are transferred under the grow light. We built this germination box our first year and have not changed it since.
|
|
|
Saturday, May 4
|
View Page
|
 |
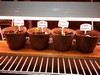
Here are all 6 starts under the grow light. Jeff and I talked about in and today we are going to repot these little fella�s in their bigger 2 gallon black pots. This will give the roots more room to grow before they finally go outside. The plants got to sit under the grow lights for a couple hours while we got the supplies ready for the starts to be transferred.
|
|
|
Saturday, May 4
|
View Page
|
 |
We cut our pots in half so we could get the plants out easily. Here I am putting two sides together then duct taping them so they hold in place. I cleaned the pots up before taping them together. It was another nice day out.
|
|
|
Saturday, May 4
|
View Page
|
 |
Here I am adding some Mycorrhizae to the organic potting soil. I have already added Holland�s �BioGrow Endo Plus� Mycorrhizae and Extreme Pumpkins�s �Pumpkn Pro Mycorrhizal Inoculant� into the dirt. This is the best chance we will have to get the Mycorrhizae right next to the young growing roots.
|
|
|
Saturday, May 4
|
View Page
|
 |
Now I am getting the Mycorrhizae all mixed in with the organic potting soil before I repot the plants.
|
|
|
Saturday, May 4
|
View Page
|
 |
Here I am repotting the second 1102 Huydic. Both of these starts look really good. These two gallon pots take quite a bit of dirt. Luckily we had just the right amount. What a great looking start.
|
|
|
Saturday, May 4
|
View Page
|
 |
Here are out cute little plants all nestled in their new pots. Now they will have lots of room for the roots to go wild. GROW! GROW! GROW! They will go back under the growing lights.
|
|
|
Saturday, May 4
|
View Page
|
 |
I went back in the evening to look at our dirt in the patch. I grabbed a handful and made it into a ball. I took this picture immediately after opening my hand. Its not a black clump. What a Change! Jeff and I are very excited about this dirt. What a funny concept. Excited by dirt! Hahaha.
|
|
|
Sunday, May 5
|
View Page
|
 |
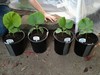
The 1264 Kline finally came up. We were a perfect 6/6 this year on germination. All 6 starts have been transferred over to the large 2 gallon pots. As we did last year, the pots have been cut in half and duct taped together making the transfer much easier.
|
|
|
Sunday, May 5
|
View Page
|
 |
The 1264 Kline finally came up. We were a perfect 6/6 this year on germination. All 6 starts have been transferred over to the large 2 gallon pots. As we did last year, the pots have been cut in half and duct taped together making the transfer much easier.
|
|
|
Sunday, May 5
|
View Page
|
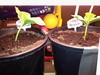 |
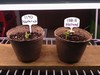
The 1190 Northrup and 1382 Bryson Looking Good
|
|
|
Sunday, May 5
|
View Page
|
 |
The 2 Huydic 1102 Starts also looking very good
|
|
|
Sunday, May 5
|
View Page
|
 |
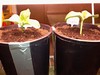
The 1281.5 Holland and 1264 Kline. Still need to finish the hoop houses outside and bury the heating cables as these babies will be ready to hit the dirt soon.
|
|
|
Sunday, May 5
|
View Page
|
 |
I had to head back to Minneapolis for a trip. I took this just before heading out, early in the morning.
|
|
|
Monday, May 6
|
View Page
|
 |
Pumpkin starts doing a little hardening off in our 90 degree weather today! They look ready now to go in the dirt and will hopefully be transplanted in the next couple of days. Going to have some tough decisions ahead. They all look very healthy
|
|
|
Wednesday, May 8
|
View Page
|
 |
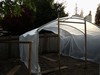
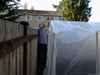
Both greenhouse frames have been completed. Each house is roughly 12ft long x 8ft wide. We like how this frame design allows us to move freely with max headroom to comfortably work on the plants
|
|
|
Wednesday, May 8
|
View Page
|
 |
Pulling the plastic over the greenhouse Frame
|
|
|
Wednesday, May 8
|
View Page
|
 |
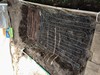
This is kind of our custom made supplies box. The green and black pieces are curved sections cut from plastic coat hangers. We used these at one point to secure soaker hose into position. We also use them to help pin vines down as the pumpkin grows. I found another use for them when I buried the heating cables this year(that photo will be posted closely following this one). The white pieces are small 1 inch sections of PVC that have a section cut out of their side. We use these "C" clips on the ends of the greenhouse so that we can take sections down quickly and then resecure them.
|
|
|
Wednesday, May 8
|
View Page
|
 |
Mounted the door frame on the end of the far greenhouse. It would have more ideal to have it on the far end but the fence prohibits this. Having these doors makes it much easier to quickly get in and out of the greenhouse.
|
|
|
Wednesday, May 8
|
View Page
|
 |
Heating cables have been laid on both ends. After covering the cables with a few inches of sand the sticks can be removed.
|
|
|
Thursday, May 9
|
View Page
|
 |
Cutting some excess plastic off of the rear greenhouse door
|
|
|
Thursday, May 9
|
View Page
|
 |
More plastic around the door frame
|
|
|
Thursday, May 9
|
View Page
|
 |
All 4 starts just before putting them in the dirt. We chose two 1102 Huydic starts, 1382 Bryson, & 1281.5 Holland. We have the 1190 Northrup & 1264 Kline still inside as backups. Two will be planted close to each other on each end. The smaller/less healthy plant will be removed after 2-3 weeks when they start crowding each other. The remaining two plants will grow head to head towards each other until we will eventually chose the best plant and let that grow over the entire patch. We have just under 500sq. ft. and will be giving all of that space to 1 plant this year with the hope of growing a big one
|
|
|
Thursday, May 9
|
View Page
|
 |
Transplanting the 1281.5 Holland
|
|
|
Thursday, May 9
|
View Page
|
 |
1102 Huydic(1) & 1382 Bryson will be planted next to each other on the fence side
|
|
|
Thursday, May 9
|
View Page
|
 |
Plants are in and heat lamps on! 1281.5 Holland on right. 1102 Huydic(2) on left.
|
|
|
Thursday, May 9
|
View Page
|
|
.
|
|
|
Monday, May 13
|
View Page
|
 |
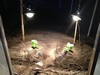
Heating cables! I went with a square zig-zag pattern and I think it worked out well. 2 starts will be planted in this area so it is double wide. We will eventually choose the best of the 2 on each end.
|
|
|
Monday, May 13
|
View Page
|
 |
1102 Huydic(2)
|
|
|
Monday, May 13
|
View Page
|
 |
1281.5 Holland
|
|
|
Monday, May 13
|
View Page
|
 |
1102 Huydic(1)
|
|
|
Monday, May 13
|
View Page
|
 |
1382 Bryson
|
|
|
Wednesday, May 15
|
View Page
|
 |
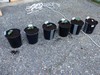
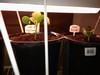
Here is a shot of Greenhouse 1 on the fence side. I repotted our 2 backup plants into 5 gallon buckets to extend the time until they become root bound.
|
|
|
Wednesday, May 15
|
View Page
|
 |
Here is the 1382 Bryson. This big haus is growing full steam ahead and looks great. We were hoping this seed would win the battle and at this point it definitely is.
|
|
|
Wednesday, May 15
|
View Page
|
 |
Here is the 1102 Huydic(1). All in all looks very good and growing at a nice pace. It is showing a little yellowing/light green area that is more evident on the other two plants
|
|
|
Wednesday, May 15
|
View Page
|
 |
Here is the 1102 Huydic(2). This shows the yellowing on the second leaf that I am concerned with. I posted a link below to a thread I started about this problem. Any advice on this would be great.
http://www.bigpumpkins.com/msgboard/ViewThread.asp?b=3&p=476764
|
|
|
Wednesday, May 15
|
View Page
|
 |
1102 Huydic(2). This is a close-up of the third leaf coming on. It appears to be somewhat misshapen and has an odd white/brown fuzzy outer edge
|
|
|
Wednesday, May 15
|
View Page
|
 |
1281.5 Holland. This plant also shows the yellowing/light green 2nd leaf. This is a strange condition that we haven't really encountered yet. All 4 starts were transplanted into the patch on 5/9 and have heat lamps about 3 feet above the plant on at night. All 4 plants have received the same treatment but 2 on the same side(receive slightly less sun) are showing this yellowing condition much more predominantly. So far they have been given doses of fish, seaweed, and Biomin Calcium.
Again, here is a link to my message board post on this issue:
http://www.bigpumpkins.com/msgboard/ViewThread.asp?b=3&p=476764
|
|
|
Tuesday, May 28
|
View Page
|
 |
I've been busy and haven't posted in a while so I thought I would give an update. After a peculiar start, the plants seem to have grown through the "yellowing" they were experiencing early on. I applied Epsom salt and also got back on our regular fertilizer schedule and the ship seems to have righted.
Here is the 1102 Huydic(2). Big green healthy leaves and a nice stout vine. This guy seems to have won the battle on this end of the patch
|
|
|
Tuesday, May 28
|
View Page
|
 |
The 1281.5 Holland. Plant looks fine now, but is smaller on the whole than the rest of the plants
|
|
|
Tuesday, May 28
|
View Page
|
 |
Here is the 1102(1) Huydic. This bad boy is really starting to take off and is now the largest and longest plant of the four.
|
|
|
Tuesday, May 28
|
View Page
|
 |
The 1382 Bryson. Looks healthy and green. Not as big as the 1102(1) right next to it but a solid 2nd out of the four. Going to be a tough decision on this end and that decision will need to be made soon.....
|
|
|
Thursday, June 13
|
View Page
|
 |
Halfway down the main vine of the 1382 Bryson a parallel split developed. We tried to patch it up as best we could. This was really a shame as it seemed to be our best looking plant. This split was the deciding factor in determining which of the two plants to choose on that end. The 1382 had to be pulled to make room for the Huydic 1102(1) on that end.
|
|
|
Thursday, June 13
|
View Page
|
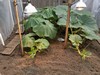 |
This is a photo from probably about a week ago. The 1102(1) Huydic is on the left and the 1382 Bryson is on the right. The 1102(1) has leaves that tend to flag somewhat especially in the sun. We wonder if this is really even a concern or what can be done to remedy the condition? As you can see from this photo, the two plants were already crowding at this point. The 1382 Bryson was pulled a few days ago because of the split on the main vine. The 1281.5 Holland was also pulled on the other end but that decision was very easy to make. We are now left with the 1102 Huydic #1 and the 1102 Huydic #2 growing head to head.
|
|
|
Thursday, June 13
|
View Page
|
 |
Here is a shot of the 1102(#1) Huydic. The main reached the end of the greenhouse a few days ago and that end wall was removed. Main vine distance is probably around 12 feet. The side vines are also starting to spill out from underneath the greenhouse. This plant is in our preferred position as this end of the patch is wider and has more space for side vines to grow to a fuller length. Something I noticed a few days ago is that the immature tiny leaves on the growth tip seem to now be coming on short and deformed. I wonder if maybe the plant was shocked by exposure to the cold night air for the first time? It still is getting down to 48 degrees or so. Because of this I set up one of our old smaller greenhouses over the growing tip with the heat lamp centered on it. Hopefully the plant will adjust and kick right back into high gear.
|
|
|
Thursday, June 13
|
View Page
|
 |
I didn't have the best angle since the plant was already all buttoned up in the greenhouse. But this is an end shot of the 1102(#2) Huydic. This plant is on the smaller end of the patch but is looking good. It seems to be 2-3 days behind the 1102(#1) but is in really good shape. The leaves on this plant also are a little flaggy but not to the degree of #1. The main is right up against the end of the greenhouse. I estimate its distance is about 10 ft. I also discovered a very tiny female about half the size of a pea. I figure this female wont open until 14-18 days from now as it is so very tiny. #2 could quickly become our #1 plant. You just never know what is going to happen next.
|
|
|
Thursday, June 13
|
View Page
|
 |
Here is a shot looking down the main of the 1102(#2) Huydic.
|
|
|
Thursday, June 13
|
View Page
|
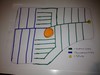 |
In the case that we do choose the 1102(#2) Huydic on the right side over #1 on the left side, I started thinking about the optimal vine pattern. Everyone always talks about how much plant they have behind a pumpkin and it got me wondering. Since we have limited space,(just under 500sq.ft.)maybe there is a modified vine growing pattern that will make better use of the space we have? I have seen the spider and designs like that. A question I have always wondered is how much do vines downstream of the pumpkin contribute to fruit growth compared to vines upstream between the stump and the fruit? If the vines upstream are much more important to fruit growth then it would make sense to maximize the space those vines cover. Especially if we have to choose our 1102(#2) Huydic plant on the right narrow side. The green lines represent vines upstream of the pumpkin and the blue lines represent vines downstream of the pumpkin. I should mention the patch is about 30ft long, 20ft across on the left side, and about 12' across on the right side. This idea could even be exaggerated further to increase the space covered by upstream(green) lines. I may start a thread on the message board down the road on this topic b/c I would love to get everyone's take on the influence of upstream/downstream vines on fruit growth.
|
|
|
Sunday, June 16
|
View Page
|
 |
First female will be at about 14ft on the main of the 1102 Huydic(#2). It would work out better if the keeper was 3-4ft further down since this plant is growing from the narrow end towards the wide end of the patch.
|
|
|
Thursday, July 25
|
View Page
|
 |
Its been awhile since our last post so here is an update. Things haven't quite gone as planned. We were going to cull down to just one plant but neither plant seemed strong enough to put all of our eggs into. So we have 2 plants and currently 3 pumpkins growing. We are trying to decide what to do with the 2 sets on the 1102 #1. The main was nipped at about 12ft before we had a female. Now we have 1 pumpkin pollinated on 7/2 on a side vine about half way down. We have another one pollinated on 7/5 on the last side vine before the main terminated. This last side vine was turned to grow downward but is not really a new main since no tertiaries grew due to crowding from the other plant.
Here is the 1102(#2) pollinated on 6/26. The plant takes up less space than the 1102(#1). It has on OTT of 192 at 29DAP.
|
|
|
Thursday, July 25
|
View Page
|
 |
This guy was pollinated on 7/5 on the last side vine of the 1102#1 before the main terminated. it is currently at 120.5 OTT at 20DAP.
|
|
|
Thursday, July 25
|
View Page
|
|
**Correction- The pumpkin pollinated on 7/5 is at 128.5 OTT at 20 DAP
|
|
|
Thursday, July 25
|
View Page
|
 |
This one was pollinated on 7/2 on a side vine about halfway down on the 1102(#1) plant. It is at 144 OTT on 23DAP
|
|
|
Thursday, July 25
|
View Page
|
 |
We have been trying to decide what to do with the 2 pumpkins growing on the Huydic 1102(#1) plant. The main was mysteriously terminated at 12ft before we had a female. The 7/2 pollination is growing on a sidevine about halfway down. The 7/5 pollination is growing on the last sidevine before the main terminated. Since the two pumpkins are on separate sidevines instead of the main we are wondering just how much energy is potentially being stolen from the other.
Here is a chart comparing the OTT growth numbers of the 2 pumpkins.
|
|
|
Saturday, October 12
|
View Page
|
 |
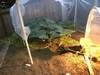
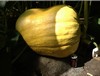
So once again our growing season did not go as planned at all. However, we were lucky enough to come away with 1 nice pumpkin and a personal best. We only have a total of 450sq.ft. of growing space and were planning on only choosing 1 plant to grow over the entire patch and go for the big one this year...That didn't happen. The main split laterally on our 1382 Bryson, our favorite seed going into the season. We were left with two 1102 Huydic plants and neither one could be selected as the clear winner for various reasons. We ended up losing 4 pumpkins to BES' on one plant and got our only pumpkin on the other, which was a much smaller plant(maybe 150sq.ft.)
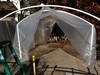
This is a shot of the 1102 Huydic in the greenhouse right before we cut it on Friday.
|
|
|
Saturday, October 12
|
View Page
|
 |
Here is Dad behind the pumpkin as we are starting to take sections of the greenhouse down. You can see how misshapen the backend is from this angle
|
|
|
Saturday, October 12
|
View Page
|
 |
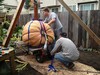
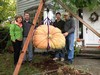
We already had a tripod made of 2x4s from another project so we figured we would try to use it to hoist Mr. Toad from the patch. Here we are tying the bottom rope together for the straps.
|
|
|
Saturday, October 12
|
View Page
|
 |
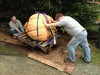
We removed the plant and discovered some nice deep taproots on the 1102
|
|
|
Saturday, October 12
|
View Page
|
 |
As we started to hoist the pumpkin the 2x4s were starting to really bow inward. So we reinforced the legs with thicker timbers.
|
|
|
Saturday, October 12
|
View Page
|
 |
Bottom check. Looks good. A little concave though
|
|
|
Saturday, October 12
|
View Page
|
 |
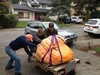
Wahoo! we have the pumpkin loaded on the pallet and dolly ready to roll. However the wheels on the dolly are complete flat with all of the weight. Out comes the air compressor to inflate the dolly wheels
|
|
|
Saturday, October 12
|
View Page
|
 |
Wheels pumped
|
|
|
Saturday, October 12
|
View Page
|
 |
So begins the giant pumpkin rollout.
|
|
|
Saturday, October 12
|
View Page
|
 |
Down the hill she comes! I made the joke that if the pumpkin got loose, we better run the Indiana Jones from the round boulder.
|
|
|
Saturday, October 12
|
View Page
|
 |
This bad boy was a tight squeeze around the side of the house. The push on the dolly continues..
|
|
|
Saturday, October 12
|
View Page
|
 |
not sure a 1500lber would fit through here
|
|
|
Saturday, October 12
|
View Page
|
 |
Getting closer
|
|
|
Saturday, October 12
|
View Page
|
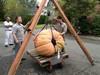 |
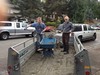
Here is the street lift. We were more nervous about this stage than any other.
|
|
|
Saturday, October 12
|
View Page
|
 |
Family shot with ole Mr. T
|
|
|
Saturday, October 12
|
View Page
|
 |
Teamwork
|
|
|
Thursday, October 17
|
View Page
|
 |
As we started to hoist the pumpkin the 2x4s were starting to really bow inward. So we reinforced the legs with thicker timbers.
|
|
|
Thursday, October 17
|
View Page
|
 |
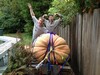
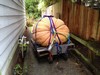
Moving the big fella to his final spot for Halloween
|
|
|
Thursday, October 31
|
View Page
|
 |
The big guy is lookin good for Hallow's eve. The Trick or Treaters were sure impressed.
|
|
