| |
|
Click on a thumbnail picture below to see the full size version.
|
299 Entries.
|
|
Tuesday, March 22
|
View Page
|
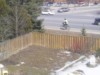 |
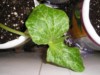
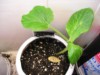
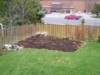
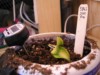
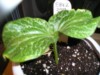
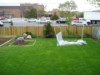
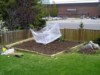
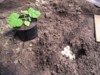
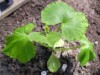
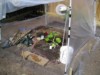
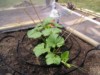
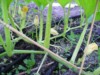
Time to start my inaugural giant pumpkin growing season off with a pic of my patch. As you can see, the snow is almost gone from the garden/patch. Although, the rest of the yard still has a couple of inches of snow on it. It is still a bit chilly.
I have been experimenting with two different heating pads and two different coolers to see which combination will make a good germinating box. So far both have a lot of variation in temperature between the areas directly above the pad and those nearer to the top of the cooler. But, hopefully the addition of pots full of soil and seeds will retain some heat and help distribute it more evenly.
More pics to come as I decide on a germinating solution and make my seed choices for the season. Thanks to Eric Gerry and Peter Frei for more good seeds than I could ever hope to grow.
|
|
|
Sunday, April 3
|
View Page
|
 |
Sunnova...
|
|
|
Thursday, April 14
|
View Page
|
 |
I finally started my seed starting practice run. Here's a shot of the seeds that I'm using for the test. Thanks to Eric Gerry for sending me plenty of seeds so that I had enough to test.
They are sitting on top of my new copy of How to Grow World Class Giant Pumpkins, II. My friend Aaron sent it to me as an early birthday gift.
|
|
|
Thursday, April 14
|
View Page
|
 |
Here's a closeup shot of the seed packets that I am using for my first test. (saves you from squinting while trying to read them in the last photo)
|
|
|
Thursday, April 14
|
View Page
|
 |
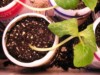
I soaked six seeds for my test run. I used three different soaking solutions, two seeds in each.
|
|
|
Thursday, April 14
|
View Page
|
 |
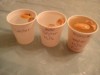
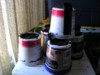
I used small plastic cups for soaking the seeds. In one I used only water. In the next, 50% water and 50% Hydrogen Peroxide (3%). In the third, 50% water, 25% Hydrogen Peroxide (3%), and 25% of some fish emulsion left over from last year.
The fish was pretty stinky. So, it may not have been a good idea to use it instead of fresh, unopened stuff. But, I wouldn't be learning anything from experimenting if I didn't mess up here and there.
|
|
|
Thursday, April 14
|
View Page
|
 |
As you can see in the last shot, the seeds that I am soaking in the water are a 530 (est.) with filed edges and an unfled 156 (cull). In the 50/50 mix I have a 530 and a 156, both filed. In the 50/25/25 mix I have a filed 156 and an unfiled 530.
You can see in this photo that all of the seeds are floating. I would expect the liquid to penetrate the shells better with the seeds entirely submerged. I thought that they may sink as moisture entered the shell. But, it's 12 hours later and they have not sunk on their own.
|
|
|
Thursday, April 14
|
View Page
|
 |
Worried about the floating seeds, I used some plastic wrap over the cups to seal the tops so that I could swish them around and try to sink those little ships. As you can see in this photo, I had no luck.
After suggestions from the mesage board, I went looking in my house for a fish bubbler. Again, no luck. I hope this is not a sign of things to come. But, I'll keep looking. I can use it to brew some compost tea even if I don't find it in time to tumble my seeds through soaking solutions.
|
|
|
Thursday, April 14
|
View Page
|
 |
I removed the seeds from their soaks. And, now I see why people soak for 8 hours instead of 12. You can see that some of the seeds have already started to poke out of their shells.
|
|
|
Thursday, April 14
|
View Page
|
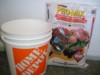 |
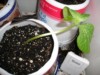
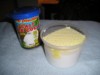
Here's the Potting/Seeding mix that I'm trying out. It's a 17.5 litre bag of "Premier Pro-Mix for Potting & Seeding". Premier also makes an organic potting mix. But, the Rona store that I went to around April 3rd didn't have any, didn't expect any to come in, and wasn't opening their garden centre for another week.
Last night I also picked up a bunch of buckets for soil mixing and compost tea collection/brewing. I bet you can't guess where I got the buckets from.
|
|
|
Thursday, April 14
|
View Page
|
 |
Mixing it up like the pros.
|
|
|
Thursday, April 14
|
View Page
|
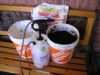 |
I ended up splitting the mix into two buckets for wetting and mixing when I realized that the stuff at the bottom wasn't getting moist.
I used my new RL-Flomaster model 1101 sprayer to spray a mist of water into the mix as I turned it by hand.
|
|
|
Thursday, April 14
|
View Page
|
 |
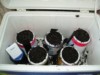
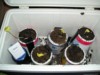
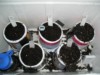
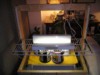
Here's the germination equipment that I have been testing for the last little while, tinkering with different settings and heating pads. The one that the filled "pots" are sitting on is a really old Thermos model that didn't work very well. So, I went with the blue Igloo.
|
|
|
Thursday, April 14
|
View Page
|
 |
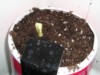
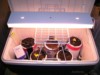
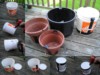
Not a very well lit shot of my ice cream container pots. They're a variety of 2L (half-gallon) containers with the bottoms cut out, a cut made along the side which is taped up with black duct tape. I didn't have a decent punch, so I used a drill to make holes in the lids for drainage. The lids were stuck on, the containers flipped over and filled with the moistened potting mix.
|
|
|
Thursday, April 14
|
View Page
|
 |
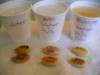
This shot is mostly for me, so I can keep track of which seeds went into which pots. I didn't make labels for the pots and my hand was full of dirt. So, I took the picture with my cleaner hand.
I also stripped the coat off of the sixth seed (not pictured) in order to try out the "advanced seed starting method". I'm pretty sure that I stripped off more than I ought to have done. So, I doubt it will work. We'll see. Anyway, I placed that seed in a folded over paper towel inside of a ziploc and placed it on top of my germinator.
|
|
|
Thursday, April 14
|
View Page
|
 |
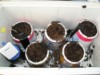
Here's a shot of the pots with the seeds all nice and tucked into their beds.
On the bottom left, you can see the sensor for my new wireless weather station. I got it in Buffalo at Walmart for $20 a couple of weeks ago. I had a heck of a time even figuring out who manufactured it (Ewig Industries in China/Hong Kong) and still can't find any extra sensors for it. It can use up to three remote sensors.
|
|
|
Thursday, April 14
|
View Page
|
 |
Here's another shot of the germinator to show the layers of heating.
On the bottom there are some towels. On top of them is an extra long household heating mat which extends the whole length of the cooler. Inside the cooler (under the sensor) I put a litre Nalgene water bottle which may or may not make a difference. On top of the cooler, you can see another heating pad with a towel on top (peeled away for illustration purposes).
|
|
|
Thursday, April 14
|
View Page
|
 |
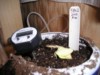
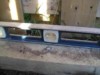
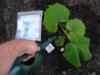
Here's the weather station base unit. It's currently showing the ambient temperature in the germinator as 25.1 degrees C.
In my tests it was holding temperatures between 85 and 90 degrees F. But, the cooler was open for a few minutes while I was putting soil in the pots and taking pictures. So, it cooled down a bit. But, it's already warmed up to 25.8 degrees C.
You can use this great page for conversions of all sorts (excluding religious conversions): http://www.weathernetwork.ca/inter/tools/conversion/index.htm
|
|
|
Thursday, April 14
|
View Page
|
 |
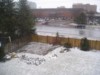
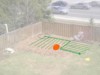
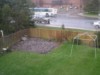
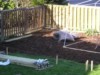
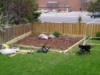
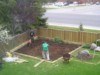
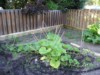
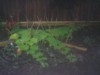
Here's the patch as it is today. I've cleaned up around it. Piled the dirt from the lawn back into the garden. I had planned last year to dig it all out, put the leaves in, put the dirt back on top and till it all up. But, I ran out of time and eveything froze shortly after.
So, yesterday I spread out all of the leaves which had been decomposing outdoors in kraft paper bags over the Winter. I can't take credit for raking them all up last fall. I swiped them from the neighbour's curb. :-)
|
|
|
Friday, April 15
|
View Page
|
 |
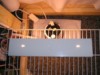
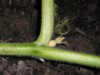
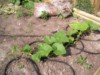
Here is one way that I'm thinking of training my vine.
|
|
|
Friday, April 15
|
View Page
|
 |
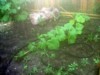
Here is another way that I may train my vine.
Any other suggestions would be greatly appreciated.
|
|
|
Friday, April 15
|
View Page
|
 |
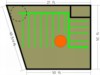
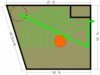
To give you an idea of the space that I'm working with, here's a rough sketch of a training/pruning pattern superimposed over the photo of my patch.
I have no idea if this is a good pattern or not. So, it may not be the one I go with. I just wanted to see what it would look like.
|
|
|
Sunday, April 17
|
View Page
|
 |
And the winner is...
After about 75 hours, the filed 530 (which was soaked only in tap water) was the first of my test seeds to emerge.
It seems to have left the seed jacket behind. I guess I won't have to remove it manually. Whew!
|
|
|
Monday, April 18
|
View Page
|
 |
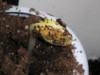
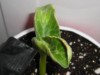
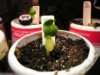
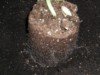
Wow! I'm stunned. In only 18 hours the first seed to pop out has grown from one inch, to six or more. What have I gotten myself into?
Should I take it out of the germintor now? I wonder if that funny yellow colour is normal and whether maybe it needs some light to grow green.
|
|
|
Monday, April 18
|
View Page
|
 |
Unfortunately, the first seed to sprout is the only seed to sprout. I hope that the others come along soon. This is not boding well for my seed starting skills when I have to do it for real.
|
|
|
Monday, April 18
|
View Page
|
 |
I guess I spoke too soon when I expressed dismay for my seedlings' sluggishness. I should have inspected my pictures from earlier today more carefully. If I had, I would have seen this one (from the top row middle) poking out just a bit. It's the filed 530 Gerry that was soaked in a 50/50 solution of water and 3% hydrogen peroxide. Took about 96 hours.
As you can see, it is still wearing its jacket. I'll give it a couple of hourse before I yank that sucker off.
|
|
|
Monday, April 18
|
View Page
|
 |
Also popping up slightly is the 156 filed seed (bottom left pot). It was also soaked in the 50/50 solution of water and 3% H2O2. Is it just a coincidence that these two seeds came up at almost the same time and were soaked in the same mix?
|
|
|
Monday, April 18
|
View Page
|
 |
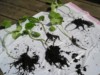
I was sure that I had messed up my advanced seed starting test. So, I opened up the ziploc bag, opened the paper towel intending to throw out the seed inside. And, this is what I saw.
Apparently it worked. But, I must have broken off the tip of the root when I carelessly opened the paper towel (you can see it in the bottom left of the photo). Lesson learned!
|
|
|
Tuesday, April 19
|
View Page
|
 |
Almost everything has sprouted at this point. I guess I should still hold out some hope for the fifth one.
|
|
|
Tuesday, April 19
|
View Page
|
 |
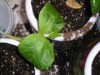
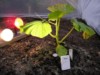
I didn't think that the colour and legginess of the seedlings were normal. So, on the advice of fellow Ontario grower, shiznit, I set up a grow light. It already appears to be greening up the plants a little. Maybe it will even coax out that last seedling. If it comes out today, it would have the same birthday as me, April 19th :-)
We had an extra 18" fluorescent fixture around. So, I bought a bulb for it a couple of weeks ago. I set it up on a timer that we had laying around. We actually have another fixture. So, I may buy another bulb to double the light. But, that one is older and requires you to hold on the button as the light charges up. So, I don't think it would work with the timer. Whereas the newer one that I am using uses a rocker switch.
Thankfully my mom keeps around a lot of random shelving. I found one of them that fit over the cooler quite well. Also thankfully, I don't think that my mom reads my BP.com diary. So, she won't notice right away that it is gone.
|
|
|
Tuesday, April 19
|
View Page
|
 |
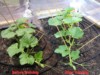
Here's a different angle showing the test seedlings. You can see how long and thin they are. That's not good, apparently. I guess, because I left them in the dark after emerging, they were still growing as if they were underground and were seeking the light, trying to break the surface of the ground.
|
|
|
Tuesday, April 19
|
View Page
|
 |
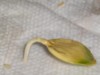
Here's a close up shot of the two plants that hadn't shed their jackets. I removed them manually. They were easy to remove with some gentle plucking.
|
|
|
Tuesday, April 19
|
View Page
|
 |
Most of the seedlings are coming along. I can see the beginnings of a true leaf on a couple. I am amazed at how green they have become after only a few hours of being in the light.
The seed that didn't break out earlier still had not a couple of hours ago. So, I uncovered it a bit. I could see that it had germinated, but just hasn't started its climb upwards. Maybe it will, maybe it won't.
|
|
|
Tuesday, April 19
|
View Page
|
 |
I am a bit concerned about some of the plants. Maybe they spent all of their energy on turning green and that slowed their growth.
But, the seed on the bottom right of this picture (the same one that was pictured in the last entry) seems to have some discolouration on the edges of its seed leaves. Maybe I over filed it? No, wait a second. I just checked back and that seed was unfiled. So, I'm not sure if this is something I should worry about.
In any event, I misted the plants with water a couple of times today. Hopefully the water will help them bulk up. They are pretty turgid as it is. But, I figured that the potting soil must be getting pretty dry by now since it is more exposed to the air and any condensation doesn't just drip back down onto the plants like it would with the lid closed.
I am generally impressed with how well they've done. But, given their speed of growth in the last couple of days, the fact that they have done very little growing in the last 24 hours is a bit disturbing. I would have expected them to be a bit beefier.
I don't imagine that they are keeping very warm. And, I can tell from my wireless thermometer that the temperature has dropped significantly since I opened the nursery lid. So, I turned up the heating pad under the cooler to "medium".
|
|
|
Tuesday, April 19
|
View Page
|
 |
Whew! Talk about leggy! It's probably about eight or nine inches long now. It hasn't grown much, not that I have noticed, in the last day. So, I have really learned my lesson. AS SOON AS THE SEEDS BREAK GROUND, GET THEM IN THE LIGHT!
On the bright side, you may be able to see the tip of a true leaf coming up between the two others.
|
|
|
Wednesday, April 20
|
View Page
|
 |
This seedling (530 unfiled) is really starting to look bad. The leaves are really curled up and you can see how brown the edges are. I don't know what the problem is.
|
|
|
Wednesday, April 20
|
View Page
|
 |
A different angle of the unfiled 530. This photo shows the brown leaf edges a little bit better.
|
|
|
Wednesday, April 20
|
View Page
|
 |
This seedling still wasn't open last night. It's the 156 filed that was soaked in water, H2O2, and fish. But, you'll recall that the fish was pretty smelly, not normal for fresh fish emulsion.
The seed with the brown edges in the previous entries from today was also soaked in the same mixture. So, maybe it affected their growth.
|
|
|
Wednesday, April 20
|
View Page
|
 |
This guy seems to be doing OK. It's the filed 530 from the water and H2O2 soak. (top middle of cooler)
|
|
|
Wednesday, April 20
|
View Page
|
 |
This is the plant from the bottom left of the cooler. It's a filed 156 from the water and H2O2 soak. The two seeds from that solution seem to have performed swimmingly.
However, the veins do look quite pale. I'm not sure if this is a problem or not. Maybe I'm just being a paranoid papa. But, these are just my test seeds. So, a parenting analogy probably isn't appropriate here.
|
|
|
Wednesday, April 20
|
View Page
|
 |
This, ladies and gentlemen, is why you don't let your plants get so darn leggy. Last night it was standing tall. This morning it had collapsed under its own weight. It's possible that this is because the automatic timer had shut the grow light off a couple of hours earlier. Thus, crushing the plant's will to live. But, I doubt that was at fault. It just got too tall to support itself.
|
|
|
Wednesday, April 20
|
View Page
|
 |
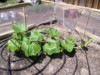
Here's a group shot so we can compare the plants. Not much of a change since yesterday. Do they need more water?
|
|
|
Friday, April 22
|
View Page
|
 |
Went to Home Depot this morning to pick up some stuff.
Got 2 500 foot rolls of 3' high chiken wire with 1" hex holes. Hopefully that will keep out the bunnies (and possibly anything bigger). I wanted to get better stuff, with 1/2" square holes and thicker steel, but it was too expensive.
Also got some stakes to hold up the wire and a roll of 6 mil clear poly sheet for the hoophouse that I plan on building.
|
|
|
Friday, April 22
|
View Page
|
 |
This is the plant with the curled and ragged-edged seed leaves that I was concerned about. It looks like it's doing OK. And, it's got a couple of true leaves coming in. Is it normal to have two coming at the same time?
|
|
|
Friday, April 22
|
View Page
|
 |
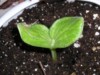
This guys looking nice. The last to come up. But, it seems to have caught up with the rest.
|
|
|
Friday, April 22
|
View Page
|
 |
Looking mighty dark green.
|
|
|
Friday, April 22
|
View Page
|
 |
This guy's getting almost as leggy as Leggy McLegleg, the first one to sprout. And, it's falling over. But, looks otherwise healthy.
|
|
|
Friday, April 22
|
View Page
|
 |
Super leggy, but still growing. Nice true leaf coming in there.
The other day I lifted it out of the cooler to see if any roots were coming out of teh bottom. I didn't see any. But, as I was doing it, or maybe when I put it back, I ripped the seed leaf. No big deal. Even if this wasn't a test, I wouldn't have planted it anyway on account of it's super long legs.
|
|
|
Friday, April 22
|
View Page
|
 |
Here's the family photo for today (from the opposite side that I usually take it from).
You can see that most of the plants are pretty leggy and some have fallen over. It's been suggested to me that this could be due to the fact that the light is too high and that they are all reaching towards it. Makes sense. It also might be that I am leaving the light on for too long. It's usually only off for a couple of hours a day. But, I don't know how long the plants really need to be in darkness.
|
|
|
Wednesday, April 27
|
View Page
|
 |
A couple of days ago my father and I went out to the Town of Markham's "Spring Compost Giveaway" for all of the free compost we could get.
Here's the "before" picture of the empty van.
|
|
|
Wednesday, April 27
|
View Page
|
 |
Eventhough we showed up early, it looked like the whole town was already here! (the guy holding the shovel at the bottom right is my Dad)
|
|
|
Wednesday, April 27
|
View Page
|
 |
Here's a panorama of the three huge compost piles that were set up in the parking lot of Milliken Mills Park.
|
|
|
Wednesday, April 27
|
View Page
|
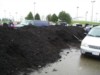 |
This chunk of the panorama shows the kind of dent that we made in the pile. I estimate that we ended up getting 10 70 litre garbage bags with 35-50 litres of compost each. We might haev been able to get more, but we had seen some rain overnight which may have made the compost heavier.
|
|
|
Wednesday, April 27
|
View Page
|
 |
Here I am with my weapon of choice, showing off my bounty.
|
|
|
Wednesday, April 27
|
View Page
|
 |
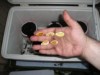
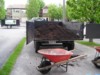
We ended up going back to the parking lot with the compost piles the next day. One pile was gone and the other two were depleted, but still pretty big. So, we loaded up another bunch of bags. We didn't fill them quite as much. But, we may have taken more bags than the first trip.
I estimate that we acquired about a yard of compost in total. That's enough to cover my patch with about an inch of the good stuff. I still have to empty the bags and spread it. But, this photo should give you some idea of how much we got.
|
|
|
Wednesday, April 27
|
View Page
|
 |
This shot was taken about 24 hours ago. It has grown a bit since. If I were planting it, I think I'd put it in the ground today. That would mean that it took 13 days to develop a true leaf which matched the size of the cots.
|
|
|
Wednesday, April 27
|
View Page
|
 |
I think this guy would be pretty much ready to be planted as well.
|
|
|
Wednesday, April 27
|
View Page
|
 |
This guy is still pretty leggy. I guess that I need to rig up something to lower and raise my grow light. I'll start my seeds for real in the next couple of days. So, I'll put together than apparatus in the mean time.
|
|
|
Wednesday, April 27
|
View Page
|
 |
I still don't like the colour of this plant. And, the veins on the cots look funny. Other than that, it seems to be reasonably healthy.
|
|
|
Wednesday, April 27
|
View Page
|
 |
The cots look horrible on this baby. This is the one that I moved and ripped them up a bit. But, the true leaf looks nice. I just wish that all of these plants were growing a bit faster. I'm concerned that they may be growing too much underneath the soil and not enough on top. It's been 13 days since this plant sprouted and I imagine that the roots have become quite bound. But, I'll chack that later when I open up the ice-cream pots.
|
|
|
Wednesday, April 27
|
View Page
|
 |
I got my soil test results today. I only sent it out on Friday and I know that it arrived at the lab on Monday. I'm very impressed with A&L's quick turnaround. Five days from mailing to results. Three if you exclude the weekend.
Organic Matter 5.6
Phosphorus - P ppm
- Bicarb 26 H
- Bray-P1 39 H
Potassium - K ppm 140 M
Magnesium - Mg ppm 140 VL
Calcium - Ca ppm 4980 VH
Sodium - Na ppm 22 L
pH 8.0
CEC - meq/100g 26.5
Percent Base Saturations
% K 1.4
% Mg 4.4
% Ca 93.9
% Na 0.4
Sulfur - S ppm 18 VH
Zinc - Zn ppm 5.3 H
Manganese - Mn ppm 43 H
Iron - Fe ppm 65 VH
Copper - Cu ppm 2.5 H
Boron - B ppm 1.2 M
Saturation - P % 15 VH
Aluminum - Al ppm 346
K/Mg Ratio 0.32
ENR 69
VL = VERYLOW
L = LOW
M = MEDIUM
H = HIGH
VH = VERY HIGH
--------------
Recommendations
N 5
P2O5 3
K2O 5
Mg 2
Fertilizer and/or lime recommendations are given as pounds per 1,000 square feet.
|
|
|
Friday, April 29
|
View Page
|
 |
If I were growing these babies for real, I'd have planted them a couple of days ago. But, I've removed them from their temporary home.
It's time for them to be terminated.
|
|
|
Friday, April 29
|
View Page
|
 |
This is a shot of the side of the unpotted plant (it's the really developed one on the top right of the incubator). You can see that the roots had started to grow beyond the potting medium and along the inside of the pot. This one definitely should have been planted days ago.
|
|
|
Friday, April 29
|
View Page
|
 |
Here's a shot of all of the test plants. You can get some idea of their root systems. Some of them have had the potting soil picked away and some were dipped in water to get the soil off.
I wasn't very impressed. I would have thought that they'd have bigger roots by now. But, what do I know.
Here's one more try on using HTML in my posts: GVGO Link I doubt it will work
|
|
|
Friday, April 29
|
View Page
|
 |
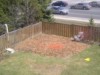
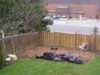
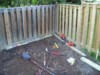
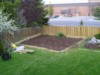
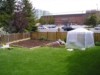
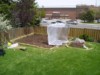
My patch is starting to look more like a garden than an accidental pile of dirt. I spread out the bags of compost more or less evenly. In the bottom left you can see some rocks that I may use to raise up the lower part of the bed.
|
|
|
Monday, May 2
|
View Page
|
 |
Time to start my first run at growing a giant pumpkin.
Here's a shot of my secret soaking solution and my seed lineup. They are:
Gerry, Eric - 300.0 2001 (1140 Stelts 845 Bobier '00)
Gerry, Eric - 275.0 est. 2001 (845 Bobier '00 x 1026 Holland)
Frei, Peter - 714.1 2003 (802 Dill '02 x Self)
Frei, Peter - 584.2 2003 (1092 Daigle '02 x 802 Dill '02)
Frei, Peter - 488.3 2004 (1026 Holland '00 x 940 Mombert '98)
I'll be growing one of these five plants, possibly planting a second as a pollinator, giving one to my cousin for a special secret planting mission, and the other two will act as backups and may be given away.
|
|
|
Monday, May 2
|
View Page
|
 |
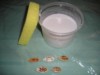
OK, I can't keep a secret. The "secret" soaking solution is one part water, one part 3% hydrogen peroxide, and one part coconut milk.
I placed them in a container with a sponge on top to make sure the seeds were submerged. I placed the container on top of my germinator to keep the soaking solution a bit warm.
Inside the germinator, I have been warming up my 1/2 gallon ice cream container pots filled with potting soil. This is not something that I did before. But, since the leftover soil from my tests was kept on an uninsulated porch and it has ben pretty cool lately, I thought it would be a good idea. I also used slightly warm water when moistening the potting mix.
|
|
|
Monday, May 2
|
View Page
|
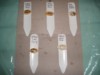 |
Here are the seeds right out of the soak. It looks like the mixture washed off some of the marking ink. I almost had to try to identify the seeds from dental records.
I've placed them on top of some handy plant labels that I made by cutting up a metal venetian blind slat. That was my Mom's idea. It worked out really well. I filed the edges a bit just to make sure there were no burrs or really sharp edges.
|
|
|
Monday, May 2
|
View Page
|
 |
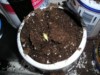
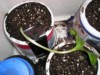
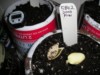
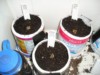
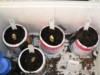
Here are all of the seeds in their new homes for the next week and a bit.
As you can see, warming up the soil while the seeds were soaking really paid off. Before warming them, the soil temperature hovered around 70 degrees F (my wireless temperature sensor tells me that the ambient temperature is also close to 85, but slightly lower). As you can see from the photo (on my new instant-read digital thermometer from the Wal-Mart kitchen section), the temperature was a nearly perfect 82 degrees F. Now, the temperature is right where it should be, around 85 degrees F.
Now, I just wait (and build a rig for adjusting the height of my grow light, add some peat moss to the garden, add some epsom salts, 20-20-20 fertilizer, build raise the bed, fill in with 4 yards of triple mix, till everyhing in, build the rabbit fence, put together my poly greenhouse, and all that's before any real growing gets started).
|
|
|
Tuesday, May 3
|
View Page
|
 |
I decided to try to put up the metal frame for my poly greenhouse this morning. The frame is from a sunshade without a cover that has been our garage and was only recently discovered. Unfortunately, it's also missing any instructions. So, I'll have to take this pile of metal and plastic fittings and hope that I get lucky.
|
|
|
Tuesday, May 3
|
View Page
|
 |
Well, there you go. It only took me 15 minutes because I ended up getting the right configuration the first time.
I'm a bit concerned about its strength. It seems a bit flimsy. But, maybe that will be fixed once it is staked and/or tied down. I'll probably take out the bottom half of the legs in order to shorten it. That might help stabilize it too.
Also, I think that there may be too much space between supports to really hold the poly sheet. But, I guess that I can always brace it with some of the 1x2 that I have laying around all over the place.
|
|
|
Tuesday, May 3
|
View Page
|
 |
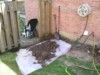
Maybe the ice pellets falling from the sky had something to do with how quickly I figured out the greenhouse frame. If you look closely at this photo, you can see short white vertical lines all over. They're particularly visible against the brown brick of the building in the background.
Also in this shot is my work-in-progress garden/patch. You can see that it's a bit browner than it was the last time I posted a photo. That's because I spread 4 big 3.8 cubic foot bales of peat moss on it yesterday. Before doing that, I spread around some magnesium sulfate (Epsom salts) on the advice of a knowledgable grower and President of the GVGO (www.gvgo.ca).
I'm hoping to get some stakes today and start putting up some of my raised edging tomorrow. After looking at all of the options, I think that I am just going to use leftover pressure treated wood left over from our deck. I am concerned about leaching of harmful chemicals into the garden. But, I figure that the wood, which has been outdoors for a number of years now, has probably already leached most of whatever it's going to leach. I'd rather use 2x12 cedar or untreated 6x6 lumber. But, all of those otions seem way too expensive.
Also yesterday I built a frame that will allow me to lower and raise my grow light as my seedlings grow (pictures later). Now, if I could just get them to actually sprout, I'd be in business. But, it's only been a day and a bit. So, I'm not too nervous yet.
|
|
|
Tuesday, May 3
|
View Page
|
 |
No, Mr. Smartypants, that's not the Epsom salts on my patch. It's the ice pellets/hail/freezing rain/brimstone/whatever that I told you about. I hadn't realized that there was so much of it until I looked out of the window a minute ago.
|
|
|
Wednesday, May 4
|
View Page
|
 |
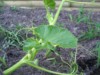
After about 60 hours, I can see the 584.1 Frei '03 working its way to the surface. I wouldn't say that it has "sprouted". But, the fact that I can see something happening has allayed some of my newbie jitters.
|
|
|
Wednesday, May 4
|
View Page
|
 |
The 584.2 Frei has pushed itself up a bit since this afternoon. And, it had pushed the seed coat open far enough for me to give it a little gentle help. I removed the coat and will put it under my new lighting rig right away. I want to avoid the problems with legginess that I experienced in my tests.
The fact that they have sprouted is nice. But, I still have lots of patch prep to do. So, I guess I've only got about a week to get it done now.
You can't see it in the photo because of the reflection of the falsh. But, the soil temperature is reading a bit high at 87.6 degrees F. So, I turned down the heating pad a bit and will leave the germinator open for a couple minutes to allow everything to cool down a bit.
|
|
|
Wednesday, May 4
|
View Page
|
 |
It's hard to see in the picture (you may be able to barely make it out in the middle of the pot). But, the 488.3 Frei is starting to break ground. It'll probably be up in a couple of hours. If it needs help with its jacket, I may need to do it in the morning.
Now, I've got to go set up my light rig and place the 584.2 Frei under it.
One more thing, I got a really cool Orbit 4 zone water timer kit. I tried to get it from Home Depot last night. But, they have been on sale and only two stores in my area had any left. So, my Mom was able to pick one up on her way home from work. I fanybody in the Toronto area wants one, it may be hard to find. But, I believe that the sale is on until this Sunday, the 8th of May.
|
|
|
Thursday, May 5
|
View Page
|
 |
Three more of my seeds are just about out of their shells. They are the 488.3 Frei, 714.1 Frei, and 275 est. Gerry. They poked out most of the way on their own. But, I did lightly brush away some of the potting soil that was covering them. There also seems to be a bit of a bulge on the surface of the potting soil containing the 300 Gerry. But, I am not going to disturb it until it breaks ground on it's own.
|
|
|
Thursday, May 5
|
View Page
|
 |
The 584.2 Frei is now under the grow light. It's out of the insulated germinator. So, the temperature went down a couple of degrees to 82.2 F. I put one of the heating pads (on the lowest setting) underneath it to try to get the temperature closer to 85.
|
|
|
Thursday, May 5
|
View Page
|
 |
Here's a shot of the new water timer I mentioned in an earlier post. It's a model #62032 "Complete Automatic Yard Watering Kit" from Orbit. You can check out its specs here: http://www.orbitonline.com/index.cfm?fa=sunmate.product&productid=32
|
|
|
Thursday, May 5
|
View Page
|
 |
Here a shot of my light rig with the 584.2 Frei underneath it. I'll get a better shot of it with some daylight in the room, and when I can get it out of the cramped space it's in (I can't stand far enough away from it to get a shot of the whole thing).
Basically, it's made out of some 2x4 and 1x4 that I had around. I used some heavy duty corner braces to make sure everything is secure. It's not completely square, it's not very pretty, but it works for now.
I probably overbuilt it. But, I wanted to leave lots of room to improve it later on with better bigger lights and a better system for lowering and raising the light. Right now it used shelving hardware. I'd like to attach adjustable clamp knobs that can slide up and down more easily.
|
|
|
Thursday, May 5
|
View Page
|
 |
Everybody has germinated. The 300 Gerry is still a bit submerged. So, I'll leave it alone for a couple of hours. But...
|
|
|
Thursday, May 5
|
View Page
|
 |
... I did help these three off with their coats. Then, under the light they went. They are also near a sliding glass door. So, I opened up the blinds to give them some natural light along with the fluroescent grow light.
|
|
|
Thursday, May 5
|
View Page
|
 |
The 584.2 Frei has greened up considerably. I learned my lesson from my tests. It may be too early to tell. But, it looks like I've avoided some of the legginess problems that I experienced earlier.
|
|
|
Friday, May 6
|
View Page
|
 |
All of the plants are now under the grow light and greening up. This should give you a better picture of my lighting setup.
I had an extra 18" fluorescent fixture and regular bulb. So, I put that into the mix, figuring it couldn't hurt at only 15 Watts.
After taking this picture, I moved the lights up a notch (about an inch) because they looked too close to the plants. I didn't want them meeting while I sleep. So, now they are sitting about 2 inches above the seedlings.
|
|
|
Friday, May 6
|
View Page
|
 |
Now here's someting funny looking. Sure, they cot on top is normal and green and the lower one is small and yellowish. But, that's not what I mean. If you look to the left of the plant, you can see a root growing upwards and out of the surface of the soil. That can't be good. So, I covered it a bit and will hope for the best.
|
|
|
Saturday, May 7
|
View Page
|
 |
I was awoken by a knock at the door at 7:50 AM today. It was this kind gentleman from Home Depot delivering the mini garden ties that we ordered the evening before.
|
|
|
Saturday, May 7
|
View Page
|
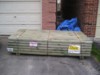 |
And here's what the lumber fairy left us.
I will be using these to build up the low areas of the garden/patch. I don't think that I'll use up all of them. But, it would have cost the same to have him deliver 40 as it did to deliver 60.
I also picked up some 6" and 12" spikes. Today, I went back to get some treatment for the end cuts and some rebar to anchor the structure. Don't worry, I'll document the entire building process, which should start tomorrow.
After doing a lot of reading, I decided to get over my aversion to using treated lumber. I would have loved to use untreated rot resistant wood. But, cedar was all I could find in my area and it is just way too expensive. I did, however, make sure that these were treated with ACQ, which is a copper-based preservative, and not CCA, which contains arsenic.
|
|
|
Saturday, May 7
|
View Page
|
 |
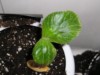
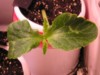
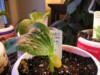
As I get ready to build their new home, most of my seedlings are growing quite nicely. I am so impressed with how much healthier they seem than my test plants. Here's the 275 Gerry.
|
|
|
Saturday, May 7
|
View Page
|
 |
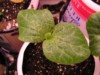
Here's the 488.3 Frei. As it grows, you can really see the difference in cot size. It may be that the dead looking cot may have met its end due to human error. I don't have a picture of it yet. But, there appears to be a hole between the yellow cot and the stem. Maybe it's not quite dead. But, it certainly is not getting what it needs to stick around for much longer.
|
|
|
Saturday, May 7
|
View Page
|
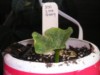 |
The 300 Gerry seems to be doing well. It's still a little bit smaller than the others. But, remember, it also took longer to sprout. So, now it's playing catch-up.
|
|
|
Saturday, May 7
|
View Page
|
 |
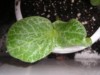
A slightly out of focus 714.1 Frei. This very well be the strongest plant. It is a really nice dark green colour. I don't know if that's important or not. But, it sparks my intuition.
|
|
|
Saturday, May 7
|
View Page
|
 |
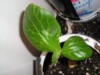
Last, but not least, the 584.2 Frei. It's doing nicely. But, again, I may have been a little too generous with the nail file. You can see how jagged one of the leaves is. Maybe my fault, maybe not. But, it probably doesn't matter much as far as the overall plant's health.
|
|
|
Sunday, May 8
|
View Page
|
 |
This was a big day of working outside in the backyard. I even got a suntan.
I started by making sure that my corners were square. I had some help laying out the stakes and string.
After that, I grabbed some of the lumber from the front of the house and started transporting it to the yard.
I started by laying out the first garden tie in the lowest corner. This took an awfully long time. All of the digging and backfilling needed to make it level took a while to figure out.
|
|
|
Sunday, May 8
|
View Page
|
|
Once teh first timber was down and level, I was ready to secure it in place.
|
|
|
Sunday, May 8
|
View Page
|
 |
There was supposed to be a picture with the last entry. But, it wasn't crucial. So, I'm not going to try to post it.
Anyway, I predrilled a hole in the lumber for the spike to hold it in place (when everything is put together, I'll reinforce the structure by driving rebar through the entire wall and deep into the ground. It's a good excuse to buy a super-long auger bit.)
|
|
|
Sunday, May 8
|
View Page
|
 |
I used 6 inch galvanized spikes to hold the first timber in place. I suppose that I could have used something longer. But, I figured that between one ties connection to those on top and below it and the rebar, that would provide enough support.
|
|
|
Sunday, May 8
|
View Page
|
 |
After driving the spikes in, I checked to make sure that everything was still level. It was close enough.
|
|
|
Sunday, May 8
|
View Page
|
 |
The other timbers in tht corner will need to be cut. So, after a using combination of a circular saw and reciprocaing saw with a low battery, I managed to make the angled cut. It's a bit ugly. But, nobody other than the people reading this diary will ever see it.
|
|
|
Sunday, May 8
|
View Page
|
 |
Since I am using pressure treated wood, it was necessary to protect the end cuts with some preservative. I used one with a slightly green tint. It looks pretty green when wet. But, it will probably dry lighter and fad in time. Anyway, once again, most of the cuts will not be visible. So, it won't matter much.
|
|
|
Sunday, May 8
|
View Page
|
 |
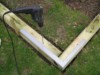
Fits like a glove.
I surprised myself with that one.
|
|
|
Sunday, May 8
|
View Page
|
 |
While I still had a wet brush, I figured that it might be a good idea to put some preservative (which contains a waterproofing agent) on the area around the spikes. Hopefully this will help potect the drilled holes.
|
|
|
Sunday, May 8
|
View Page
|
 |
Don't laugh! This is all I really got done today.
I was able to get down the first two corner timbers. These were the most important pieces. So, I spent a lot of time making sure that they were level. I think I have the hang of it now. That plus the fact that the upper timbers will be easier to secure (no digging required) should mean that I can get a lot more accomplished tomorrow.
I am not going to expect to finish tomorrow. But, if I do, it'll be a nice surprise. It'll also mean that I can fill it up with triple mix sooner. And that means that I can plant sooner. I want to get them in ASAP. If I can't do so within a few days, I may have to transfer the plants to bigger pots to avoid root binding.
|
|
|
Thursday, May 19
|
View Page
|
 |
I missed posting a whole bunch of progress shots last week when the server was down. So, I'll spare you some of my seedling and raised bed progres shots.
Here is the fully built-up raised bed. All that was left to do from this point is to secure it a bit better to the ground and to fill it in with some planting medium.
|
|
|
Thursday, May 19
|
View Page
|
 |
To secure the structure to the ground, I needed to pound in some rebar. I should be able to get away with 24" long pieces all around. Although, I got some 36" long bars just in case.
To get through all that wood, I needed a long drill bit. So, I used a 1/2" spade bit that is 16" long.
|
|
|
Thursday, May 19
|
View Page
|
 |
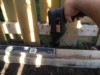
After the pilot hole was there, banging in the rebar was not all that hard...most of the time. I had a pretty good heavy hammer which also absorbed much of the shock.
|
|
|
Thursday, May 19
|
View Page
|
 |
I bought some 6 mil plastic sheeting a couple of weeks ago. But, I found a roll of some plastic sheeting in the garage. I decided to see if I could use that up and save some money. I didn't have enough 2" binder clips. So, I just did a test fitting to see if I knew what I was doing.
|
|
|
Thursday, May 19
|
View Page
|
 |
Three minutes later...
|
|
|
Thursday, May 19
|
View Page
|
 |
Tuesday, our triple mix arrived.
|
|
|
Thursday, May 19
|
View Page
|
 |
We had the triple mix delivered by the folks that we use for some of our other gardening needs. They also tilled and spread it. Unfortunately, the tiller they brought with them was a bit too small for the job (Honda F210, I think). It made their work a lot harder.
|
|
|
Thursday, May 19
|
View Page
|
 |
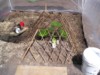
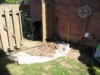
Here's what it looked like after they put in about three yards. It didn't fill in as much as I had hoped. And, the junky tiller didn't break up the clumps very well.
|
|
|
Thursday, May 19
|
View Page
|
 |
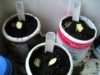
We definitely needed more soil in the garden/patch. So, we ordered it. But, I wasn't sure when it would come. So, I had to repot my seedlings. That meant making new transplant pots. I couldn't find any suitably sized and inexpensive pots for the task. So, I used what I had.
Here's a composite of my process in turning a 5 gallon bucket into a pot. Also shown are the other pots that I made.
|
|
|
Thursday, May 19
|
View Page
|
 |
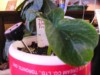
Here's the reason that I needed the new pots. You can see that the roots of this plant were ready to bust out of the pot days, maybe a week and a half, ago.
|
|
|
Thursday, May 19
|
View Page
|
 |
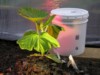
Here's the 584.2 Frei in a nice big pot. It's about the same height as the 5 gallon bucket. But, it's much wider. So, I'm guessing that it's 10 or 15 gallon. I filled it up with a mixture of bagged topsoil that had been sitting in the backyard all winter (this might be a bad idea) and whatever potting mix I had left.
|
|
|
Thursday, May 19
|
View Page
|
 |
It's gotta be a bad sign when vultures are circling over your patch and you haven't even planted yet.
I realize that birds of prey are great pest control measures. But, it's not that often that I see them flying over my suburban backyard.
Is it possible that they were attracted to the smell of the triple mix as it heated up in the morning sun?
|
|
|
Thursday, May 19
|
View Page
|
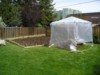
 |
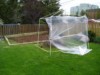
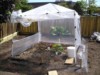
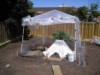
Anyway, I finished covering the poly house. I had to bust open the new roll of 6 mil. When I compared the feel of the two plastics, the 6 mil was clearly thicker. So, I guess the other stuff was 3 or 4 mil.
|
|
|
Thursday, May 19
|
View Page
|
 |
It's getting better. This time it took a whole 20 minutes to blow over.
|
|
|
Thursday, May 19
|
View Page
|
 |
So, I pushed into the ground a bit better and put some wood on the base...
|
|
|
Thursday, May 19
|
View Page
|
 |
OK, I give up for now. I'll be able to secure it into the ground a lot better when it's actually in the patch and I can bury the legs and tie it down and cover the edges with soil.
|
|
|
Thursday, May 19
|
View Page
|
 |
YESSSSS!!!!!!
As it turns out, I may have wasted some time transplanting last night. The guys came today with the rest of the triple mix that we needed. This time they came with a big rear tine Honda F800 model. It looked a bit tough to handle. But, it did a much better job than the first one they had. I took note of the store that they rented it from so that I can get the same model for my fall prep.
|
|
|
Thursday, May 19
|
View Page
|
 |
The bigger tiller made it easier to hack up the chunks of clay, sod, and soil. And, that made it easier to smooth out. So, now it's all nice and soft and ready to plant.
I think that I'll add some 20-20-20 fertilizer today and plant tomorrow or on the weekend. It's supposed to get much warmer out soon and the evenings are still cool. Although, there isn't any frost expected in my area. So, it'll probably be tomorrow.
|
|
|
Saturday, May 21
|
View Page
|
 |
It's planting day...FINALLY!!!!!
I dug a big pit yesterday and soaked down the planting area with 10-52-10. Along the way the new fertilizer sprayer I bought broke before I used it and the sprinkler I tried also broke. The result was pretty uneven coverage of the area under the greenhouse. And, because I had dug down to the clay, I made a bit of a "bathtub" which caused me to wait until today to plant.
What's that you say? There's a pixelated part of the image? That's right. It's my secret weapon. It's something that I am willing to bet absolutely nobody else uses to grow giant pumpkins. Of course, I am also not sure that it will work. So, I don't want to reveal what it is just yet.
|
|
|
Saturday, May 21
|
View Page
|
 |
And, the winner is...
The 584.2 Frei. It grew the fastest. It's the biggest. So, that's the one that I'm going with. Although, I will probably plant at least one other plant for pollination either in my garden or in a community garden that offers free 10'x20' plots for gardeners. Maybe I'll even do both so that I have a choice of pollinators and a backup plan or two.
|
|
|
Saturday, May 21
|
View Page
|
 |
It's the baby's first night out. So, I am pretty worried. Later today I'll put up a temporary fence around the poly house. But, I also applied a full kilogram of "Critter Ridder" around the perimeter. I have a feeling that my secret ingredient may attract critters (not to mention the tasty pumpkin seedling).
|
|
|
Sunday, May 22
|
View Page
|
 |
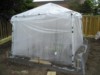
Everybody's gotta have at least one of these in their diary. So, here's my shot of a glowing poly house at night.
You may be able to see the stakes from the temporary fence in the picture. I didn't put up a very strong fence. It's only about a foot high and is made out of plastic chicken wire and wooden stakes. There's no way that it would stop a determined racoon. So, I'll just have to hope that my neighbourhood is filled with slacker critters. With some luck the combination of the skimpy fence, light, and "Cirtter Ridder" will be enough of a deterrent for animals to destroy my seedling.
|
|
|
Monday, May 23
|
View Page
|
 |
Here's what my poly house looked like yesterday morning. Clearly it's holding in quite a bit of moisture. You can see it dripping down the inside walls.
|
|
|
Monday, May 23
|
View Page
|
 |
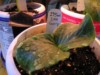
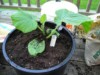
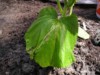
Here's the Frei 584.2 yesterday. As you can see it's a little bit wilted and the third true leaf is starting to yellow. I'm guessing that this could have a lot to do with transplant stress. So, I am not panicking just yet.
|
|
|
Monday, May 23
|
View Page
|
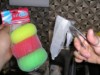
 |
Just to make sure that the little guy has enough water and nutrients to stay healthy, I created a little drink for it. I took some sushi nori (the seaweed wrapping) that we had lying around for a while, cut it up and blended it with some water. I let it sit overnight and then used the mixture to water the seedling. That was yesterday. Today, I'll check to see if they plant has plumped up at all. From a distance it would appear that it has become a bit more turgid.
|
|
|
Tuesday, May 24
|
View Page
|
 |
Here's a progress shot. It looks like the plant is starting to send out a couple of little curly "grabbers". Some of the leaves are still a bit discoloured. But, it seems a bit stronger than before and continues to grow.
Earlier today we had wind that was gusting up to 40 km/h. So, I am glad that the poly house held up. Although, I think it would be a good idea for me to add some weight to it and/or tie it down with some stakes.
|
|
|
Tuesday, May 24
|
View Page
|
 |
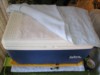
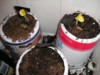
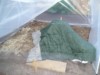
This is what I've come up with to keep the pumpkin warm at night. It isn't doing a terribly good job at keeping the temperature anywhere near what it is during the day. But, it does seem to keep the temperature at least a couple of degrees above the outdoors temp. That's good since the next couple of nights will be pretty cold. Although, I don't think any frost is expected.
|
|
|
Tuesday, May 24
|
View Page
|
 |
Here's a closer shot of the 5 gallon bucket of warm water and the 584.2 Frei. I've got the wireless temperature sensor set up and the soil thermometer (a.k.a. digital meat thermometer) is in the ground. The soil seems to be quite a bit cooler than the ambient temperature. But, everything seems to be going well at the moment. So, I am not planning on monkeying with anything for a couple of days.
One thing that you may be able to see in this photo is the seaweed that I put on a couple of days ago. The mushed up seaweed actually spread out and dried around the stem. It has formed a bit of a layer around the top of the mound. I should probably break this up. But, I don't want to disturb any nearby roots. So, I'll wait until the next watering. That should soften up the seaweed skin. Then I can mix it in a bit with the surrounding soil and mushroom compost.
|
|
|
Wednesday, May 25
|
View Page
|
 |
Here's my wilty plant earlier today. I noticed that the temperature in the poly house was approaching 29.5 degrees C (close to 85 degrees F). That was in the early afternoon. So, I knew I'd have to do some cooling.
|
|
|
Wednesday, May 25
|
View Page
|
 |
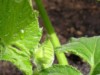
While out there, I noticed this particularly nasty looking hole in one of the leaves. I'm not sure what it's from.
|
|
|
Wednesday, May 25
|
View Page
|
 |
I lifted up some of the flaps to allow some wind to pass through. The others stay down to protect from stronger winds.
You'll notice that on one side the flap has a top and bottom. This originally came out of a measuring error. But, I kind of like the fact that I can open the top without lifting up the whole side. And, since heat rises, it makes sense to keep the top open for cooling.
|
|
|
Wednesday, May 25
|
View Page
|
 |
A little bit later in the afternoon, I noticed that the temperature in the poly house had climbed to a seedling-cooking 37.3 degrees Celsius. So, I had to do something more to cool things down.
|
|
|
Wednesday, May 25
|
View Page
|
 |
I originally came up with the idea of using a raspberry cage (I think that's what it is) to act as a frame for a blanket to keep the seedling warm at night.
|
|
|
Wednesday, May 25
|
View Page
|
 |
After setting up the cage I noticed some unwanted drying and shrivelling at the end of one of the leaves. It is the same one that has the hole in it.
|
|
|
Wednesday, May 25
|
View Page
|
 |
I threw an old semi-sheer drape over the cage to use as a shade cloth. After doing so, the temperature dropped about four or five degrees in twenty minutes. Hopefully, it'll drop another three or four.
In the future, I'll have to find a better cooling method. We have these little plastic bags that are meant to be used as reusable ice cubes in drinks. But, I bet they'd work well to cool down the plant when needed.
Another idea that I had was to use a kid's ringed pool toy or an inner tube filled with cool or warm water as a temperature control device. I bet that I can find a really cheap one that would sit well around the base of the plant.
|
|
|
Wednesday, May 25
|
View Page
|
 |
I think that I mentioned earlier that I wasn't happy with how cold my plant got at night. So, I decided to tuck it in using an old sleeping bag that was never going to be slept in again anyway (I got a nice new one for last summer's huge Phish concert in Vermont).
I put the light under it (possible fire hazard, I suppose). The water bucket's under there too. And, apparently it worked. Only moments ofter setting it up, while the temperature outside was dropping, the temperature under the sleeping bag was rising slightly.
There's no thermostat attached. So, I'll have to watch it this evening and figure out if I can leave the light on overnight. I suspect that I will be able to. But, we'll see.
|
|
|
Thursday, May 26
|
View Page
|
 |
Things are not looking good in pumpkinville.
|
|
|
Thursday, May 26
|
View Page
|
 |
But, this leaf on the back side looks even worse. It's pretty crispy.
|
|
|
Thursday, May 26
|
View Page
|
 |
On top of all that, I noticed a lot of bugs around the plant yesterday. When I started to water today they scattered. This one perched itself right up on the most tender part of my plant. I sure hope these SOBs have nothing to do with the damage to my seedling. If they do, the war is definitely on.
|
|
|
Thursday, May 26
|
View Page
|
 |
Watering was probably something that I should have done anyway. But, it was actually my second try at cooling the plant down today. The first try was with an electric clip-on fan which I originally had on the low setting closer down to the plant.
In any case, when I came back into the house, I could tell from the wireless thermometer receiver that I was able to drop the temperature about twelve degrees celsius to 25.
|
|
|
Thursday, May 26
|
View Page
|
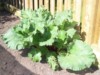 |
Is there some kind of contest for rhubarb? This is my mom's rhubarb that is behind my poly house along the back fence. It is getting absolutely huge. Some of the leaves are aproaching 24" across if not bigger. And, some of the stalks are as thick as my wrists. If I don't win any pumpkin weigh-offs, maybe I can recoup some of my losses with the rhubarb?
|
|
|
Wednesday, June 1
|
View Page
|
 |
Here's where I'm at so far.
The plant has started to "lay down" and the vine has definitely started to form. It isn't pointing in the exact direction that I had hoped. So, I'm going to try to turn it slightly, only about 15-20 degrees. I put in some bamboo stakes as supports and as trainers. I'll put some more in later today when the plant has had a chance to warm up.
When I saw it starting to lay down, I figured that I should set up the soaker hose that I am going to use around the planting mound. It would have been harder to get it under if the plant was already on the ground. I spiralled it around. I haven't actually tested it yet. It will eventually be hooked up to another couple of 5/8"x50' soakers. And, I'll feed fertilzer through it with one of my hose end injectors.
|
|
|
Sunday, June 5
|
View Page
|
 |
Holy vining Batman! I stop taking pictures for a couple of days and all of a sudden I turn around and see a 4 foot vine. I'll be taking down the poly covering today to give the plant a couple of days to get used to being uncovered while I'm on vacation. And, it's a good thing, too. At this rate, the plant would probably be poking out soon anyway.
The leaves are a bit wet in this photo because they just received a cooling mist.
|
|
|
Sunday, June 5
|
View Page
|
 |
Here's a different angle of the plant. It is still trying to curl to the left (right, in the photo). So, I'll have to adjust my bamboo stake X's in a couple of hours when the plant has had a chance to warm up a bit more.
|
|
|
Sunday, June 5
|
View Page
|
 |
OK, I lied, a bit. After looking at the weather forecast for the evening, I have decided to take off the poly sheeting tomorrow during the day.
But, I did reposition some of my bamboo stakes in order to get the vine pointed more in the direction that I would like it to go. Here's a before and after picture so you can see the slight angle change. The change may look a little bit more dramatic in the photo than it actually was. That's probably got soemthing to do with slightly different camera angles and the fact that the newly staked plant has had the end of the vine pinned closer to the ground than in the before shot. The upward curl may have looked a bit more horizontal than it was.
|
|
|
Tuesday, June 7
|
View Page
|
 |
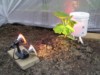
OK, so, I lied again. I didn't take off the poly until this afternoon. Yesterday we had some pretty ferocious winds. So, I kept it up. But, now most of it is down except for two short panels at the bottoms which I may keep up as windbreaks while I'm on vacation.
As you can see, the plant is still a bit wilted. But, I'm sure that's just because of the heat here. It was about 30 degrees Celcius here today. I'll water and fertilize today.
Speaking of watering...
|
|
|
Tuesday, June 7
|
View Page
|
 |
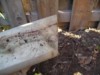
As you can see, my water tap is on the opposite side of the gate as my patch. So, today I set out to remedy that situation. I dug a trench across the gate, long enough to fit a 5 foot length of 3" perforated PVC pipe. I put the soil on a tarp for easy backfilling.
|
|
|
Tuesday, June 7
|
View Page
|
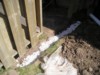 |
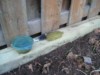
Next, after emptying out the trench, I lined the bottom with some marble chips that we had around the house.
|
|
|
Tuesday, June 7
|
View Page
|
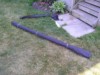 |
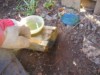
After covering the marble chips with some of the soil, and tamping it down (mostly with my feet), I took the pipe and wrapped it in some landscape fabric to help keep out critters and roots.
|
|
|
Tuesday, June 7
|
View Page
|
 |
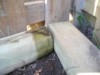
After laying out the hose to make sure that I bought the right length, I fed it through the tube. I had cut the landscape fabric intentionally a bit long because I may be putting some short radius elbows at the ends of the pipe. I left the dirt at the ends of the pipe a little bit loose to facilitate easy excavation for attaching the elbows at a later date.
In the mean time I secured the hose to the ends of the fabric using some plactic ties. Then it was time to backfill, tamp down, water a bit, tamp down some more, and wait for it to dry and settle so that I can fill in any depressions with more soil and maybe some clay or sod clumps. At the moment the layer over the pipe is not deep enough and will easily wash or erode away. So, I want to make sure that there is some more soil covering it. But, for all intents and purposes, the hard part of the project is done. Now I just have to run the hose along the fence to the garden/patch and presto!
|
|
|
Saturday, June 18
|
View Page
|
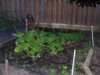 |
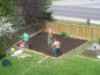
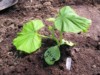
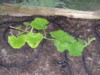
I'm back! And, what's the first thing I did after getting out of the car? Did I go in the house? Did I check the mailbox? No, silly! I took pictures of my pumpkin plant(s).
I already had confirmation that they were not dead. So, I wasn't worried about that. But, as you can see from the photos, I have a heck of a weeding job ahead of me.
|
|
|
Saturday, June 18
|
View Page
|
 |
Here's the same plant from a more head-on angle. This shot should give you a better look at how long the secondary vines are getting.
My first giant pumpkin plant is looking very healthy. Apparently we had lots of rain. And, I imagine that my automated watering worked. So, it got more than its share to drink.
|
|
|
Saturday, June 18
|
View Page
|
 |
The main plant is probably about 10 feet long by now. maybe more. But, as dark as it was when we arrived home, I was able to spot what looks like a female flower that didn't quite make it at about 8 feet on the main vine. Of course, if it had made it, I would have made sure it met its end anyway.
|
|
|
Saturday, June 18
|
View Page
|
 |
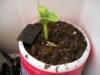
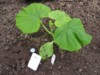
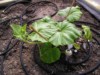
Before I left for the trip ten days ago, I decided to plant the 300 Gerry, mostly as a pollinator. So, I am not going to ive it much room. But, I'll keep it going in a snake pattern. If I can, I'll grow a pumpkin on it. But, that won't be its main job this year.
I haven't been maintaining it at all. So, its healthy, but small. I guess it may still be getting over transplant shock too. So, it should start running pretty soon. I just hope it has flowers when I need them.
|
|
|
Thursday, June 23
|
View Page
|
 |
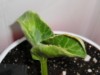
Here's a view from the back of the main plant (584.2 Frei). I didn't take any shots of the 300 Gerry today, but it's still alive. Very skinny, though. It doesn't look like it will have flowers when I need them to pollinate the Frei.
I'm more or less going with a "Christmas Tree" pruning pattern. The only variation may be that I'll turn the tip of the main vine a bit so that it goes towards the rhubarb.
I had a visit from Phil "Copper" Hunt yesterday. He wisely suggested that I burry my vines. I plan to do so. But, the virus I caught while on vacation really has me beat. So, the vine burying may have to wait a few days.
|
|
|
Thursday, June 23
|
View Page
|
 |
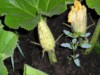
These two beautiful ladies are hanging out together about 18 inches from the tip of the main vine. I suppose only one of them can be pollinated. Or, maybe I should pollinate both in case one doesn't set. I'm not sure. But, clearly these flowers should be open in a few days. So, there's no way that the 300 Gerry will be ready in time. It'll have to go pollinate itself when it's time. I don't have much room for it. But, I might as well try to get a pumpkin out of it.
|
|
|
Thursday, June 23
|
View Page
|
 |
Of course, I have plenty of male flowers now on the main plant. Some of them were open today and some will open tomorrow. If I see any of them nibbled away, I guess I'll have some idea if my "rabbit proof" fence is working.
Also soon, I'll start feeding some Neptune's Harvest fish/kelp through the soaker hoses and as a foliar feed. Phil was kind enough to sell me some of his extra mixture. And, since my attempt at fertilizing before I left for my trip ended up in multiple broken fertilizer feeders, I don't think that the plants have been getting much to eat other than what's in the ground. So, I really need to start feeding them ASAP. I suppose they could use a preventative fungicide spraying as well.
|
|
|
Saturday, June 25
|
View Page
|
 |
I've got at least four female flowers that I have noticed. Two of them are about 8 inches apart from each other near the tip of the main vine (middle detail photo) and the other two are on secondaries. It's possible that there are others that I have missed. But, everything seems to be going according to schedule.
Today I did a foliar spray with some Neptune's Harvest fish/kelp. I mixed in the appropriate amount in my 1 gallon pressurized sprayer with about a gallon of water. I hope this is enough. It certainly won't be as the plant gets larger. So, next time I may need to do two applications, or get a 2 gallon sprayer.
I still need to bury my vines so that they can suck up more water. But, I'll need to lay down some more soaker hoses first. I expect this to be a tricky job since I'll have to sneak them back and forth under the vines. Obviously, I'll have to be very careful and do this in the late afternoon when the plant is more pliable.
I have some doubts about weather or not the plant is getting enough water. It certainly isn't getting enough out past six or seven feet on the main because the soaker hoses don't reach there yet. So, I'll either have to raise the watering time through the soakers or do a bit of hand watering. And, now that I'll have 200' of soaker hose to deal with (and I'll probably need more) I'm starting to consider breaking the watering into zones so that no soaker hose run is longer than 100'.
|
|
|
Saturday, June 25
|
View Page
|
 |
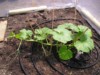
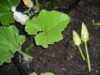
Here's the 300 Gerry. It doesn't seem to have grown very much at all. I don't remember if I mentioned that many of the smaller roots got severely damaged during transplant from the large pot to the ground. That probably has a lot to do with the slow growth.
I probably ought to be paying more attention to it by giving it some extra water and fertilizer. I did give it a bit of a foliar feeding while I was spraying the main plant. So, maybe that will help. It is certainly growing and not dead. I suppose there is still a chance that it will have male flowers in time to pollinate the main plant.
|
|
|
Tuesday, June 28
|
View Page
|
 |
Here's a horrible picture of the main plant. It's horribly dark because it rained a heck of a lot today. Thunder, lightning, the whole shebang. But, I don't notice any major damage. Of course, I couldn't really go into the patch because it was so soaked. That might have something to do with a bit of overwatering last night.
I had trouble with the timer (user error) and eventually gave up and just turned the tap off and let the timer open and close to it's heart's content. With no feed, it couldn't do any more damage. Anyway, with the rain, I figure that I probably don't have to water for almost a week.
Yesterday I managed to bury most of the main vine. That was good. But, while I was scooping up dirt to cover the vines, I ripped through some roots that I thought were from weeds. But, they were way too long to be from the puny weeds in the patch. Then I realized that they must be from the pumpkin. NOT GOOD!
I was surprised at how far out they had spread and at how shallow they were, only about an inch below the surface in some areas and barely covered at all in others. I should have taken pictures of all of this. But, it has been in the mid 30's Celcius here for the last little while. With the humidex, it felt like 39. So, who had time to think of pictures?
|
|
|
Tuesday, June 28
|
View Page
|
 |
Here's the 300 Gerry. This picture has funny colour too because I also took it in gloomy, rainy conditions. But, it's coming along. It seems to be getting over some of the root damage from transplant and the vine is starting to get a bit longer. I can see the beginnings of flowers on their way. But, it's not looking like they'll be ready in time.
Ohhh, that's what I forgot to say in the last entry. One of the flowers at the tip of the main vine of the 584.2 Frei, the one closest to the tip, looks to me like it'll be ready to open tomorrow. But, it was hard to get a really good look at it because of the heat and rain today. I didn't get to cover it. So, I am just going to have to gamble that it will open the next day.
If it does open in the morning, I can pollinate it anyway and still be sure that it is getting pollinated by its own male flowers because there aren't any other pumpkin plants with flowers around. I just hope that doesn't mean that I have to declare it as an "open pollination". I want to do this properly, with known genetics.
|
|
|
Wednesday, June 29
|
View Page
|
 |
OK, I changed my mind. I couldn't sit around wondering if I'll mess up my first shot at a monster. So, I did what any giant pumpkin grower would do..go out to the garden at midnight with a flashlight to cover female flowers and snip some males. But, I needed something good to cover the flowers with. I found these scrub pads under the kitchen sink, which came in a fine meshed plastic bag. So, I cut it into two pieces so I could use it for two flowers.
|
|
|
Wednesday, June 29
|
View Page
|
 |
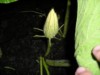
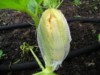
Here's the lady I've been dreaming of. She's even more beautiful when lit by a flashlight.
|
|
|
Wednesday, June 29
|
View Page
|
 |
Normally it's not polite to tie women up. But, pumpkin growers are a quirky bunch. Anyway, the bees won't stand a chance tomorrow morning. That is, as long as they don't notice the hole in the top of the mesh that must have been made when I put the bag over the flower.
|
|
|
Wednesday, June 29
|
View Page
|
 |
Here's one of the males that I snipped. It was on the main vine, just a couple of feet closer to the stump than the female.
|
|
|
Wednesday, June 29
|
View Page
|
 |
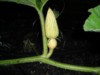
I snipped off one other male that looked to be ready to go. Then I turned my attention to this guy. He'll get special treatment.
|
|
|
Wednesday, June 29
|
View Page
|
 |
Remember the other part of the mesh bag? I tied off the top with a twist tie and put it over this lucky male. I think he's on what I've heard referred to as the "back vine". Although, mine is sort of growing to the side, like a regular secondary vine.
|
|
|
Wednesday, June 29
|
View Page
|
 |
I stuck the two snipped guys in the fridge to cool off. They are the same two on the ground in the last photo.
I didn't really keep very good track of which flowers have opened and closed again. So, it's possible that one or two of the male flowers I've chosen have been open before and are spoiled. But, they couldn't all be. Besides, I've watched flowers open and close before. And, I am pretty sure that I can tell when a flower has been opened. Usually the tips of the petals don't close up quite as tightly as they were before it opened.
I sure do hope that I am doing all of this right. I also hope that I didn't step on anything important in the dark. I already know that it was a bad idea to compact the soil while it's wet. But, I am gambling that compaction is better that than missing a chance to pollinate.
|
|
|
Wednesday, June 29
|
View Page
|
 |
I went out this morning at about 8:45am to see if I wasted my time last night. Can you tell from this picture if it was open or not?
|
|
|
Wednesday, June 29
|
View Page
|
 |
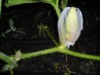
Of course it was open! But, not entirely open. (That'll become relevant in a minute.)
Looks like a five lober to me.
|
|
|
Wednesday, June 29
|
View Page
|
 |
I started with the longer stemmed male flower from the fridge. I carefully pulled the petals apart and stripped some of them off. I used some scissors to cut around the base of the petals to remove them completely. Of course, the whole time I am being careful not to knock off too much of the pollen inside. Then, I paint away.
|
|
|
Wednesday, June 29
|
View Page
|
 |
Remember when I said that the flower hadn't opened all of the way? Well, that made it hard to spread around the pollen. So, I tried to open it a little bit more. But, I didn't really count on the petals being so fragile and they ripped a bit. Nevertheless, you may be able to see some of the pollen grains that have been applied to the flower.
This shot was taken after pollinating from the secong flower from the fridge and the third one that was left on the vine until the last moment. The third one was open underneath it's mesh covering. So, I know that I have pollinated with at least one flower that was definitely ready to do the deed.
|
|
|
Wednesday, June 29
|
View Page
|
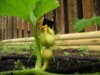 |
I did my best to fold up the rip as I gathered the tips of the petals and held them closed with a binder clip.
There are chances of more rain later today. So, I may go out and cover the lucky lady with a ziploc bag or something to keep her dry. But, otherwise, I'll more or less leave her alone and hope she makes it.
The soil in the patch is still incredibly saturated with water. And, seeing it in the light, I will really have to do some light cultivating with the garden claw to fluff up the places where my feet sank in last night. But, it'll have to dry up quite a bit first. I imagine it could take up to a week considering how wet it is.
|
|
|
Wednesday, June 29
|
View Page
|
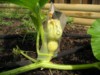 |
OK, I went outside again this morning to put a ziploc bag over the flower. It's a lot of activity for the morning. But, I figured if I do it earlier, I can sleep longer once I get back inside. :-)
|
|
|
Wednesday, June 29
|
View Page
|
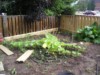 |
Here's the main plant, still chugging along nicely. Some of the older leaves have shrivelled. But, that's probably not all that strange. I am a little bit worried that my plant isn't quite as bushy as some of those I see on this site. I guess that could be because I was away and didn't get to apply the high nitrogen fertilzers or bury my vines until recently. Then again, like the experienced growers say, "we're not growing salad, we're growing pumpkins". So, I shouldn't worry so much.
|
|
|
Sunday, July 3
|
View Page
|
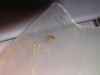 |
Grrrr....
I was out today doing a preventative spraying of some garden sulfur to ward off powdery mildew. While spraying I noticed this spotted cucumber beetle inside one of the males on the Gerry 300. So, I am going to need to get my hands on some Sevin and FAST!
This guy stopped moving when I put him a little too close to a lightbulb. Oops ;-) And, guess what, dead (baked) beetles can't swim as you flush them down the toilet. Who knew?
|
|
|
Tuesday, July 5
|
View Page
|
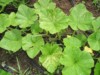 |
I did some spraying of liquid Sevin today on all of my plants (including the cucumbers). I should have done it earlier. But, I didn't have the Sevin, and it's been raining alot in the last two or three days. So, spraying didn't seem to make sense.
While out in the garden I saw that the leaves on the 300 Gerry are starting to look horrible. They never looked great to begin with. But, they were just starting to look normal. Now, some of the leaves have dry brown spots on them (as seen in this picture). I'll have to figure out what this is and hope it can't spread to my main plant.
|
|
|
Tuesday, July 5
|
View Page
|
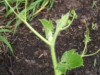 |
Speaking of my main plant...
Most of the early female flowers have aborted. This probably had something to do with the extremely hot weather as they emerged. Luckily I was able to pollinate one. And, now it's looking as if I'll have some more opportunities in the next couple of weeks. There are a couple of newish females that seem like they may grow to maturity. As well, there is still a female that may grow on the 300 Gerry.
The female in this picture is on the secondary vine of teh 584.2 Frei, closest to the watering timer. It is also nearing the fence. So, the vine would have been terminated. But, now I'll see if I can pollinate the flower as a backup and train the vine away from the fence.
|
|
|
Tuesday, July 5
|
View Page
|
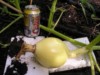 |
I think it's probably safe to say that this fruit has set. It's now about the size of a softball, or one of those mini-footballs that are sometimes given out as promotional gifts. I'm half tempted to etch some stitches into the side and try to sell the giant final product to the Argos. :-)
I'm pretty happy with the way that it is growing. But, I'd like to pollinate some other flowers just in case. I guess time will tell if I'll have that chance.
For now, this is my baby. I placed some thin styrafoam underneath the fruit to cusion it and keep it from sitting on the soggy ground. Given the weather lately, I should probably also put a bit of a shelter over top of it to keep it dry. Thankfully, it is growing under one of our neighbour's trees that hangs into our yard and is providing some natural shade and protection.
|
|
|
Friday, July 8
|
View Page
|
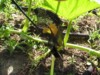 |
My pumpkins made love this morning.
I wasn't sure if the female flower that I have been watching on the 300 Gerry would open today or tomorrow. So, I covered it last night. And, wouldn't you know it, I'm two for two in covering females the night before they open.
I couldn't find the great mesh bags that I used last time. So, I found some screen from an old door and made little bags by rolling it up into a tube and closing the seams and one end with staples. Then I placed the bag over the flower and closed the bottom with a binder clip. I don't think I would use these bags again since they were a bit too rigid and hard to close up.
I used the same method to cover two male flowers on the 584.2 Frei. I did not cut off any flowers to store them. The two flowers I picked both opened on their own (protected by the mesh bags) this morning. So, that confirms that they were ready to go.
|
|
|
Friday, July 8
|
View Page
|
 |
Here's the inside of the flower that I pollinated. A four lober. I don't really know if the lobe count really makes that much of a difference to me at this point in my growing "career". But, these ones do seem to be wider than most of the pictures I've seen. I wonder if that makes them easier to pollinate successfully.
|
|
|
Friday, July 8
|
View Page
|
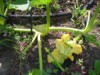 |
I used the "artist's brush" method again to pollinate. Then, I closed up the flower with a binder clip.
The position of this flower is a bit of a problem. I have this plant growing in a more or less snake pattern. Although, I haven't actually pruned any of the secondaries because they still have some room to grow.
I have layed out the main vine in a bit of a zig zag to maximize my space. That means that this flower is on the inside of a curve. That probably also means that I'll have to retrain the entire vine so that the inside curve turns into an outside curve. That might be a bit dangerous. But, if I don't do it, the fruit will have nowhere to grow.
|
|
|
Saturday, July 9
|
View Page
|
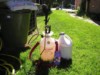 |
I got some Ambush today. I figured that I would throw in a bit of Neptune's Harvest Fish/Kelp too. Since I haven't fertilized in about five weeks, I thought the plants could use some feeding.
|
|
|
Saturday, July 9
|
View Page
|
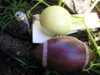 |
Here's the fruit on the 584.2 Frei. It isn't really football shaped anymore. But, I put a CFL sized ball in there for scale, along with the can of Diet Coke.
This is certainly way more fun that growing regular pumpkins. When you can see a change in the size of the pumpkin every day, it's a good dose of immediate gratification. Now I just have to hope that all of the bugs that I've been trying to kill this week are dead, dead, and DEAD!
|
|
|
Saturday, July 9
|
View Page
|
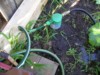 |
Again, since I haven't fertilized in a long time, I decided to put some Neptune's Harvest in my Miracle-Gro hose-end fertilizer sprayer. But, instead of spraying it, I just hooked it into the soaker hoses so that the mixture is evenly distributed to the root zone and along the main vine. And, sooner or later I'll lay out the other two soaker hoses to cover the secondary vines.
|
|
|
Saturday, July 9
|
View Page
|
 |
Oh, one thing I forgot: In the last photo you can clearly see that the hose feeding the fetilizer injector has a big bulge in it. I guess I'll need to replace it with another short hose.
This is a photo of the flower that I pollinated yesterday morning. It seems to have grown some. So, it looks like my second plant may have a fruit set soon. Now I just have to fix it's aweful position.
Actually, I may not need to since there is a new female flower near the end of the main. If that comes through, it'll be in a perfect position. I'm inclined to let both pumpkins develop, given that it's not my main plant. It'll be neat to have a couple of 200 pounders on the 300 Gerry to go along with the 1500 pounder on the 584.2 Frei plant :-)
|
|
|
Monday, July 11
|
View Page
|
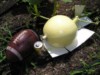 |
Here's a shot of my main fruit after I did some pruning. The day before yesterday I pruned off the secondary near the stem. I mixed up some garden sulpher with water to form a paste and I put it into a tube so that I could just squeeze it out when I need it. I need to mix it constantly to keep it from seperating. But, it works pretty well to seal up wounds.
The pumpkin is quite a bit larger than the other day. While that may sound great, I just discovered a potential disaster. There was a bit of a split where the stem meets the fruit. So, I used the sulpher paste to cover it up. Now I just have to hope that the split doesn't cause any more problems down the line. But, it's hard to see how it wouldn't.
|
|
|
Monday, July 11
|
View Page
|
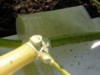 |
Here's a close up of the vine where I did the pruning. You can see the sulpher paste tube in the background. I also trimmed off the leaf and some of the tap roots along the main vine close to the fruit to allow for movement as it grows.
In other news, the fruit that I pollinated on the 300 Gerry seems to have set. Although, it is still in a funny position and the stem seems a bit twisted. The other female flower that I mentione on that plant seems to be coming along. It may be about two or three days away from opening. Maybe a few more days than that. But, it looks like it'll make it to pollination.
|
|
|
Monday, July 11
|
View Page
|
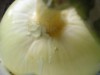 |
Here's a shot of the stem split that I mentioned in an entry earlier today. The photos a bit out of focus because I couldn't get a very good look at the view screen while holding the vine out of the way.
|
|
|
Monday, July 11
|
View Page
|
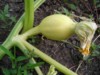 |
This is the fruit that I pollinated a couple of days ago on the 300 Gerry with males from the 584.2 Frei. It, like the other fruit, is starting off as a football. But, who knows if it'll end up that way too.
|
|
|
Monday, July 11
|
View Page
|
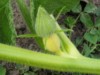 |
Here is a female flower on the 300 Gerry that looks like it has at least another day to go before opening. It's in a pretty good spot, though, considering how cramped that plant is. But, I realized that in the zig zag pattern that I have it in, I can allow short secondary vines to fill the concavity of the curves. So, maybe I can get more power out of fruit on this plant than I thought. But, it's not going to get my that 1500 pounder.
|
|
|
Tuesday, July 12
|
View Page
|
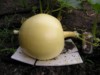 |
Off topic: I smoked a whole chicken today on the barbecue. It turned out great. I used apple wood bits and mesquite chips soaked in water-diluted whiskey. I glazed it with maple syrup. Mmmmm....
Back on topic: I had a bit of a scare this evening when I looked out at my pumpkin and it seemed to have a giant split in it. Thankfully, it was just the setting sun shining through the fence, casting a line of light accross the fruit. Whew!
I took some measurememnts today for the first time. The OTT total was 78 3/8". But, I don't think I did it very accurately. I'll use some string next time instead of the junky tape I have. Anyway, it is still growing and appears to be developing some big shoulders. As I understand it, big shoulders is good news for good weight.
|
|
|
Wednesday, July 13
|
View Page
|
 |
The 300 Gerry is not enjoying these ridiculously hot days that we have been having.
Either that or I need to spray some Ambush again.
|
|
|
Wednesday, July 13
|
View Page
|
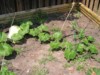 |
The main plant isn't liking the heat either. But, it only seems to be wilting on the leaves past the pumpkin. Most of the others seem fine.
I should have also mentioned in the last post that the pollinated flower does not seem to be growing at all. Also, the flower that I photographed a few days ago, the one that looked like it would open soon, does not seem to have progressesd at all in the last two days. So, it may be doomed as well.
|
|
|
Wednesday, July 13
|
View Page
|
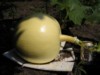 |
Here's the main pumpkin. It definitely looks bigger than yesterday. And, I measured it again today to prove it. The OTT is 87-3/4".
|
|
|
Wednesday, July 13
|
View Page
|
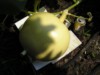 |
But, as you can see here, the pumpkin is not in a very good position in relation to the vine. I have been nervous about moving the fruit at all. But, it's looking like I am going to have no choice soon. I'll probably also have to move the vine at the same time. And, it's growing so fast, that it looks like I need to snip more tap roots as well.
It's also getting close to the time when I'll need to get something bigger to put under the pumpkin. I am thinking that I should grow it on top of a pallet topped with a sheet of styrafoam. I can already see how hard it woll be to get this monster out of the yard. So, growing on the pallet might make things a bit easier.
|
|
|
Friday, July 15
|
View Page
|
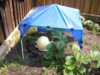 |
There was some pretty stormy weather here yesterday as the remenants of hurricane Dennis reached us. Some areas not to far from us had more than 2 inches of rain. We had some, not that much, along with some thunder and lightning. But, the thing that really worried me was that The Weather Network was calling for the possibility of small hail.
Well, that got me scared enough to get around to putting up a shade structure. It's made out of the same frame as my poly house. I just used half as many poles and it seemed to work. So, I covered it with a 6x8 foot tarp that was on sale for only 2.79 at Canadian Tire (we got three in total for future use) and voila!
It's especially important for me to put up something to cover the pumpkin because I am concerned about vandalism. The pumpkin is maybe 8 feet from our back fence which is probably ten or twelve feet from a sidewalk and main street. So, there are a lot of people who walk and drive by. And, as the pumpkin gets bigger, it will be more noticable and prone to attack by any number of projectiles.
|
|
|
Friday, July 15
|
View Page
|
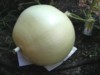 |
Speaking of the pumpkin getting bigger...
I didn't take any measurements or pictures yesterday. So, in the last two days, the OTT has gone up by 11-3/4" to 99-1/2", or close to ten pounds. To me that seems like alot, since this two week old pumpkin is already bigger than the best full grown pumpkin I've ever grown. But, it sounds slow compared to other folks. So, since it doesn't look like I am going to get to pollinate any more females on the main plant, I should probably start loading it with fertilizer. Some 20-20-20 will be fed through the soakers in the next couple of days if not this evening.
I am beginning to notice a bit of a ridge forming on this fruit. It may just be part of its shape. But, I suppose it could also be the start of a dill ring. Frankly, I'm a bit worried. But, as long as the pumpkin holds together, I couldn't care less if it ends up looking like a fat man with a tight belt.
Over the last two days or so, I have done some vine training and very minor fruit repositioning. That has remedied the situation in which I could have had the pumpkin growing on top of the vine in the very near future. I probably should do a little bit more. But, things are much safer now.
|
|
|
Sunday, July 17
|
View Page
|
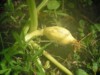 |
Here's the fruit on the 300 Gerry that got pollinated a little while ago. It's not growing and looks like it's rotting. So, it's getting the snip today.
|
|
|
Sunday, July 17
|
View Page
|
 |
The flower on the 300 Gerry is going to be ready to pollinate tomorrow morning.
|
|
|
Sunday, July 17
|
View Page
|
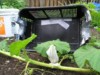 |
So, I found something in the garage the other day that I decided to use for covering the female flower. It's marketed as a turkey stuffing bag. But, it's basically a very flexible cotton bag, almost like cheesecloth. I tied it off with a string and covered it with the basket in the background.
The basket has the handles cut off and taped up with padding so that they don't damage the vines that run through the holes from one end of the basket to another. I have been using it for the last couple of days to shade the flower from the hot sun. It's been around the mid 30s Celsius over the last couple of days. But, it's also felt closer to 40 because the rain is causing a lot of humidity. So, the basket is also keeping the flower dry.
|
|
|
Sunday, July 17
|
View Page
|
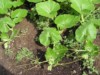 |
The 300 Gerry is starting to produce a huge number of females. Each of these short secondary vines have olive-sized females at the ends (although you may not be able to see all of them in the picture).
|
|
|
Sunday, July 17
|
View Page
|
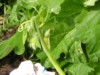 |
Here's the biggest secondary vine, coming from near the stum, that was growing towards and under the rhubarb in the background until I trained it out a bit before taking the photo. You can see one female flower easily and you may also be able to spot a small female at the very tip of the vine.
|
|
|
Sunday, July 17
|
View Page
|
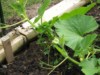 |
And, here are another bunch of females on anotehr secondary of the 300 Gerry. I think there are another three in this shot. There are the two obvious ones and a tiny bud between the two of them. Actually, I think these are two secondary vines. But, they are probably too close to the fence to grow. But, I am not going to pinch off anything until I have some successful pollinations on this plant. If I have to move the fence to make room for a pumpkin, I will.
|
|
|
Sunday, July 17
|
View Page
|
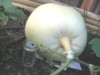 |
Here's a shot of the blossom end of the fruit on the 584.2 Frei. It's coming along nicely. The stem may get a bit stressed soon. So, I am going to have to give the pumpkin some more slack to grow. This photo, and the next one, have been brightened because the shade structure is working well. Although, there are a number of dirt specks on the fruit from falling rain bouncing up bits of soil.
|
|
|
Sunday, July 17
|
View Page
|
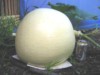 |
I took this side shot to try to show the bit of a ridge forming on top. You may not really be able to see it. But, it's probably nothing. I gather if it were a dill ring, it would be concave, not convex.
Anyway, the circumference is 47-7/8". The side-to-side measurement is 35-1/4" and the end-to-end is 33-1/4". The total is 116-3/8" which gives an estimate of around 42 pounds. That's an estimated gain of 14 pounds in the last two days.
At this rate, I may just hit my goal of 500 pounds. But, it may be tight (but not as tight as our very frustrating baseball game this morning in which we lost 15-14, giving up a five run lead in the bottom of the 8th).
|
|
|
Sunday, July 17
|
View Page
|
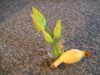 |
There weren't many male flowers available on the Frei plant. So, I'm going to need to self the flower that opens tomorrow. I cut four flowers which went into some water and into the fridge overnight.
Two of them may not really be mature enough. But, the other two are ready to go and I want to get as much pollen as I can this time. On the last pollination on the Gerry plant I got cocky because of my success on the Frei plant and decided to only pollinate with two flowers. The culled fruit in the photo was the result. So, I'm not taking any chances this time.
|
|
|
Monday, July 18
|
View Page
|
 |
Ha! A Bee? What the heck do they know about pollinating?
Actually, the bees were going crazy on the 300 Gerry this morning when I went out to pollinate. There were at least three males open on the plant. That really makes me wonder if I snipped the wrong flowers yesterday.
|
|
|
Monday, July 18
|
View Page
|
 |
Here's the interior of the flower on the 300 Gerry. I had to move fast because the bees were so active. Two landed inside the flower as soon as I removed the cover. But, I quickly shooed them away. So, I think I can still call this a controlled pollination.
|
|
|
Monday, July 18
|
View Page
|
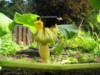 |
I really hope this one takes. But, I doubt it will. Eventough I took some precautions by snipping flowers yesterday, the pollen inside still seemed a bit damp. Maybe I should have taken them out of the jar of water for an hour or so before pollinating. So, it could be my fault. But, for now, in the imortal words of Milli Vanilli (or, at least, the words they lipsynched to) I am going to "blame it on the rain."
In any case, this will probably not be a competitive pumpkin. But, it'll make a cool jack-o-lantern and will help me learn more about growing.
|
|
|
Monday, July 18
|
View Page
|
 |
It is crazy hot out today. But, I still managed to get out to take some fruit pictures and take measurements. I don't think I really have any good blossom end pics in my diary. So, here's one.
|
|
|
Monday, July 18
|
View Page
|
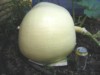 |
In this shot you can really start to see the hump that is forming. It's a lot less sharp than before. So, it's probably not a dill ring.
|
|
|
Monday, July 18
|
View Page
|
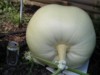 |
Here's a good stem end shot.
The OTT for today totals 121-3/4" for an estimated weight of 47 pounds.
|
|
|
Monday, July 18
|
View Page
|
 |
I think this is probably normal. But, it made me a bit nervous. As you can see in this shot, there are what look like little splits all over the stem that have been healed over. It doesn't seem to be causing any problems. But, if you're reading this and it is not normal, please let me know.
|
|
|
Monday, July 18
|
View Page
|
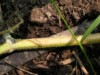 |
Here is a section of the main vine, about two or three feet before the pumpkin, that appears to be discoloured. It looks like it may have been burnt by the sun. But, nothing else around it seems to have been burnt. I seriously wonder if you could use sunscreen on pumpkins. I have some stuff that is supposed to resist washing off right away.
|
|
|
Tuesday, July 19
|
View Page
|
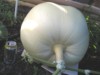 |
Here's my pumpkin today. It looks alot like it did yesterday. But, it's a little bit humpier and a little bit wider. The OTT total is 129-1/8" for an estimated weight of 55 pounds. That's not a huge gain. But, it's decent. Also, when I get the pumpkin onto the styrofoam, I will be able to take more consistent measurements because it won't shift as much as the soil.
I noticed that the shoulders are really starting to grow. So, that is putting a bit of pressure on the base of the stem where it meets the pumpkin. So, I did some vine positioning and used some bamboo stakes to help support the vine.
I'll be getting some bigger and thicker styrofoam soon to put under the pumpkin. I've abandoned the idea of putting a pallet underneath it at this stage. It's still light enough to move. But, I don't want to risk doing too much damage.
Also, I did a combined spray today of sulphur fungicide, Ambush, and Sevin. I noticed some wilted leaves again today. So, I wanted to spray to eliminate SVB as a possible cause of some wilting and confirm that the cause is the crazy hot weather we've had this summer. Next week I think it;s supposed to go down a bit. I can only hope. Yesterday it was so hot and humid, I literally had to go inside because I couldn't breathe!
|
|
|
Thursday, July 21
|
View Page
|
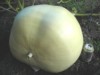 |
Here's a blossom end shot. The fruit is really starting to spread out and widen. Hoping to get some styrofoam and sand tomorrow to support the pumpkin and keep it from spreading out so much that it splits itself.
|
|
|
Thursday, July 21
|
View Page
|
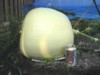 |
Here's a nice gratuitous side shot. It doesn't really show you anything new.
But, the OTT has gone up to 138-3/8" with a circumference of 58-3/8". Yesterday I didn't post any pictures, but I did measure. Yesterday the OTT total was 132-1/2" with a circumference of 55-1/4". So, the pumpkin has grown from an estimated 59 pounds to 66 in one day. Looks like that seven pound daily gain is about average so far.
|
|
|
Thursday, July 21
|
View Page
|
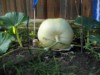 |
Here's a shot that's a little farther back than usual. I pulled back a bit to show that I cut some of the leaves from the vine on either side of the stem. I also cut off a short secondary vine that was close to the pumpkin. I did all of this trimming because it seemed as if all they were doing was weighing down the vine and causing some stress to the stem. You can also see that I am using some bamboo X's to support the vine.
|
|
|
Thursday, July 21
|
View Page
|
 |
This flower on the main of the Gerry plant is going to be ready to pollinate tomorrow morning. So, I covered it with the turkey stuffing bag to protect it from horny bees.
I also culled the fruit that I pollinated a couple of days ago. It didn't seem to set. So, snippity-snip!
You can also see in the picture a honey container that I am using to dispense sulphur paste to help heal the areas that felt my pruning wrath.
|
|
|
Friday, July 22
|
View Page
|
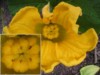 |
Here's a shot of the flower that I pollinated today at around 7:10 AM with the three flowers from the 584.2 Frei that were shown in yesterday's diary. It looks like a six lober. Although, one of the lobes appears to be a bit deformed. The inset detail shows that the top lobe is a bit misaligned. You can also see that the petal on the top of the photo is a bit mishapen. So, we'll have to wait and see if that matters or not.
|
|
|
Saturday, July 23
|
View Page
|
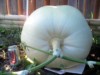 |
This is a shot from yesterday. The OTT was 144-5/8" for an estimated weight of about 75 pounds.
I didn't take any measurememnts or pictures today. But, the flower that I pollinated yesterday on the Gerry may have set. Hard to tell. But, I didn't notice any growth.
|
|
|
Sunday, July 24
|
View Page
|
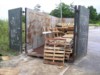 |
Score!
After our baseball game today (we won 12-16) we cruised by an industrial area and spotted this dumpster/skip full of pallets. I took three. But, I could have taken more if the van wasn't full of baseball equipment.
They are not in the best condition. That's why they were in the dumpster, I guess. But, a few extra nails and some planks to replace a couple broken bits and they will be ready to haul my monster by the end of the season. I didn't have a chance to measure them. But, I think they will all fit through my gate.
|
|
|
Sunday, July 24
|
View Page
|
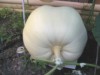 |
Here's my pumpkin shot of the day. The OTT came out to 147-1/4", but my end-to-end measurement must have been wrong because it came out to less than my last one two days ago. But, I took a better circumference measurememnt of 62-5/8". So, I am going to estimate the weight at 83 pounds.
|
|
|
Wednesday, July 27
|
View Page
|
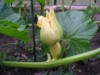 |
I was pretty sure when I saw this flower on Monday that it would open Tuesday. But, it was a bit deformed. So, it was hard to tell.
Of course, it did open on Tuesday morning. I know that the bees got to it because I saw them getting in there. But, it also rained a lot today while the flower remained uncovered. And, when I inspected it later in the day, I saw that the lobes were pretty deformed and there was water pooled in the flower. So, this one probably will die off. And, even if it doesn't, it isn't really in a place where it can be grown.
|
|
|
Wednesday, July 27
|
View Page
|
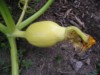 |
Here's the fruit on the 300 Gerry. It seems to be doing OK. But, the last abort got to this "lemon" size. So, I'll still need some convincing.
|
|
|
Wednesday, July 27
|
View Page
|
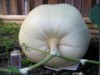 |
28 days after pollination and the pumpkin on the 584.2 Frei has an OTT total of 157-7/8" and a circumference of 66-1/4". So, that works out to an estimate of about 95 pounds.
Looks like I'll break 100 pounds by tomorrow. I'm way off pace for a 1000 pounder though :-( I suppose I could still hit 700 if I get really lucky. But, my goal was 500. So, I'm not going to get greedy. But, I haven't been adding much fertilizer. Maybe it's time to put some more Neptune's Harvest into the Miracle-Gro hose end fertilzer sprayer.
|
|
|
Thursday, July 28
|
View Page
|
 |
I did some backup pollinating this morning. This guy is on the main of the 300 Gerry. But, it's on the inside of a curve. So, I'll have to see how the other pollination goes.
If it goes well, this one will definitely get culled. The least of the reasons would be the fact that it is what has been referred to as a "siamese pumpkin" (although, I think the politically correct term is "conjoined pumpkin" since we no longer call Thailand "Siam"). It looks like each side has two full lobes. Although, there was something in between them that you can't see in this shot.
|
|
|
Thursday, July 28
|
View Page
|
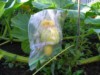 |
After pollinating I tied the top up with some jute and covered the whole shebang with a ziploc to protect from possible rain.
|
|
|
Thursday, July 28
|
View Page
|
 |
This is what I saw when I went out this morning. A whole bunch of Canadian Geese crossing the road. Those SOBs better not enjoy eating pumpkins. If they do, I just may enjoy eating geese!
|
|
|
Thursday, July 28
|
View Page
|
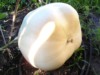 |
A new angle for a change. You can really see how the blossom end is getting fat while the stem end is not growing quite as much.
It taped out at 162-1/2" OTT with a 68-1/2" circumference. So, I'm going to estimate the weight to be around 104 pounds. But, it's probably reached 105 since I measured it. So, let's just say 105. :-)
|
|
|
Thursday, July 28
|
View Page
|
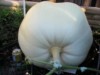 |
Definitely getting bigger. But, seems to be slowing down a bit. We've had plenty of rain. So, it's getting enough water. It's probably time for some fertilizer again.
|
|
|
Thursday, July 28
|
View Page
|
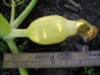 |
This is the fruit on the 300 Gerry that was pollinated on July 22. It seems to be shaping up to be just like the last one that got to this stage. I just hope it doesn't start to soften up and abort like the last one. But, it doesn't seem very big for six days old. The Frei fruit was probably three times the size after as many days.
|
|
|
Thursday, July 28
|
View Page
|
 |
I forgot to mention that the flower I pollinated today was a cross with the 584.2 Frei. I used three males that I collected last night.
Also, remember the flower that the bees took care of a couple of days ago? You know, the deformed one that I didn't think would open, but it did. Well, as it turns out, although it was open, it wasn't really open. I say this because the next morning it actually opened all of the way. So, the fact that the petals were deformed probably pried the flower open prematurely. For that reason, plus the fact that the flower filled up like a rain gauge, that fruit will probably not set.
|
|
|
Thursday, July 28
|
View Page
|
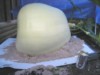 |
I did a bit of heavy lifting today. It was definitely way past the date that I should have been putting a bigger piece of styrofoam under my pumpkin. So, it was pretty heavy when I lifted it. But, I had some help and I was gentle. So, I hope it works out.
You can see that the fruit cracked the 2" styrofoam as soon as I put it down. I guess it had already hollowed out a hole in the ground for itself. So, it tried to settle back into it. That's good, I guess.
I also added some play sand to support the sides and tried to shove as much as I could underneath. I'll have to add more styrofoam around the sides pretty soon. But, I think that's the last time that I'll need to move the pumpkin.
The vine will need some adjusting, though, because the shoulders are starting to creep closer and closer. I'll probably pot some smaller pieces of styrofoam between the shoulders and vine to keep them from rubbing or causing too much stress.
|
|
|
Friday, July 29
|
View Page
|
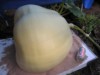 |
I hope that moving the vine and fruit around yesterday didn't give its system too much of a shock. I was gentle, but moved everything a bit more than usual.
While taking pictures today I noticed that the skin is starting to turn a little bit darker. Not quite orange. But, more beige than the previous pale yellow. This may have something to do with the fact that the shade structure I have doesn't really shade the pumpkin much from 4pm or so until sunset.
The OTT today (day 30 after pollination) was 166-1/4" with a circumference of 70-7/8" for an estimated weight of about 113 pounds.
Measurements might be a bit different since the measurement to the ground will have changed now that the fruit is sitting on the styrofoam and sand. I measured to the styrofoam, not the actual ground (as will be my practice for the remainder of the season). But, there still could be some variance.
|
|
|
Friday, July 29
|
View Page
|
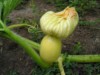 |
This is the deformed flower on the 300 Gerry that was open pollinated in pretty wet conditions. Not much growth to speak of.
|
|
|
Friday, July 29
|
View Page
|
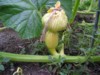 |
This was the most recently pollinated flower on the 300 Gerry. Not much growth here either. Am I going to get anything set on this stupid plant?!
|
|
|
Friday, July 29
|
View Page
|
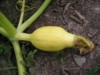 |
I have not noticed any growth on this fruit on the 300 Gerry either. This is not looking good. I'm starting to think that I'm wasting my time on this particular plant this year. I like the seed. But, maybe I just planted it too late and in a bad spot.
|
|
|
Monday, August 1
|
View Page
|
 |
I forgot that this flower would be opening today. So, It'll go down as yet another open pollination on the 300 Gerry plant.
Upon further inspection, the little black specks in the flower are not bits of soil. They are actually moving on their own! I also noticed a small wasp camped out underneath the lobes. It's there in the photo, you just can't see it. I wonder if the mini-bugs are from the wasp. In any case, it's probably time to spray some pesticide again. I'll try to do it later in the day when the bees aren't still out and the sun won't burn my face off.
|
|
|
Monday, August 1
|
View Page
|
 |
Here's another open pollination on the main. This one opened mostly yesterday. But, it was still a bit open today. I think it has five lobes. But, the fifth one is pretty strange looking. Maybe the seed I planted is a mutant?
|
|
|
Monday, August 1
|
View Page
|
 |
This is a flower that was open pollinated a couple of days ago (Wednesday July 27th, I think). It seems to be growing. So, I cut the leaf off to allow the fruit to lie down. It was growing directly under the stem.
|
|
|
Monday, August 1
|
View Page
|
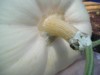 |
Here's the stem of my only real fruit so far. It seems to be holding together. Although, you can see a number of healed scars around the stem. Hopefully some of the shifting I did a few days ago will help. I want to have something to bring to the weigh-off.
I won't be taking measurements as frequently. I'm beginning to get concerned about scratches to the fruit that I may be causing. So, I will take measurements about every five days (as long as I can keep from temptation). But, two days ago the OTT was about 170" with a circumference around 71". So, the fruit has got to be about 125 pounds or more by today.
|
|
|
Wednesday, August 3
|
View Page
|
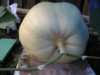 |
Here's my pumpkin on day 35. There has been a whole lot of rain here lately. So, I've needed to set my water timer to "delay" almost every day this week. The plants may even be getting too much water.
But, it's still growing at pretty much the same rate as before. The circumference is 76-3/4" and the OTT is 178-5/8"/ So, I am estimating the weight at over 135 pounds.
It's already outgrowing its first piece of styrofoam. And, the shade structure is a bit too small. Rain is still getting in. The sand underneath it was damp and the rain caused specks of soil bounced off the ground onto the fruit. Although, with the way it rained today, it would have gotten in anyway.
|
|
|
Wednesday, August 3
|
View Page
|
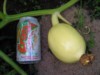 |
Here's the fruit that was open pollinated on (I think) July 29th. In a previous picture I guessed the 27th. But, I think the 29th is correct.
It's my most promising fruit so far on the 300 Gerry. I've pretty much given up hand pollinating on this one. The bees are doing a better job than me anyway.
|
|
|
Wednesday, August 3
|
View Page
|
 |
The Gerry plant is literally climbing the walls. This female is bound to open tomorrow. But, I don't see how I could keep this one. Given its position, I would have to do some major vine renovations. Or, I could detatch the plant and remove the fence. But, that opens it up to the rabbits. That would be a disaster.
|
|
|
Wednesday, August 3
|
View Page
|
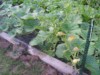 |
Here's another female bound to open soon that is climbing the chicken wire. I guess it's time to terminate these vines. But, I am reluctant to do so before I have a decent fruit set.
|
|
|
Wednesday, August 3
|
View Page
|
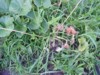 |
I knew that the leaves around my stump were gettng old and crispy. But, they really seemed to die off quickly. So, now my stump has no protection and will need a cover to ward off rotting.
Of course, you may have trouble seeing the stump in all of the weeds and grass. Basically, they have won the battle. I can't pull them because it'll yank out roots from the mound. I can't spray them with herbicide so close to the stump. So, I am just going to have to settle for trying to kill off the weed seeds by heating my soil with some plastic next season. And, I'll use mulch too. It's too late for this year.
|
|
|
Tuesday, August 9
|
View Page
|
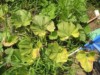 |
OK, this is a serious problem. Almost all of my leaves are dying from the stump out to my pumpkin. I have no idea what to do other than watch them die. There is a lot of tall grass growing in my patch now. It has just about taken over. Could that be doing it? I haven't noticed any obvious damage to the vine or leaves. They are just turning yell, brown, then crispy brown.
I didn't worry when it was just the oldest leaves by the stump. But, this is more than just a few leaves now. Any suggestions? Fertilizer? Fish/kelp foliar feed? Anything?
|
|
|
Tuesday, August 9
|
View Page
|
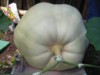 |
The pumpkin seems to be getting bigger. I think yesterday was day 40. But, I was sleeping after getting up early to watch the space shuttle land. Then it was delayed. Anyway, the measurememnts today were: OTT=189-5/8" with a circumference of 80-1/4". So, it looks to be about 155 pounds.
The area around the stem is starting to get rough in texture and I can see a hint of red right near the stump. The ribs are really starting to take shape too. But, the growth seems to have slowed. It has gotten alot hotter again. Maybe that's it?
|
|
|
Tuesday, August 9
|
View Page
|
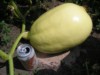 |
Just when the Frei plant seems to be going to hell, the Gerry plant is popping with flowers all over the place. But, this one has obviously set. I guess it's around day 12 or 15 for this one. The OTT is not on the chart yet at 77-1/2" and a 32-1/4" circumference.
|
|
|
Tuesday, August 9
|
View Page
|
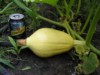 |
Here's another fruit on the Gerry plant that seems to have set. I may just let both of them grow. It looks like I may not get the monster I want on the Frei plant. So, maybe I can have a bunch of little monsters instead.
|
|
|
Tuesday, August 9
|
View Page
|
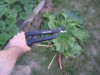 |
I got this baby the other day. It's a Fiskars pruner with a long handle. I used it to clear away some of the rhubarb and to terminate some of the vines. I terminated some secondaries on the Gerry as well as the main and the main and one or two secondaries on the Frei. I did a couple more today.
This was after I started to see the problem with the leaves. Otherwise I would have blamed that. And, I sprayed Sevin and Ambush the other day too because I saw a cucumber beetle and was worried about my leaf problem. But, I haven't noticed any major damage from beetles either. So, I don't think they are causing my problems either.
|
|
|
Friday, August 19
|
View Page
|
 |
This was the defining picture of the day. You see that little red area crossing just North of Toronto? That's where I live.
|
|
|
Friday, August 19
|
View Page
|
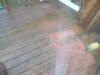 |
There was an awful lot of rain. I'd been expecting that since it has been forecast since a few days ago. But, they didn't say anything about hail! This is a shot of my back deck, through the glass sliding doors, covered with 1/2" diameter hail stones.
|
|
|
Friday, August 19
|
View Page
|
 |
The hail stones didn't last long because the rain kept going for a while and melted them away. You can see just how much rain there was from the flooding on the street just behind my patch. Some cars in the parking lot there actually suffered some water damage because the drains in the parking lot got filled up fast abd covered with debris.
|
|
|
Friday, August 19
|
View Page
|
 |
The hail was not very friendly to the leaves in my patch. All of them are shredded up. Here's a shot of the fruit on the Gerry plant along with many of the ripped up leaves.
|
|
|
Friday, August 19
|
View Page
|
 |
The uncovered fruit did not do well at all. The surface was covered in little pits and bruises from the hail. I'll have to dust it with fungicide when the moisture in the air subsides. That should be a couple of days. There may be more rain later.
|
|
|
Friday, August 19
|
View Page
|
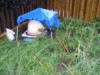 |
Besides having its leaves totally mangled, the 584.2 Frei seems to have benefitted from living under its little roof and the overhanging tree branch (which, thankfully, stayed attached to the tree during the storm). I didn't notice any real damage. But, I'll have a better chance to inspect it when the ground isn't so darn wet.
|
|
|
Friday, August 19
|
View Page
|
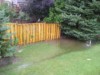 |
This is the area on the other side of the fence from my patch. It looks flooded now. But, it was much deeper earlier. The road was flooded and the water flowed down into this ditch every time a car went by.
|
|
|
Friday, August 19
|
View Page
|
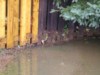 |
This is a bit of a closer picture, right on the opposite side of the fence from the back corner of my patch. You can see just how high the water was from the debris stuck to the fence. It must have been a foot deep. In retrospect, it's a really good thing that I built the raised bed. Otherwise, all of that water would have been covering my patch.
In fact, that corner did fill up a bit with water. But, only for a short time and it was only a couple inches deep. It's only about six feet from my main fruit. But, it didn't look like it reached it. In any case, the fruit is on styrofoam and sand. So, it would drain quickly if the flooding had reached it.
On the positive side, I don't have to water for another six months. Now I just have to see if the plant can continue to feed the pumpkin in its current state. If it can't, I might have an opportunity to do some early patch prep.
|
|
|
Saturday, August 20
|
View Page
|
 |
After the storm yesterday I figured that I'd better take some measurements so that I can see if the leaf shredding hail will stop the pumpkin growth.
When I got closer, I could see that the fruit had, in fact, sustained some hail damage. But, the wounds are pretty superficial and only seem to have hit the one side of the fruit that is least protected by the tarp hut.
The circumference is now 90" with an OTT of 209-3/8". So, the weight is something close to 205 pounds. That's a 50 pound gain since the last measurements that I took 11 days ago.
So, obviously the weight gains have slowed down since the days in which I was getting 7 and 8 pound daily gains (I know that's not much for some, but it impresses me). But, I'm just happy that the thing is still growing. I'm optomistic in that I still have the rest of August, all of September, and a week in October if I take the fruit to the Niagara weigh-off. There's lots of time left for this thing to grow some more.
|
|
|
Saturday, August 20
|
View Page
|
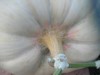 |
I took this shot of the stem to show that the fruit is developing some colour around the stem. There's a bit of pinkish red in there with some grey/green. I felt the areas to make sure that the colour is natural and not a result of rotting. It seemed firm enough. So, I think it's OK.
|
|
|
Monday, August 29
|
View Page
|
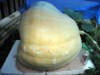 |
Well, it looks like my season may be winding down. My OTT total for today is only 1-1/2" bigger than nine days ago. However, my circumference measurement was probably off today given that it was slightly less than before.
Either way, the 584.2 Frei fruit hasn't grown very much since the hail storm. But, I also haven't fertilized for a while. So, I'll do some of that tomorrow if it's not too rainy.
I'm estimating it to be about 210 pounds. That's only five pounds since the last measurements. Is there any chance that it's way heavier than it looks? Maybe it actually weighs close to 1500 pounds, amking it 700% over the charts :-)
This shot shows the side of the pumpkin that sustained hail damage. A couple of days ago I pasted over some of the dents with sulphur. Most of the dings were already healed at that point. But, hopefully, the sulphur will help keep it rot free.
|
|
|
Wednesday, September 7
|
View Page
|
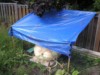 |
A couple of days ago I took down the original pumpkin shelter and rebuilt it so that it would be easier to get to the fruit for cleaning, inspecting, and measuring. It's attached to the fence at the top and to stakes at the bottom of the slope. I'll need to move the stakes a bit farther out since the tarp doesn't cover the stem end very well.
|
|
|
Wednesday, September 7
|
View Page
|
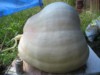 |
Here's the fruit's best side (the one without hail pockmarks). There is some more orangish pink colour in the skin. But, most of it is still pretty creamy yellow.
It realy does seem to have stopped, or severely slowed down, in growth. The circumference has grown less than an inch in two weeks. The end to end and side to side measurements haven't grown much more in the same period. So, I think that I am at the point where my main mission is just to keep the plant alive and the pumpkin from rotting before the weigh-off.
The OTT total was 214-3/4" yesterday around noon. The circumference was at 90-3/4", end to end 58-1/2", side to side 65-1/2". That should make the estimated weight about 215 pounds. But, I would expect it to go a bit light since the stem end did not grow as much as the blossom end.
|
|
|
Wednesday, September 7
|
View Page
|
 |
Here's my second fruit, the only one on the 300 Gerry plant. It has a really strange shape, but a nice light orange colour. It would be so much nicer without all of the hail damage. I may enter it in the Royal Winter Fair just for fun. But, I think that they have the right to reject fruits that aren't aesthetically pleasing. And, this is one ugly pumpkin.
I haven't paid much attention to it in my diary. But, it's pretty big now. I can't tell how fast it has grown because I haven't measured it very often. But, yesterday would have been close to 40 days since its open pollination.
The OTT was 188-1/8" with a circumference of 85-7/8". That would make the estimated weight close to 150 pounds, maybe a bit more. But, since this was a deformed flower, it became a deformed pumpkin. One of the lobes didn't seem to grow. That is what gave it the funny shape. And, the shape makes it unlikely that the chart will give an accurate weight estimate.
|
|
|
Wednesday, September 7
|
View Page
|
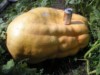 |
Here's a shot from the other side of the Gerry fruit. I noticed yesterday that this side has what look like, except for the fact that they don't go all the way around the pumpkin, little dill rings. It looks like what happened was that one part of the fruit was growing while the other was not. So, as the other side expanded, this side buckled and bunched up. It'll be interesting to see this one from the inside. I wouldn't expect many seeds out of it.
|
|
|
Monday, September 12
|
View Page
|
 |
OK, I just had to do a quick Photoshop job to see how it might look if I grew a pumpkin as beautiful and big as Martin's :-) I put a watermark on to make it crystal clear that I am not pretending that this is actually a pumpkin that I grew (as if the lousy hack job I did is enough to convince anybody). Just a bit of computer fun since I figure that I won't get my hands on a 670 Daigle any time soon.
source image: http://www.bigpumpkins.com/Diary/DiaryViewOne.asp?eid=42541
|
|
|
Saturday, September 17
|
View Page
|
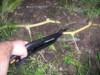 |
Well, today was not a good day. I went out to check on the pumpkin and I noticed that one of the secondaries was discoloured. Upon further inspection, I saw that a number of them were rotted and a bit mushy. So, I cut all of them off.
Then I checked the stump. Crap! It was feeling a bit hollow as well. I suppose that it's possible that it got overwatered. Afterall, we have had a lot of rain lately and in the last two days I was unable to turn off the automatic watering.
I suppose it could be fertilizer burn too. But, I don't really think it is either since the 300 Gerry plant isn't experiencing any of the same problems. And, they have both been getting the same fertilizers and watering. So, it may just be old age. That and the fact that all of the leaves were gone anyway. Or, maybe this all started a long time ago once the leaves started to die. Who knows?
Anyway, the rot was pretty severe. So, rather than wait to see if it would reach the pumpkin, I cut the main. Hopefully I got it in the right spot so that the rot won't spread. There is still some vine past the pumpkin. But, that doesn't have any leaves on it either. And, I don't think it has very deep tap roots. So, I think we're, for sure, not going to see any more growth.
|
|
|
Saturday, September 17
|
View Page
|
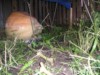 |
This shot shows just about how close the rot was to reaching the pumpkin. I'd say less than six feet. I am surprised that it could rot that quickly. But, then again, I may not have noticed the rotting because I have had really bad weeds in the last little while. I still do, even after filling three yard waste bags full of quack grass and thissles. Maybe that provided a home for all sorts of pathogens. Or, maybe pulling all of those weeds damaged the root system. Then again, it didn't seem to affect the Gerry plant.
|
|
|
Saturday, September 17
|
View Page
|
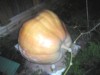 |
This is another photo of the 584.2 Frei fruit to show that it may actually be growing a Dill ring. You can see it going across the hump on the blossom end. I hope that doesn't make it more difficult for me to keep the fruit around long enough to get it to the weigh-off. As small as it is, I still want to take it to see how much it actually weighs.
The OTT today was about 216" with a circumference of 92". So, that either means that I am not a very good measurer (a distinct possibility), or the fruit has grown an estimated five pounds or so for a total estimated weight of 220 pounds.
|
|
|
Saturday, September 24
|
View Page
|
 |
Here is a shot of my Dad (left) and myself posing with my main pumpkin. I know it seems like a small pumpkin in the picture. But, we are actually each about seventeen feet tall. So, that accounts for the dwarfing of the fruit.
A couple of nights ago I cut it from the vine, which had withered and dried up. I also liberally pasted on a bunch of fungicide because I was concerned about rotting. That didn't seem to make a difference since the stem is pretty soft.
|
|
|
Saturday, September 24
|
View Page
|
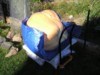 |
I forgot to mention that yesterday I was able to get the pumpkin on top of the tarp all by myself. That could mean that the pumpkin is very small. But, I prefer to think of it as me being very strong.
We used the tarp to lift the fruit out of the patch and onto this dolly. I padded it with some bags of topsoil and a sheet of two inch thick styrofoam.
|
|
|
Saturday, September 24
|
View Page
|
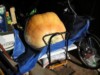 |
Here's the pumpkin sitting in its new home for the next week until Port Elgin. I know it'll be the smallest one there. But, I wasn't about to go there without something to show for it. Besides, the entry fee includes admission and a good parking spot.
After placing the pumpkin in the garage, I noticed that the styrofoam had broken off and one of the corners of teh dolly's platform had dug into the pumpkin. So, I had my Dad lift it slightly and I placed something more rigid under the tarp. Then I softened the area with sand and sprinkled it liberally with fungicide.
It didn't seem like too deep a gash. So, I hope it heals enough to keep from rotting and stay official. Otherwise I may have to use my other fruit. In any case, I think that the platform the pumpkin is on is kinda precarious right now. So, I want to put it on a pallet as soon as I can.
|
|
|
Saturday, September 24
|
View Page
|
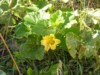 |
Speaking of the 300 Gerry fruit...How did I miss this?! The plant is still trying to pump out females. I guess it wasn't happy with the fruit that's on there already. Everyone's a critic!
It was getting pretty easy to spot new growth. All I had to do is see a leaf that didn't have a hole in it and I knew it must have grown after the hail last month. If there were any male flowers to use for pollination, I would have considered leaving it on. But, the main jellybean fruit may still be growing. So, I snipped it to divert all plant power.
|
|
|
Sunday, October 2
|
View Page
|
 |
Before heading to Port Elgin for Pumpkinfest, we wanted to do some fishing. So, we stopped at the Bass Pro Shop in the morning to get some bait. We ended up coming home with two new rods and reels, a couple of lures, and almost forgot to get the bait on our way out. That store is a serious financial threat!
|
|
|
Sunday, October 2
|
View Page
|
 |
Here's a shot of my loading crew. That's me on the right, and my dad on the left. In the middle is my friend Jeff who just happened to be home on a two week vacation from teaching English in Beijing, China.
|
|
|
Sunday, October 2
|
View Page
|
 |
Here's a shot of the nice little bed and breakfast that we stayed in on Friday night. After checking in we went to do some fishing at Denny's Dam in Southampton. It was a great spot. But, you really need hip waders to fish there without having your line get swept into the banks of the Saugeen River really quickly.
|
|
|
Sunday, October 2
|
View Page
|
 |
We got up at 5am on Saturday morning in order to go fishing. When we got there, it was still really dark. We didn't have the proper equipment for that either. But, there were a lot of people already there and a bunch that arrived while we were waiting for sunrise. Here I am casting with the new rod and reel. We didn't catch anything. But...
|
|
|
Sunday, October 2
|
View Page
|
 |
...This young guy caught a nice rainbow trout (that's what he said it was, I have no idea) about 15 feet away from where we were casting. So, I can't blame our misfortune on the location. This photo does not really do justice to the beauty of the fish. We also saw people with salmon both on Friday evening and that morning on Saturday.
|
|
|
Sunday, October 2
|
View Page
|
 |
Finally, at the weigh off...
It took a while, but the finally got the pumpkin out of the minivan.
|
|
|
Sunday, October 2
|
View Page
|
 |
You know, with a little bit of creative photography, my pumpkin doesn't look so small afterall. :-)
|
|
|
Sunday, October 2
|
View Page
|
 |
Here's my pumpkin of the scale. It was the only one that they moved by hand with the tarp. The final weight was 204.5 pounds. The scale says 205.5 because the weigh-off official is apparently putting a pound of pressure into writing the weight on the fruit. My dad wasn't able to get a good shot of me standing with the fruit on the scale. But, there is one posted on the Pumpkinfest website through the results page.
|
|
|
Sunday, October 2
|
View Page
|
 |
I think this is called a swan gourd. I took a shot of it on our way out because I thought it looked really cool. I don't know if it won anything. But, it sure is neat.
|
|
|
Sunday, October 2
|
View Page
|
 |
Here's a shot of Bob MacKenzie's new World Record squash (which beat his wife's entry of 1003 pounds). Way to go! I see that they also won both the regional pumpkin and squash competitions today with specimens of 1104.5 pounds and 728.5 respectively.
I'll post more photos on the GVGO website at http://www.gvgo.ca. I have a whole memory card full of pictures. It just makes more sense to post them there instead of here since all of the photos are of Ontario growers and their fruits.
|
|
|
Monday, October 10
|
View Page
|
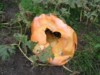 |
I haven't written much lately despite having attended the Port Elgin weigh-off last week and the Niagara weigh-off this weekend.
The 300 Gerry collapsed on itself a bit more than a week ago. I meant to harvest whatever seeds I could the day that I discovered it was done. But, I was pretty busy. So, it's an entire write off. I can't even eat them. When I opened it up a bit (using my bare hands to rip the walls) all sorts of flies came out. So, it'll have to be composted or put out with the yardwaste.
|
|
|
Monday, October 10
|
View Page
|
 |
I opened it up a bit more. But, I couldn't do much inspecting because it really smelled pretty bad. I did notice a seed or two. But, there's no way that they are healthy to eat. Plus, we've had some really cold temperatures here and rain. So, I doubt that any seed that's in there would be very healthy.
Oh, well. I guess it's a good thing that Eric game me a bunch of seeds. I really liked the colour and heartiness of this fruit and plant.
|
|
|
Monday, October 31
|
View Page
|
 |
On Saturday I cut open the 204.5 Levy 2005 and gutted it.
|
|
|
Monday, October 31
|
View Page
|
 |
The insides only filled up about half of a five gallon bucket. That seemed like very little. Some of the flesh was green which gave me the impression that it wasn't completely mature. I wasn't expecting to get many seeds. I ended up with about 200 that look more or less mature. But, I'm sure some are at least partly empty.
|
|
|
Monday, October 31
|
View Page
|
 |
Yesterday I started carving. Here are some progress shots. I still have some to do this afternoon.
|
|
|
Monday, October 31
|
View Page
|
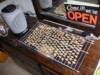 |
Here's a little shot of the seeds from the 204.5 Levy 2005. I think that there are about 205 in the picture.
This is how I've set up the drying station. I have a fan heater on a relatively low setting blowing over the seeds. To do some initial drying, I had the seeds on paper towels for a day and then a single sheet of newspaper for a day. They are now sitting on some screen door mesh on top of a wire shelf. This should allow air to circulate on both sides. I guess they should be done in a couple of weeks.
|
|
|
Monday, October 31
|
View Page
|
 |
Here's the final product from a couple of angles. (Note the initials on the back. Every great artist signs their work :-))
|
|
|
Monday, October 31
|
View Page
|
 |
Here's what she looks like when it's dark and the lantern inside is turned on.
|
|
|
Monday, October 31
|
View Page
|
 |
Here's another night shot from a different angle.
|
|
|
Thursday, November 24
|
View Page
|
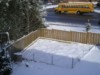 |
Well, this year's first diary entry started with snow. And, now this one has snow in it too. About 2-3 inches covering the 18 or so bags of leaves that I spread around the patch. I didn't get to till them in. That's the bad news. The good news...
|
|
|
Thursday, November 24
|
View Page
|
 |
Here's the good news. I may get a short window of opportunity to do all of the other things in the patch that I wanted to do before Winter really started. I don't think that I'll be able to get the composted manure that I wanted to get. But, there may be time to till in the leaves and soak them with some molasses to help them break down over the Winter.
|
|
|
|
