| |
|
Click on a thumbnail picture below to see the full size version.
|
6 Entries.
|
|
Sunday, March 3
|
View Page
|
 |
On March 1st the SGPG was launched. This club is for lovers of growing giant vegetables who are dedicated to everything about growing giant pumpkins, melons, squash and giant vegetables in general in the Southern United States. And if you are not from the South and just grow giants...your welcome nevertheless!!
http://sgpgrowers.wix.com/homepage#
|
|
|
Sunday, March 3
|
View Page
|
 |
SEED STARTING CHART BY TEMPERATURE
|
|
|
Sunday, March 3
|
View Page
|
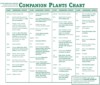 |
Companion Plants Chart
|
|
|
Monday, March 11
|
View Page
|
|
Here is our first Video of the season...If video is fuzzy then change the quality to 360 on the tool bar of the Video itself...:)
http://www.youtube.com/watch?v=1DVz05gqv8g&feature=youtu.be
|
|
|
Saturday, April 27
|
View Page
|
|
Why Sterilize Potting Soil?
Sterilizing potting soil is very important when sowing seeds, seedlings, and cuttings. Soil naturally contains pathogens, harmful bacteria, and fungi that can harm or kill susceptible plants. Insects and larvae may also be present, which can harm plants and become a nuisance. Store bought soil that claims to be sterile may be contaminated via bag punctures, old shelf life, mishandling, and other numerous reasons. Sterilizing potting soil is easy and very beneficial to plant health. Only a few household items are needed, and about 45 minutes of time to prepare and sterilize the soil.
"Be forewarned - sterilizing potting soil indoors will cause an unpleasant odor that is extremely earthly. Some people can tolerate it, but others may be panicking to open the windows for fresh air. Open the windows and turn on a ceiling fan before sterilization begins. The odor will not linger very long if indoor air is circulating with outdoor air."
Soil Consistency
The soil needs to be moist enough to compact into a ball, but should crumble when pressure is removed. This can be done by simply packing a ball of soil between the hands. Add a little water and mix until consistency is met.
Placing Soil into Pan
Place the soil into a roasting pan or baking sheet. Evenly distribute the soil in the pan and break up any clumps. Do not fill to the edge of the pan, and keep depth under 4 inches deep. Cover the pan or sheet tightly with aluminum foil. The foil needs to be tight and secure to prevent moisture loss and burning of the soil. Poke a hole in the center of the foil that is large enough for a meat thermometer to fit through.
|
|
|
Saturday, April 27
|
View Page
|
|
Beginning Sterilization
Place the tray into an oven and set the oven to a low temperature. The ideal temperature for sterilization is 180 degrees Fahrenheit. Temperatures over 180 degrees Fahrenheit may cause burning. Burning the soil will chemically change the composition of the soil. Soil that is burned or overheated will harm plants. Do not heat soil over 200 degrees.
Baking Duration
The soil needs to remain in the oven for 30 minutes, while the temperature needs to remain closely around 180 degrees Fahrenheit. Monitor the thermometer and adjust the oven temperature as needed. Paying close attention to temperature fluctuation is a must.
Cool Down
After baking for 30 minutes, remove soil from the oven and let stand until the soil reaches room temperature. Carefully lift a corner of foil to allow heat to escape. The escaping steam will be very hot and can burn skin.
|
|
|
|
